
Implant Master
Quick Start Guide
How a case runs through GuideMia Implant Master dental implant software, from a folder of DICOM files to an exported surgical guide and a drilling report. The full-arch case leads, because it is the one that shows what the automation is for.
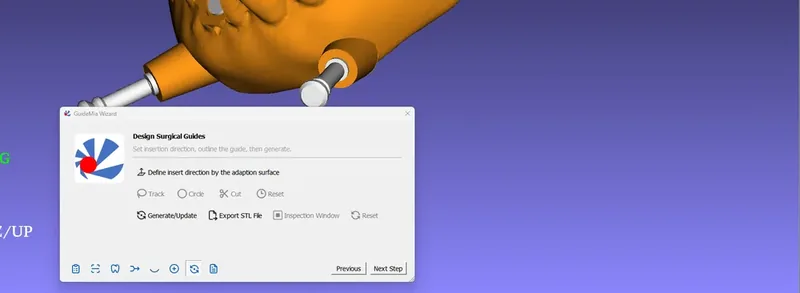
Everything follows from what the guide sits on
A surgical guide has the same three elements whatever the case: an adaption surface that fits the patient's anatomy, drilling holes with sleeves that embody the plan, and optional features such as irrigation and inspection windows. Which surface it adapts to is the decision that shapes every step that follows, and there are only two answers.
Tissue-borne
Sits on the soft tissue and tooth surfaces, for non-invasive surgery. Built from an intra-oral scan, a scanned stone model, an impression, or a radiographic guide. The route this walkthrough follows.
Bone-borne
Sits on the jaw bone, for surgery in which the tissue is reflected. Built from the CT scan itself: a model 2-3 mm thick derived from the bone and tooth structure, with the drilling holes cut into it.
Front matter
Intended use and safety
What the system is for, what its measurements are worth, contraindications, the risks of misplacement, the surgical precautions the guide itself is subject to, and where responsibility sits.
Before you start
What a surgical guide is made of, the two families of guide, the five scanning protocols and how to prepare for each, what the software reads and writes, where it will struggle, and the terms it uses.
The showcase case
A full arch, planned end to end
A maxillary full arch on a radiographic guide: four fixtures, three anchor pins and a tissue/tooth-borne guide, from a folder of DICOM files to a printed drilling report. Five chapters, each one a page.
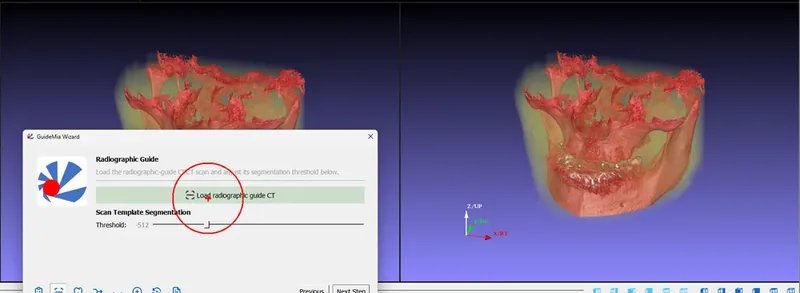
Step 14 of 18
Starting a full-arch case
Why a full arch is usually a radiographic-guide case, loading the scan template and setting its threshold by measurement, and segmenting an edentulous ridge without the AI engine.
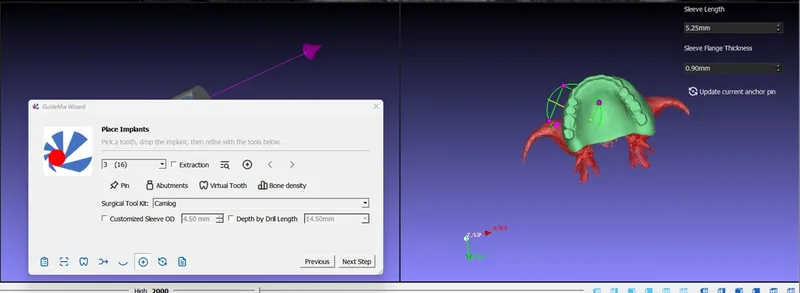
Step 15 of 18
Implants along the arch
Copy Implant, which replicates a fixture's specification and angulation onto the next tooth, the safety zone across several fixtures, and the twenty-degree rule between neighbours.
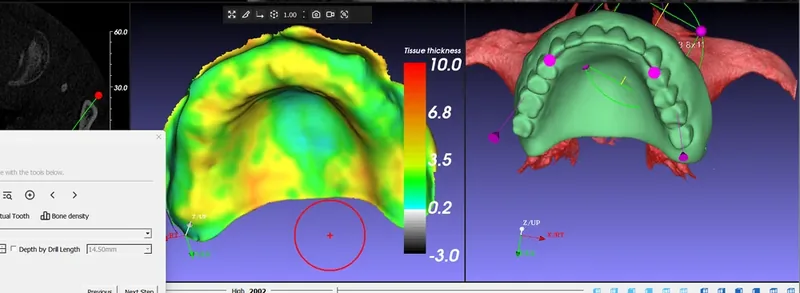
Step 16 of 18
The virtual tissue model
The step that exists only on a radiographic-guide case: reconstructing the tissue surface from the scan template, and reading the tissue-thickness map the software insists you look at.
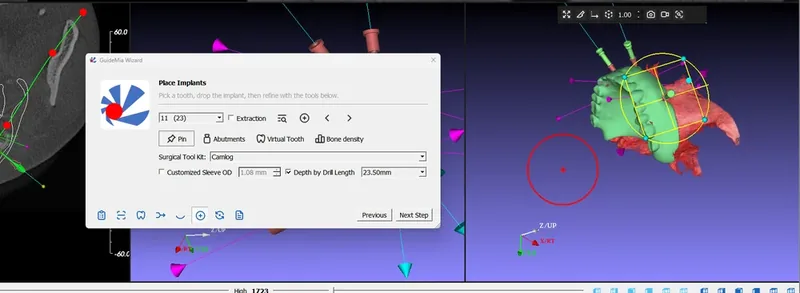
Step 17 of 18
Anchor pins
What holds a guide that has no teeth to seat on: placing pins, the colour change that is the only interference warning, and what the guide and the report do with them.
Step 18 of 18
The full-arch guide and report
The plan validation gate and every criterion it checks, the guide parameters a long span needs, splitting, and the report a four-fixture case produces.
What the software does for you
A full arch is four to six of every decision a single unit makes once. These are the places GuideMia takes the repetition out, and each one is covered in the chapter named beside it.
AI segmentation of the whole jaw
Roots, bone and the nerve channels together, from the CBCT, started in the background while you set the case up. Segmentation and nerve tracing become review steps rather than work.
Covered in Step 3
Copy Implant along the arch
Duplicates a fixture's make, model, size and angulation onto the next tooth, at a position the software estimates for that site. You choose the implant system once; every subsequent site inherits it.
Covered in Step 15
Parallelism and the 20° check
Make several fixtures parallel in one pass, and have the plan checked against the twenty-degree limit between neighbours before any guide is built.
Covered in Step 15
Automatic drilling depth and abutment direction
One depth rule applied across every site instead of each one set by hand, and abutment orientation derived rather than dialled in.
Covered in Step 15
Plan validation before guide design
Eleven criteria checked automatically — interference between implants, sleeves against anatomy, registration quality, slice thickness — with the failures named by tooth number and the override gated behind an explicit acknowledgement.
Covered in Step 18
One click for every guide the case needs
Generate/Update rebuilds the guide after any change of plan without re-tracing the outline, and on a case with reduction, plateau or combined guides it builds them all together.
Covered in Step 18
The single-unit case, step by step
The full-arch chapters assume this one. A posterior mandibular site planned on a CBCT with an intra-oral scan, finishing in a tooth-supported guide — six stages, thirteen steps, in the order the work happens.
Preparation
The CT scan comes in and becomes a case: the volume of interest, the scan protocol, bone and roots and nerve channels segmented from the volume, and the optical scan registered against them.
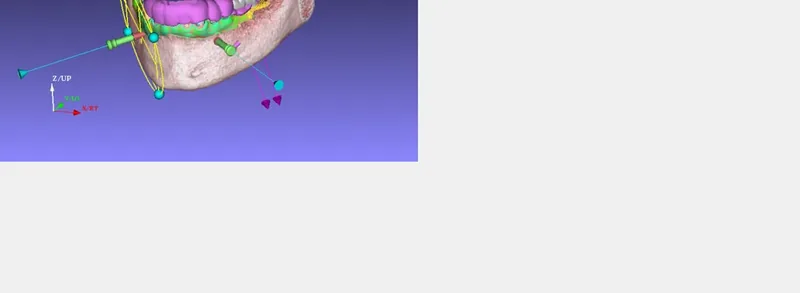
Step 1 of 18
Creating the project
Load the DICOM series, set the volume of interest, and get a project on disk before any planning starts.
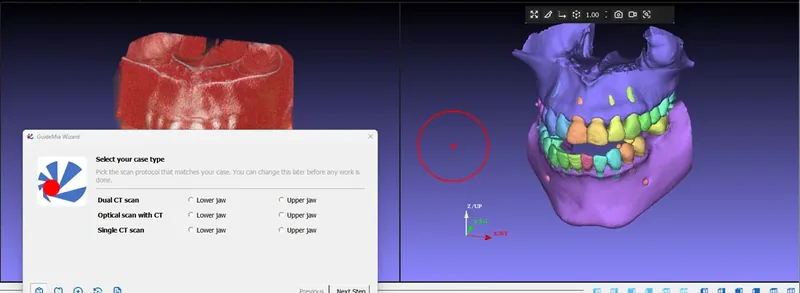
Step 2 of 18
Choosing the case type
Pick the scanning protocol and the jaw. This decides which guide family the case can produce, and it can only be changed before work begins.
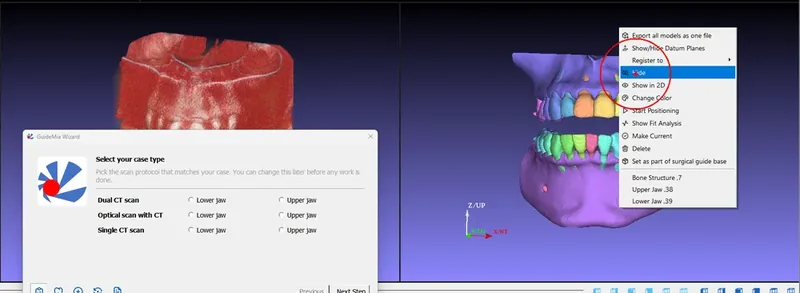
Step 3 of 18
Segmenting the bone
Build the bone, tooth, root and nerve models from the volume — with AI, or with thresholds and seed points where the scan makes that hard.
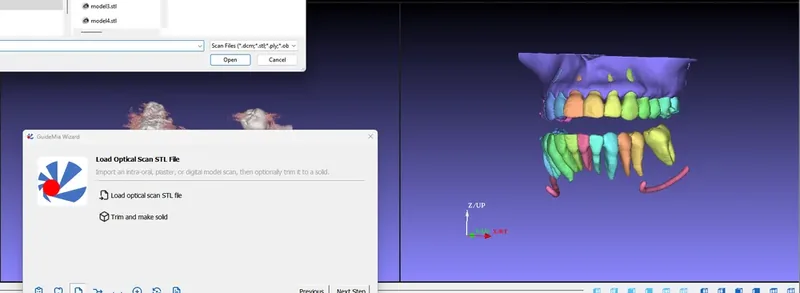
Step 4 of 18
Loading the optical scan
Bring in the intra-oral or model scan that will make the guide fit teeth rather than approximate bone, and look at it before you register it.
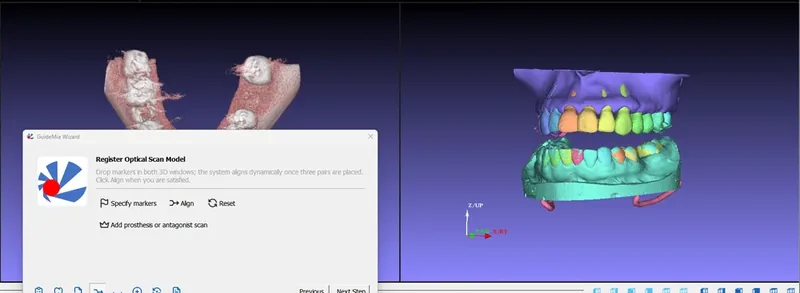
Step 5 of 18
Registering the scan
Pair matching points across the scan and the volume, align, and commit — the step whose accuracy every later one inherits.
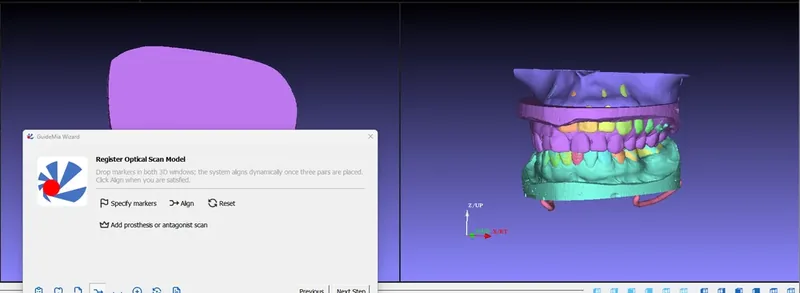
Step 6 of 18
Additional scans
The antagonist, the diagnostic setup and the pre-extraction model: what each one is for, and why the opposing arch matters before you place anything.
Viewing and diagnosis
Measurement and the archiving of diagnostic findings, alongside the planning tools rather than separate from them — the implant-centric cross section, bone quality and the panoramic reconstruction.
Planning
Implant selection, placement, adjustment and analysis: the fixture judged on all three planes, against the restoration it has to serve and the arch it has to occlude with.
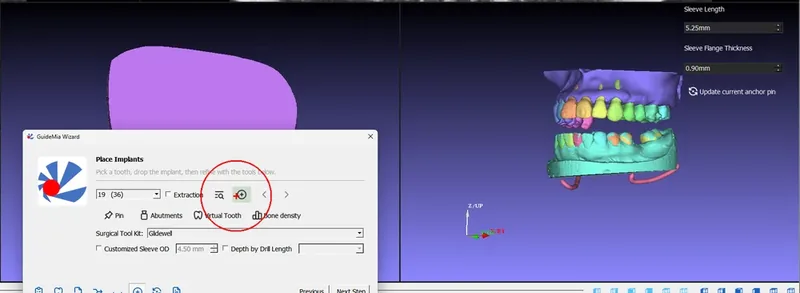
Step 7 of 18
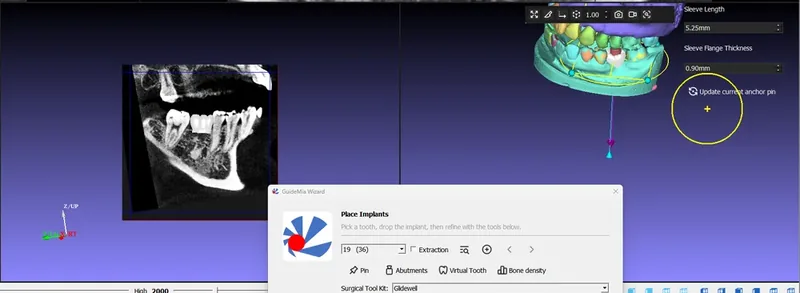
Placing the implant
Pick the tooth, choose the fixture from the library, judge it on all three planes, and set the surgical kit, sleeve and depth the guide will be built from.
Step 8 of 18
The virtual tooth, and reviewing the plan
Put the restoration on the plan, check it against the opposing arch, and satisfy yourself on bone, canal, restoration and occlusion before any geometry is built.
Simulation
There are always errors in the clinical outcome of an implant procedure, whatever the data and whatever the planning technology. This is where you find out whether the plan tolerates yours.
Design
The guide itself: insertion direction, outline, thickness and sleeve system, the windows cut into it, and the check that it will actually seat.
Step 9 of 18
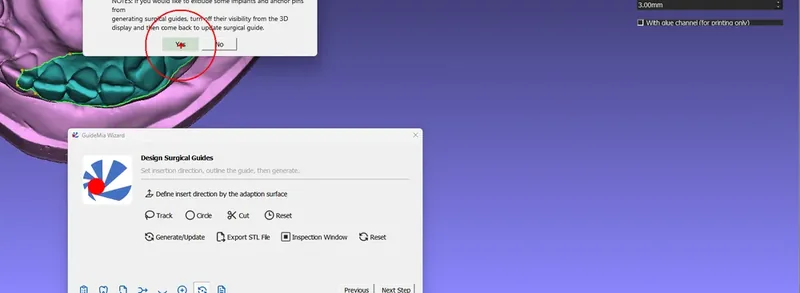
Designing the guide
Set the insertion direction from the view, outline the guide base, cut it, choose thickness and sleeve system, and generate — an outline that survives a change of plan.
Step 10 of 18
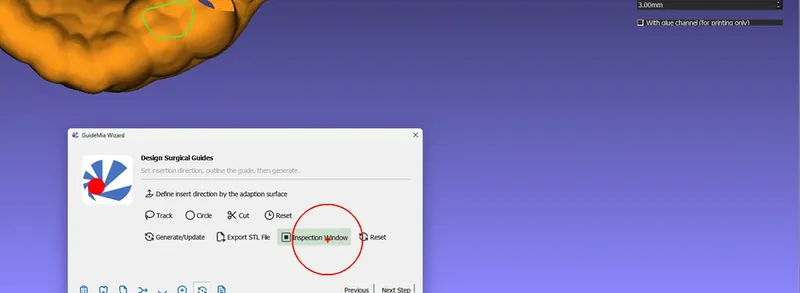
Inspection and irrigation windows
The two openings cut into every guide: one so the surgeon can confirm it is seated, the other so the bone survives the drilling.
Step 11 of 18
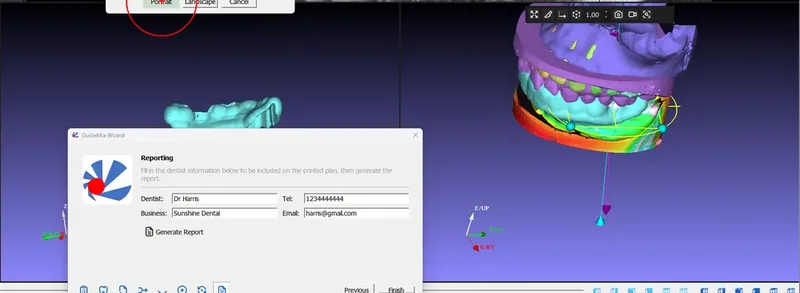
Export, save and report
The three things that leave the software — the guide for manufacture, the project for storage, and the report the surgery runs from.
Step 12 of 18
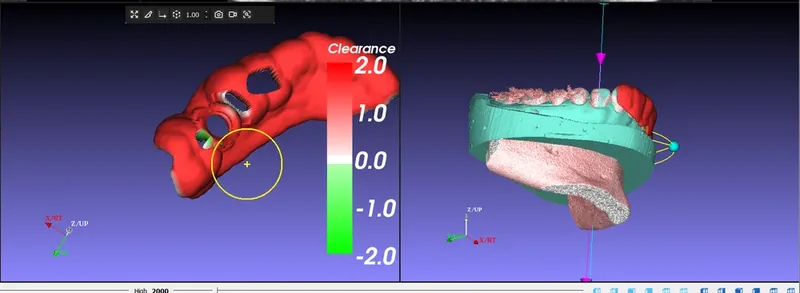
Fit analysis
The clearance map between the guide and the model it was designed from: what it measures, what it cannot tell you, and what to do about what it shows.
Manufacturing
A lab prints the guide from the exported STL and finishes it with drilling sleeves — the software does not produce a finished device. Manufacturing itself is outside this guide.
Part Three — reference
Two set-up tasks rather than case steps. Each is done once — when your implant system or your surgical kit is not one of the shipped ones — and then holds for everything you plan afterwards.
Expanding the implant library
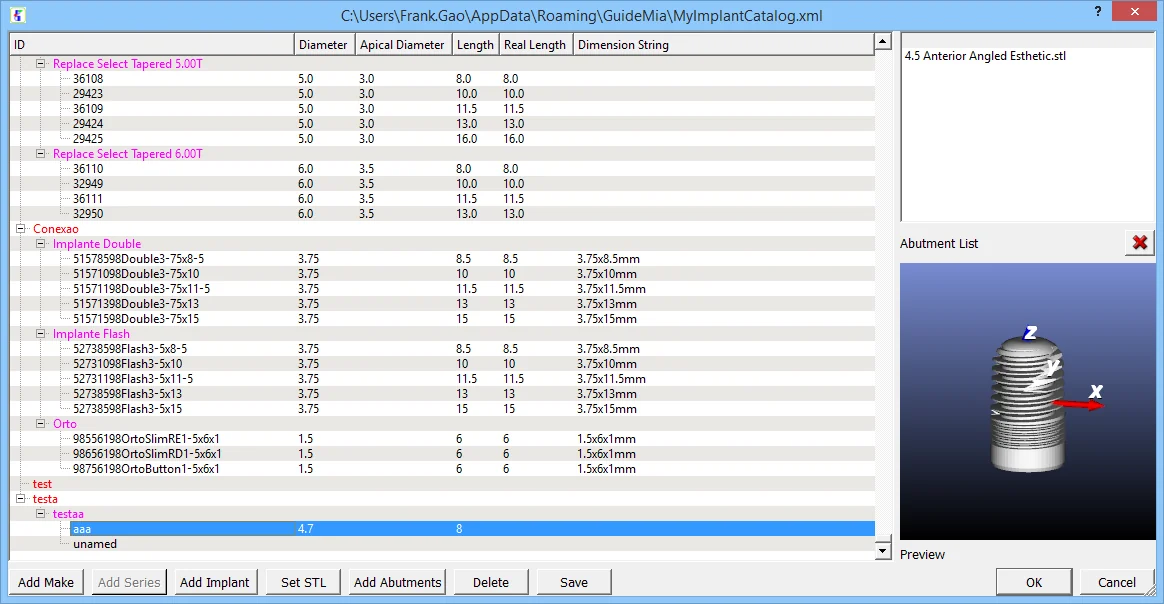
Adding an implant system GuideMia does not ship: where the files go, the coordinate system every implant and abutment STL has to be in, and the catalogue format support accepts.

Customising the surgical kit
Defining a surgical kit of your own — sleeve dimensions, drill sequence and guide options — when the kit you use is not one of the shipped ones.
Before you start
The protocol decides the case
Five scanning protocols are supported, and the one you used determines which guide family the case can produce. Metal artefact near the implant sites is what forces the dual scan with a radiographic guide.
This case is a single unit
A posterior mandibular site, CBCT plus an intra-oral scan, a tooth-supported guide. Where the software offers a choice this case did not take, the step says so rather than walking it.
The guide is not a finished device
What the software exports is geometry. The guide must be finished with drilling sleeves, and its fit verified on the patient before surgery — a guide that will not seat properly must not be used.