
Bracket bonding software
Orthodontic bracket bonding software: placement, design and bonding guides
GuideMia OrthoPlus places brackets on the digital setup, designs the bonding guide in the style your workflow uses, and outputs it for printing or milling: indirect bonding arch models, ADB jig guides, GuideMia jigs, jig-free guides, gauge-style guides, acid etching guides and anchorage implant guides. Any bracket brand.
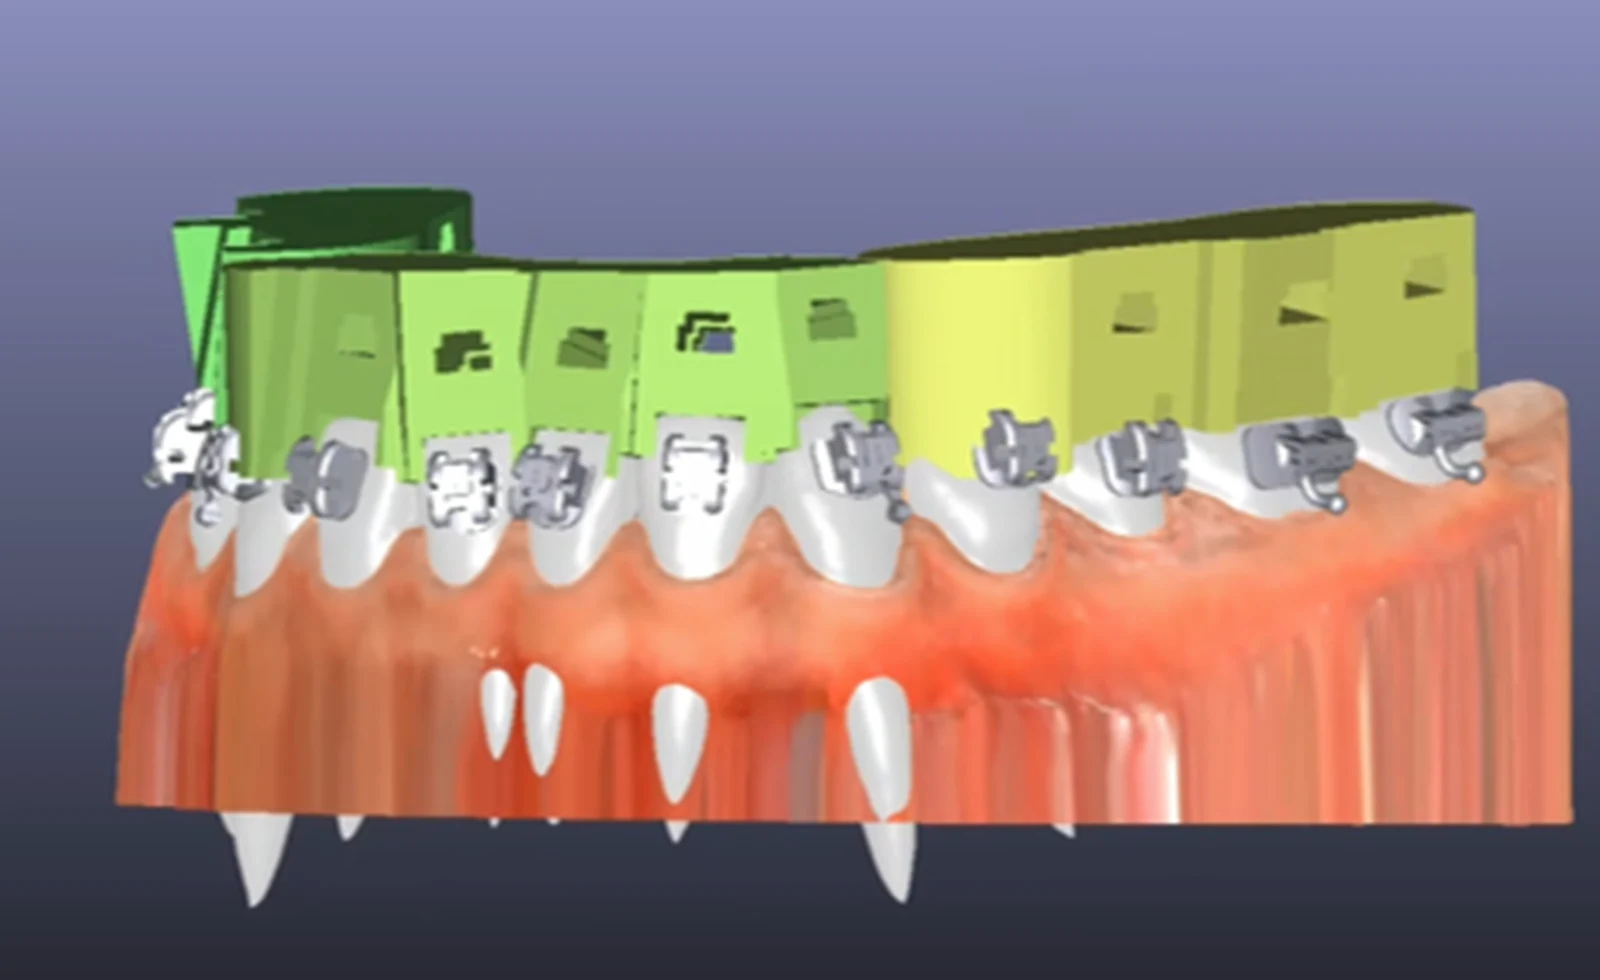
Bracket bonding software has one job: put each bracket on the tooth at the planned position and orientation. A printed guide with a housing for every bracket is the obvious design, and in practice it fits poorly, because bracket brands and designs vary and a bracket's outer geometry has never needed to be precise. GuideMia's bonding guides rely on the two things that are accurate: the bracket slot and the tooth surface.
In OrthoPlus the bracket is placed by tooth, at the facial centre and snapped to an adjustable occlusal plane, or along an arch curve that stands for the arch wire. Brackets come from a brand library or from a GuideMia customisable bracket whose torque, width and in-out are edited as numbers; bases conform to the tooth surface automatically as teeth or brackets move. Placement runs on the digital setup, so brackets are planned against the final tooth positions.
Six guide styles are generated from the same placement. ADB jig guides connect the guide to the bracket through the slot, with jigs that customers mill or print from the design. GuideMia jigs need no insertion holes or slots in the guide. Jig-free guides work where bracket data is accurate. Gauge-style guides follow a conventional bracket gauge with configurable slot parameters. Acid etching guides mark the bonding area on each tooth. Anchorage implant guides use the surgical guide engine from GuideMia Implant Master. Indirect bonding arch models carry position markers so a technician bonds brackets at the planned position on a printed model. GuideMia OrthoPlus is FDA 510(k) cleared (K162850).
What the bracket bonding software does
- Bracket placement by tooth, at the facial centre, snapped to an adjustable occlusal plane with a per-jaw offset
- Placement along an arch curve that stands for the arch wire, displayable over the models
- Bracket library by brand, plus a customisable bracket with torque, width and in-out edited as numbers
- Custom bases that conform to the tooth surface as teeth or brackets move; incisal distance, mesial and distal limits and long-axis angle editable
- Bonding guides in six styles: ADB jigs, GuideMia jigs, jig-free, gauge-style, acid etching and anchorage surgical guides
- Indirect bonding arch models with position markers, with or without the brackets on the model
- Temporary anchorage devices placed and adjusted on the CBCT, with the pin from an STL
- Post-processing: inspection windows, area trimming with reverse selection and a case tag on the model
Guide styles and models
Every style starts from the same bracket placement on the digital setup. Pick the one your bonding workflow uses.
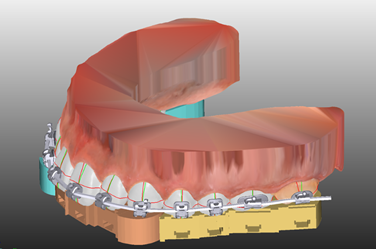
Bracket placement
By tooth or along the arch curve, on the final setup, with the arch wire shown over the models.
Indirect bonding arch models
Printed arch models with position markers and adjustable resin pads that compensate for each bracket's torque, for conventional IDB from model bonding to thermoforming.
ADB jig guides
The jig connects the guide to the bracket through the slot, whose size and accuracy are reliable where the bracket's outer shape is not. An optional flexible jig angle shortens the guide.
GuideMia jigs and jig-free guides
GuideMia jigs need no insertion holes or slots in the guide. Jig-free guides work where the bracket data is accurate.
Gauge-style guides
Follow the geometry of a conventional bracket gauge, with configurable slot parameters, so brackets land at the positions planned for that gauge.
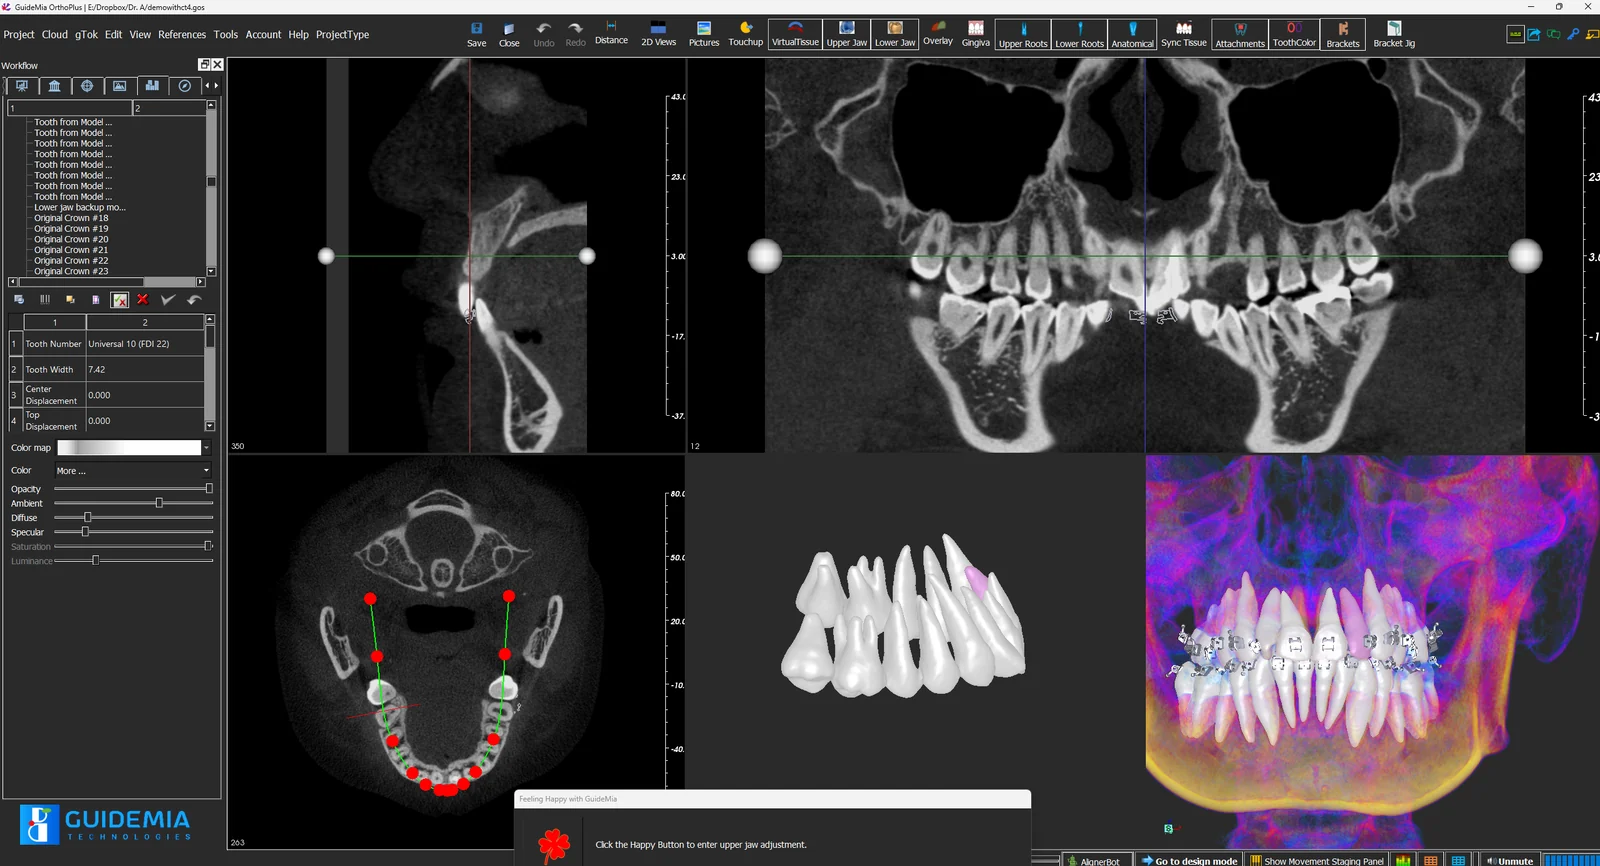
Acid etching guides
Mark the bonding area on each tooth so etching and primer stay where the bracket base will sit.

Anchorage implant guides
Temporary anchorage devices planned on the CBCT, with a surgical guide generated by the same engine as GuideMia Implant Master.
Inspection windows, trimming and tags
Post-processing on any guide: inspection windows, area trimming with reverse selection, and a case tag placed on the model, all resettable.
See it in OrthoPlus


What you bring in
Bracket placement runs on the scan and the setup. A CBCT is optional for placement and required for anchorage planning.
- Intraoral scan
- STL, PLY or OBJ from any intraoral scanner: both arches and the bite. This is the one input every case needs.
- Stone model scan
- A desktop optical scan of the cast, for practices that do not scan chairside. Same requirements as the intraoral scan.
- CBCT (DICOM), optional
- Bring it when roots, an impacted tooth, alveolar bone limits or a skeletal question decide the plan. Without it the crowns still move; with it the roots are in view.
- Face scan, additional
- For checking the setup against the facial midline and the smile line as well as the arch.
- Antagonist and bite
- The opposing arch and the bite, because the finish is an occlusion.
- Attachment, bracket and appliance libraries
- Attachments, buttons, brackets and bracket prescriptions, from any brand.
A bracket case, step by step
Placement and guide design take about two minutes once the setup is approved.
01
Import
Open the intraoral scan, and the CBCT if anchorage is planned. Model cleanup, hole filling and base trimming run in one pass.
02
Set up
Segment the crowns and build the setup. AlignerBot runs the segmentation and the initial alignment on a bracket case too.
03
Place brackets
Pick the brand or parameterise the GuideMia bracket, place by tooth or along the arch curve, and adjust torque, in-out and position as numbers.
04
Design the guide
Choose the guide style, generate it, add inspection windows, trim and tag. Or generate indirect bonding arch models with position markers.
05
Make
Export STL to the printer or mill, and bond the arch from the guide or the model in one appointment.
Three seats, one engine
The same engine in three arrangements. Bracket placement and guide design are in the OrthoPlus seat.
Design
GuideMia OrthoPlus
The full seat: segmentation, staging, interproximal reduction, attachments, aligner and bonding-guide design, and export for manufacture. FDA 510(k) cleared under K162850.
Chairside
GuideMia OrthoClic
The chairside planner. An automatic workflow to a treatment plan in minutes, with the design handed to a lab or to the GuideMia design service.
Planner, free
OrthoPlus Planner
Opens a case someone sends you, and reviews and adjusts the staging tooth by tooth. It cannot start a new case; creating, design and export are in OrthoPlus.
Automatic segmentation
Tooth segmentation is where a case is either started or stalled. AlignerBot separates the crowns automatically, and where a CBCT is present it carries the roots and the alveolar bone along with them, so the staging moves whole teeth.
- Automatic crown segmentation from the intraoral or model scan
- Roots and alveolar bone from CBCT, fused into the same model as the crowns
- Automatic staging, interproximal reduction and attachment placement
- Model generation and trim paths, including models for directly printed aligners
Cases it is built for
The standard orthodontic taxonomy. Bracket cases run through the same plan: segment, set up, place brackets, output the guide.
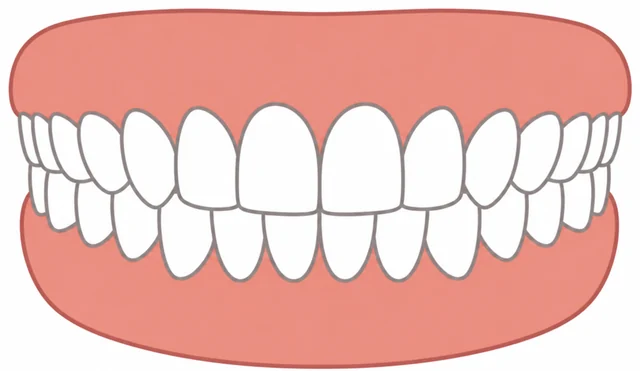
Class I
A normal molar relationship with the problem somewhere else — crowding, rotations, a midline off. Most aligner cases start here.
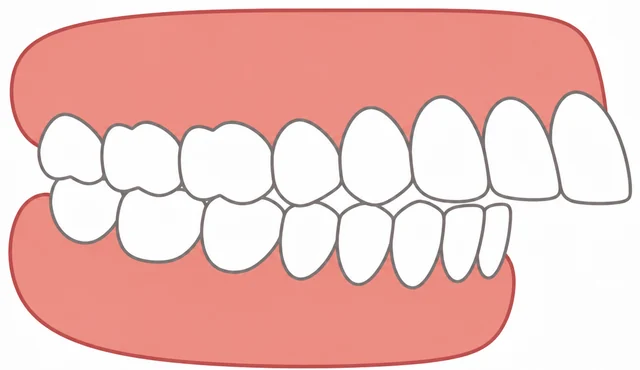
Class II
The lower arch sits behind the upper. Distalisation, elastics, extraction or surgery, and the plan has to commit to which.
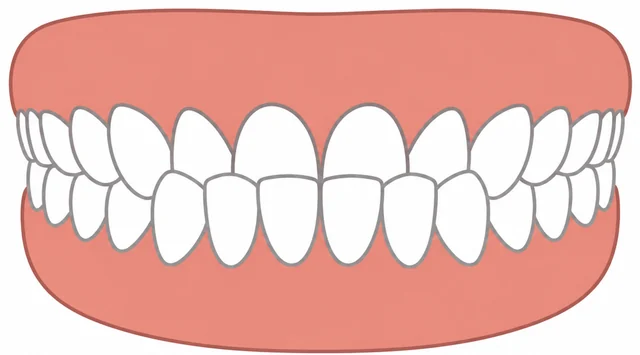
Class III
The lower arch sits ahead of the upper. Mild cases move with aligners; a skeletal one is a surgical plan, and the records should tell you which you have.
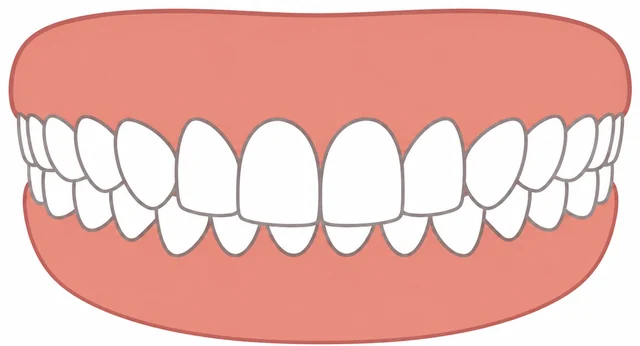
Deep bite
The upper incisors cover too much of the lower. Intrusion, proclination or posterior extrusion each leave a different finish.
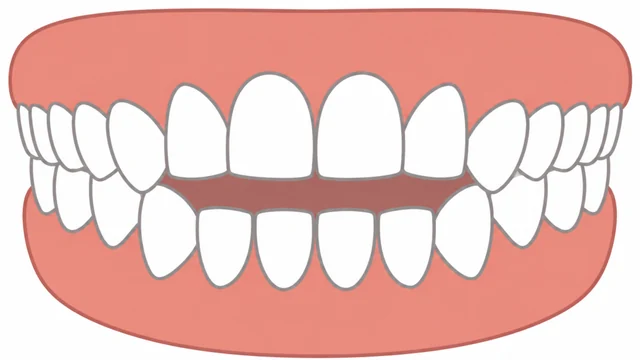
Open bite
No contact where there should be. Staging is where an anterior open bite is won or lost.
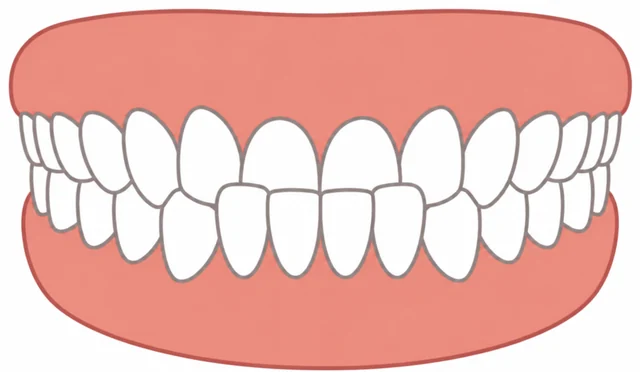
Anterior crossbite
Upper incisors biting behind the lower instead of in front. Worth correcting early, before it wears the lower edges or drives a functional shift.
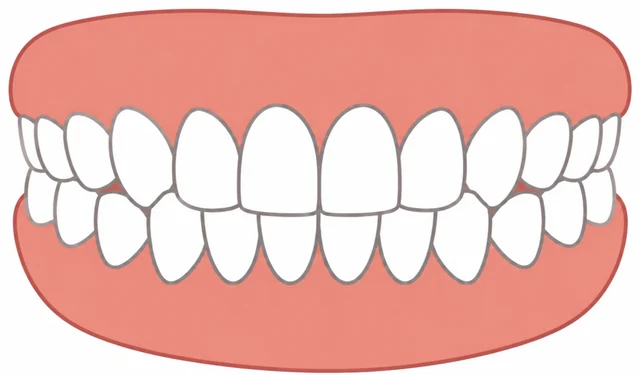
Posterior crossbite
Upper back teeth biting inside the lower, on one side or both. Expansion has to be planned in millimetres rather than hoped for.
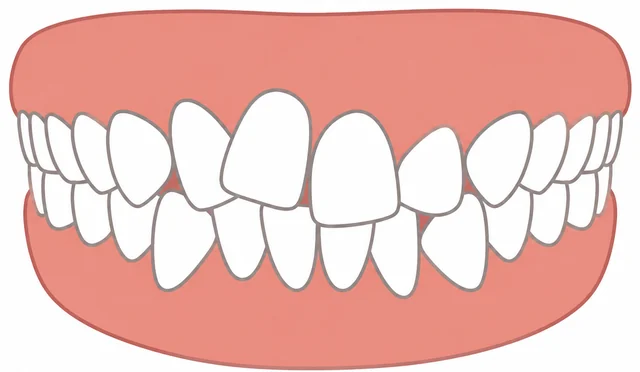
Crowding
More tooth than arch. The plan is arithmetic first: how much space, and whether it comes from expansion, stripping or extraction.
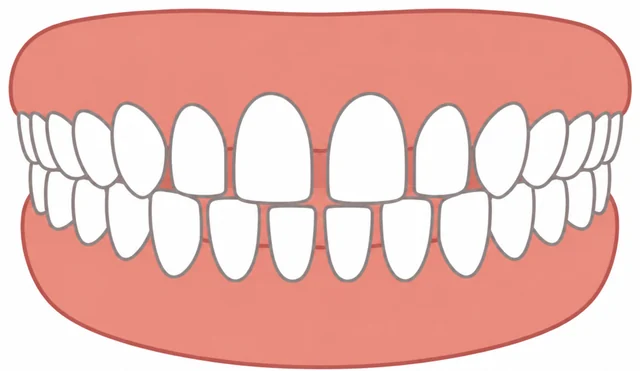
Spacing
Gaps to close or to distribute. Closing them moves the incisors, which moves the profile.
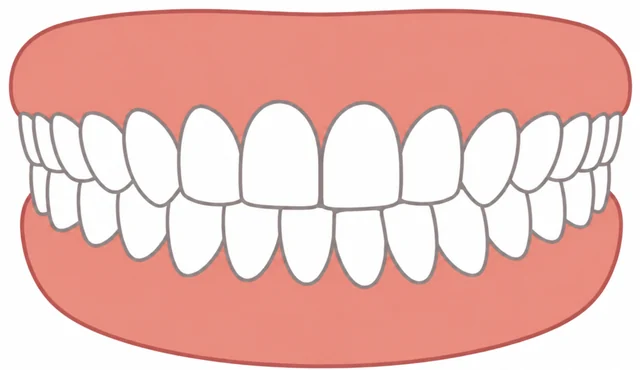
Midline shift
The dental midline off the facial one. Easy to miss at the start and impossible to miss at the finish, so it is judged against the face rather than the arch.
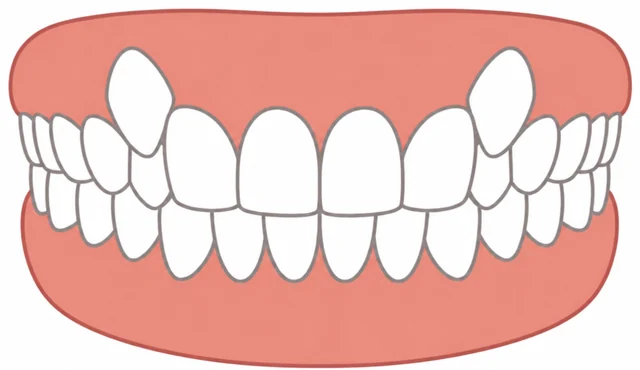
Ectopic eruption
A tooth arriving outside the line of the arch. The space analysis comes first: the plan depends on whether there is room for it.
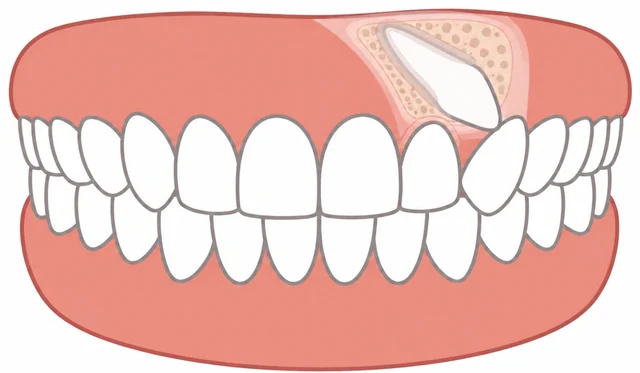
Impacted tooth
A tooth that has not erupted and will not on its own. Exposure, traction and the space to receive it all have to be in the plan before the first aligner.
Extraction cases, anchorage cases and mixed dentition run through the same software. What changes is the placement and the anchorage, not the tool.
Around the software
Showing the case to someone else
Most orthodontic decisions involve someone else: a patient looking at where their teeth will end up, a referring dentist, a lab doing the design. Cympha Studio opens the same case in a browser, from a link.
- Step through the staging online, with nothing installed
- Show a patient the finish before the first appliance is made
- Send a link to a referrer or a lab instead of a file
Cympha is a separate product from a partner company. Accounts, billing and support for it are handled by Cympha, not GuideMia.
Who uses GuideMia bracket bonding software
Orthodontists bonding in-house
Plan the placement on the setup, print the guide or the model in the practice, and bond the arch in one appointment with the brackets you already stock.
Dental labs offering indirect bonding
Take a scan and a prescription, return a bonding guide or an IDB model for any bracket brand, and keep the design in the same software as the lab's aligner work.
Design services
One OrthoPlus seat plus a Cympha account covers intake, design and delivery of bonding guides alongside aligner cases.
The products
Bracket placement and bonding guide design are in OrthoPlus. OrthoClic plans chairside; the free Planner reviews a plan.
GuideMia OrthoPlus
The full orthodontic software and clear aligner CAD: CBCT fusion, AI segmentation, automatic staging, aligner and bracket bonding design, and production output for both manufacturing paths. FDA 510(k) cleared (K162850).
GuideMia OrthoClic
Chairside orthodontic software for clinics. Automatic setup and simulation in minutes, patient presentation, and a hand-off to a designer through Cympha.
OrthoPlus Planner
Open a case someone sends you, step through the staging and adjust movements tooth by tooth. It cannot start a new case; the plan has to reach you first. No card and no expiry.
Questions about bracket bonding software
- Which bracket brands does it support?
- Any. Brackets come from a brand library or from the GuideMia customisable bracket, and the guides rely on the slot and the tooth surface rather than on the bracket's outer geometry, so an unlisted system still bonds correctly.
- What is an ADB jig guide?
- An adaptive direct bonding guide. The guide holds a jig that connects to the bracket through its slot; customers mill or print the jigs from the designs in the software. Because the slot is accurate and consistent, the guide fits brackets whose outer shape varies.
- Can it generate indirect bonding models instead of guides?
- Yes. Arch models are generated with position markers, with or without the brackets on the model, so a technician bonds brackets at the planned position on a printed model and transfers them conventionally.
- Does bracket placement need a CBCT?
- No. Placement and guide design run on the intraoral or model scan. A CBCT is needed when temporary anchorage devices are planned, so the pin is positioned against bone.
- How long does placement and guide design take?
- About two minutes for placement and guide design on an approved setup. Segmentation and the setup itself take the same time as an aligner case.
- Does the same software design aligners?
- Yes. The same setup drives aligner staging and output; that side is described on the clear aligner software page.
- Which printers does it work with?
- Any. Output is STL for any printer or mill. There is no tied consumable and no proprietary file format.
- Is the software cleared for clinical use?
- GuideMia OrthoPlus is FDA 510(k) cleared under K162850 and is developed under an ISO 13485 certified quality system.
Cookbooks on this topic
Also from GuideMia
See what OrthoPlus costs
Bracket placement, six guide styles, indirect bonding models and anchorage guides in the same seat as aligner design. A free OrthoPlus Planner is on the product page if you want to review a plan first.