
This is the step the whole case exists for. Everything before it prepared the anatomy; everything after it builds hardware around the decision made here.
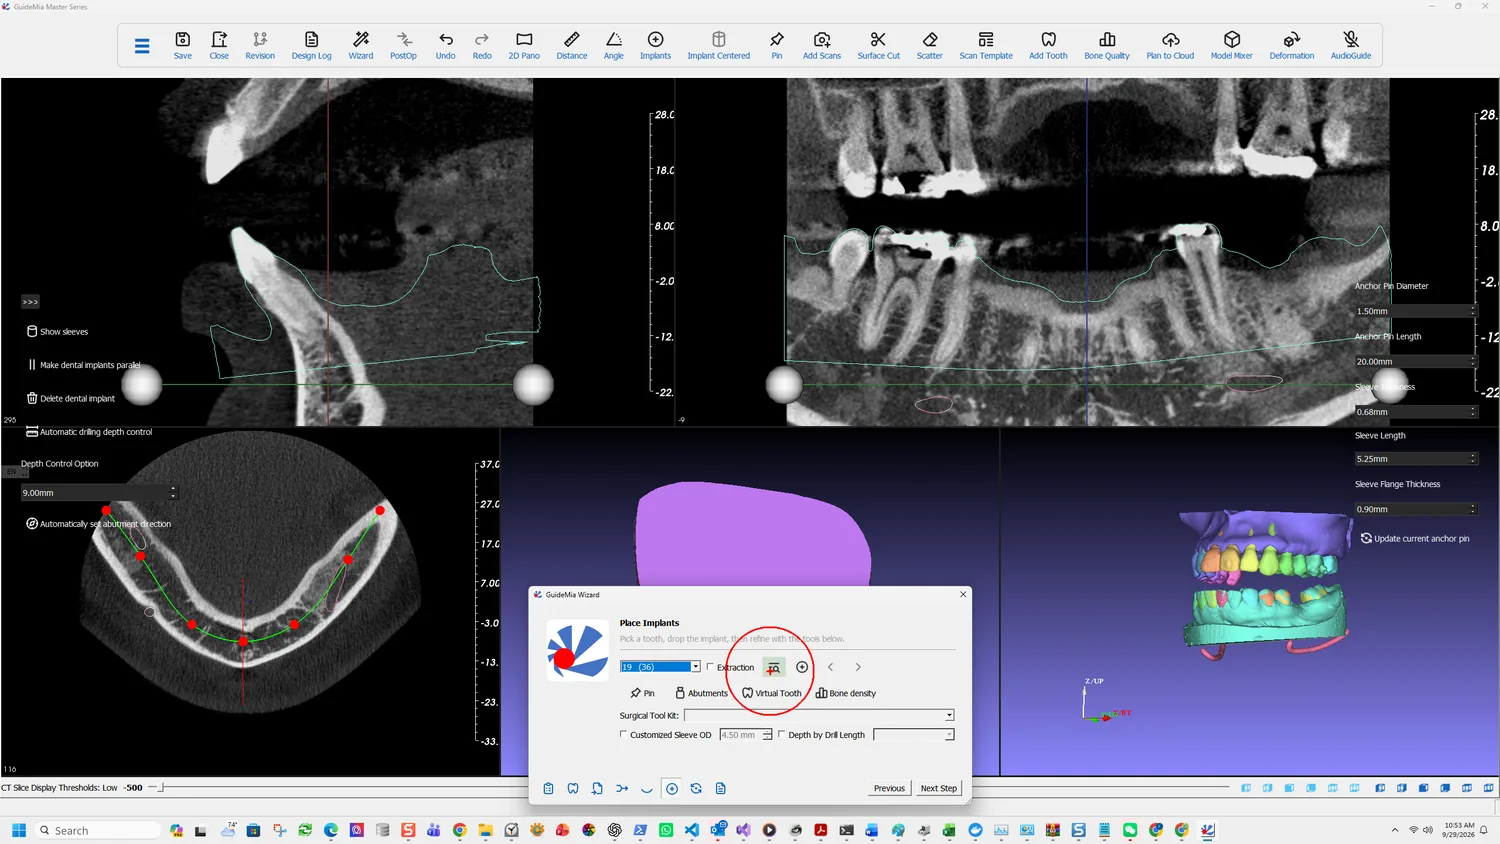
The Wizard reduces it to a sentence: "Pick a tooth, drop the implant, then refine with the tools below."
Pick the tooth
The tooth number list drives the page. Selecting a number either edits the implant already at that site or starts a new one — the page's own status tip says so: "Select a tooth number to edit an existing implant or to create a new one." In this case it reads 19 (36), the universal number with the FDI number beside it.
Extraction is not a note to yourself. It changes what the guide can rest on:
This option will tell the system that the tooth with given number will be extracted at treatment time. The extraction option essentially tells the system that the tooth surface of the implant site will be gone, and it cannot provide support to the surgical guide. Accordingly, GuideMia will add materials in this side to design the surgical guide.
Tick it for an immediate-placement case and the guide is designed differently. Forget it and the guide is built to seat on a tooth that will not be there when the guide is used.
Choose the fixture
Browse opens the system implant library. The library ships with a long list of manufacturers; if yours is not among them, it can be added.
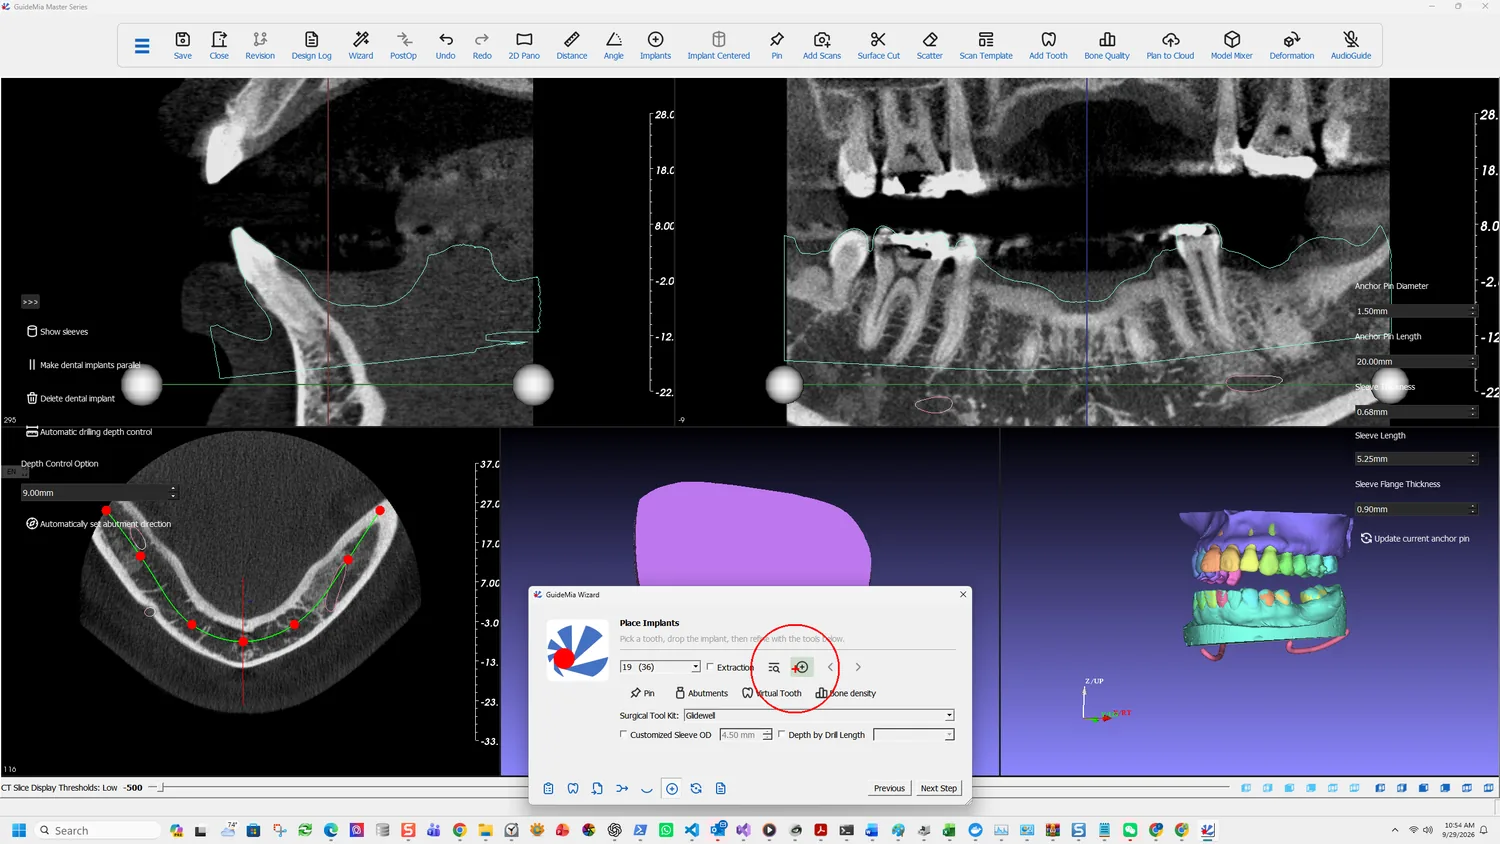
With an implant chosen, click where you want it in any image window — 2D slice or 3D — and it is placed there.
Add/Update Implant does double duty, and the second half is the one that gets missed:
Add or update current implant. To add implant, click at wherever you want to add implant in any image window. If you change any parameters or options of the current implant, use this button to update.
Change a diameter, a length, an option — nothing happens until you update. The screen will keep showing the old geometry and it looks like the change was ignored.
Previous / Next Implant step between fixtures. A single-unit case has one; a full arch is where these earn their place.
Judge it on all three planes
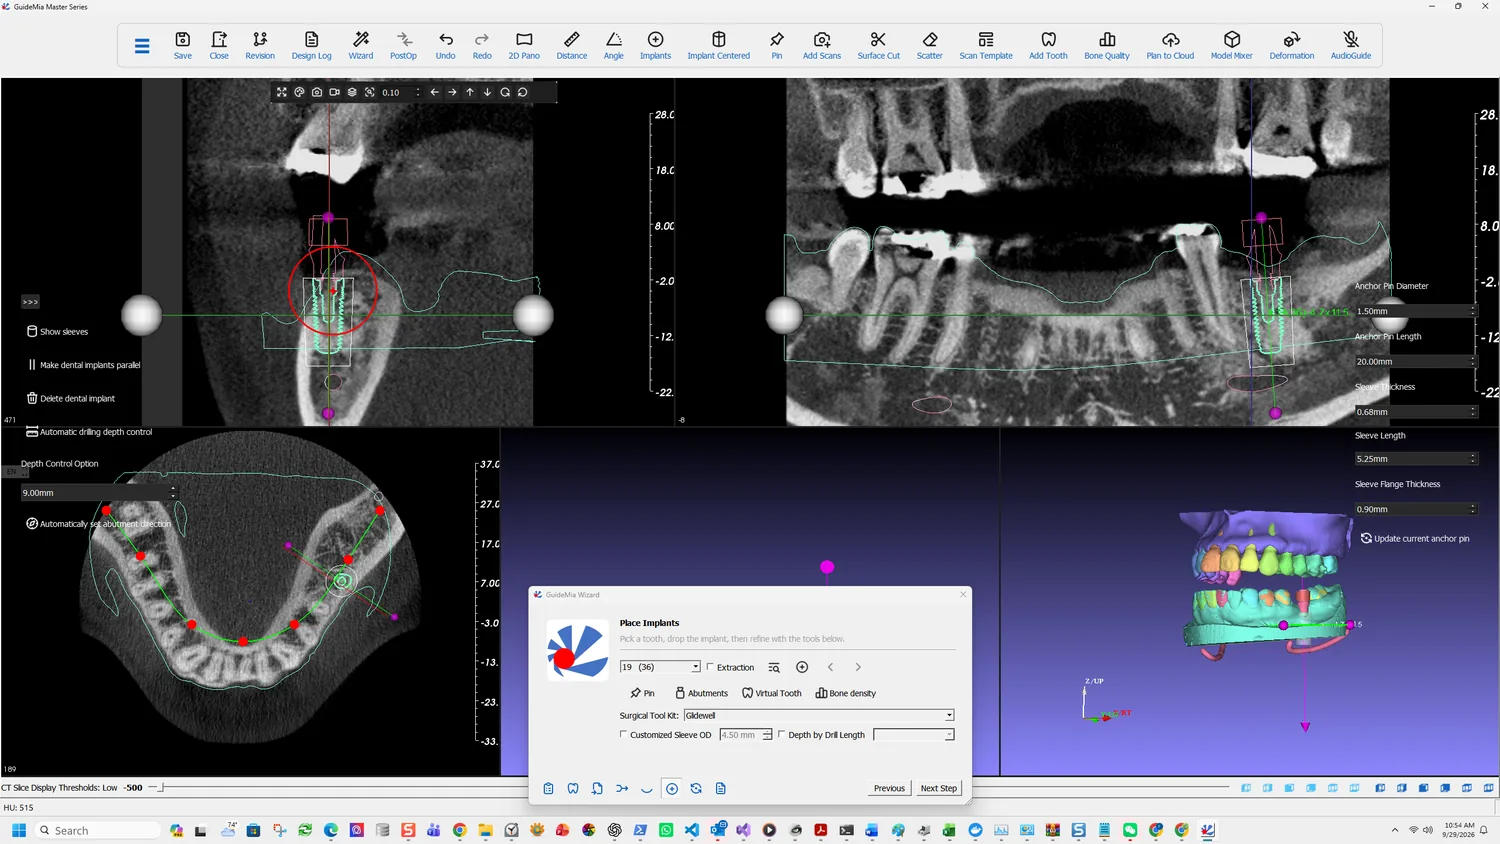
A position that looks right on one plane is routinely wrong on another. The sagittal view shows the angulation relative to the ridge and the opposing arch; the coronal shows the buccolingual position and the distance to the canal; the axial shows where it sits along the arch relative to its neighbours.
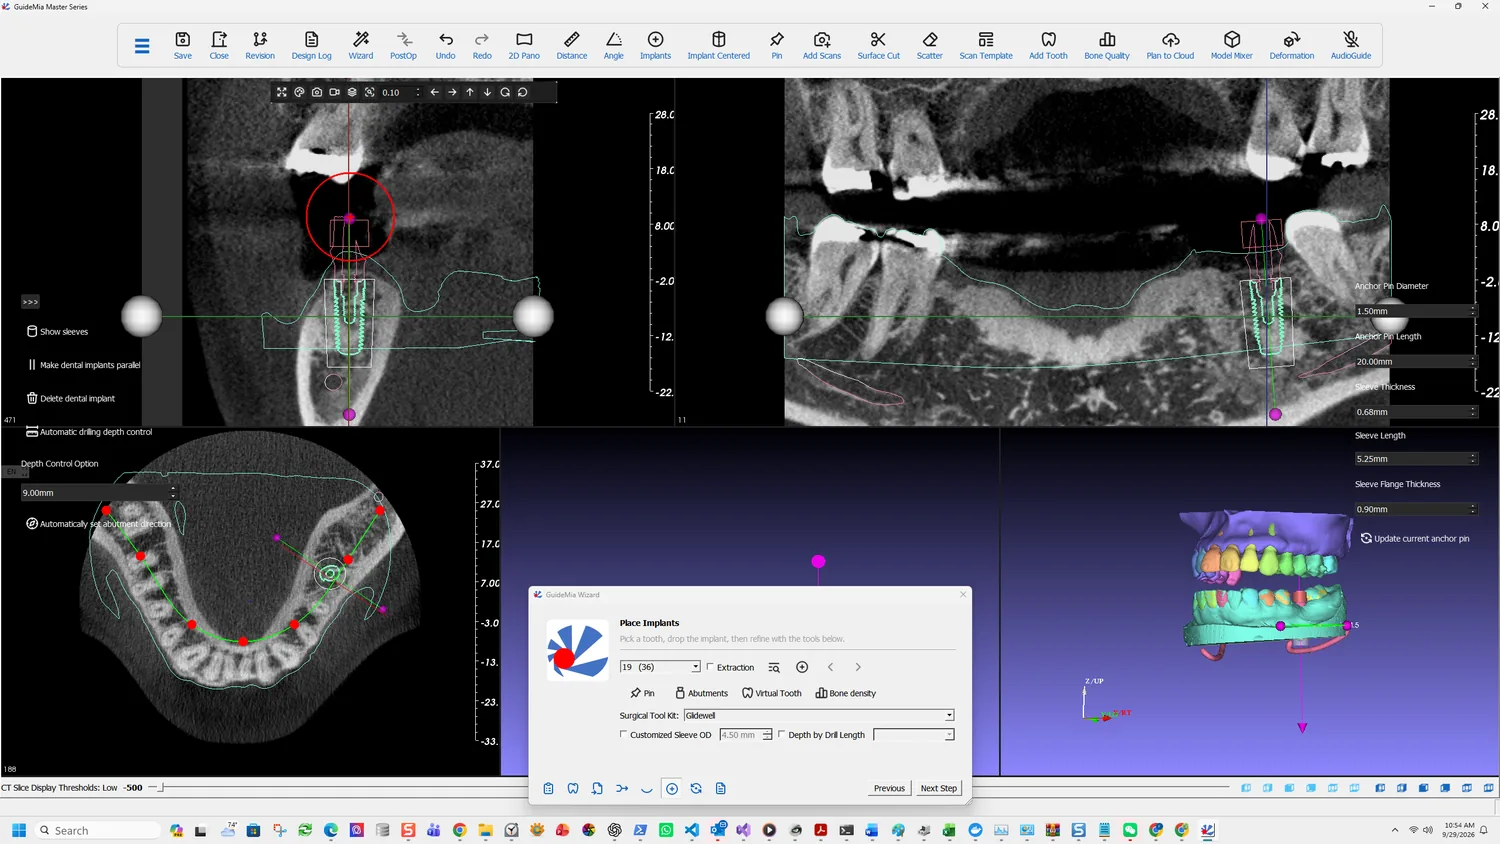
Show dental implant centric cross section view reorients the slices around the implant rather than around the volume's own axes:
Show dental implant centric cross section view. Use space bar to toggle mode.
That is the view to judge angulation in, because the slice is taken through the fixture rather than through the scan. The space bar toggle is worth learning — you will move between the two constantly.
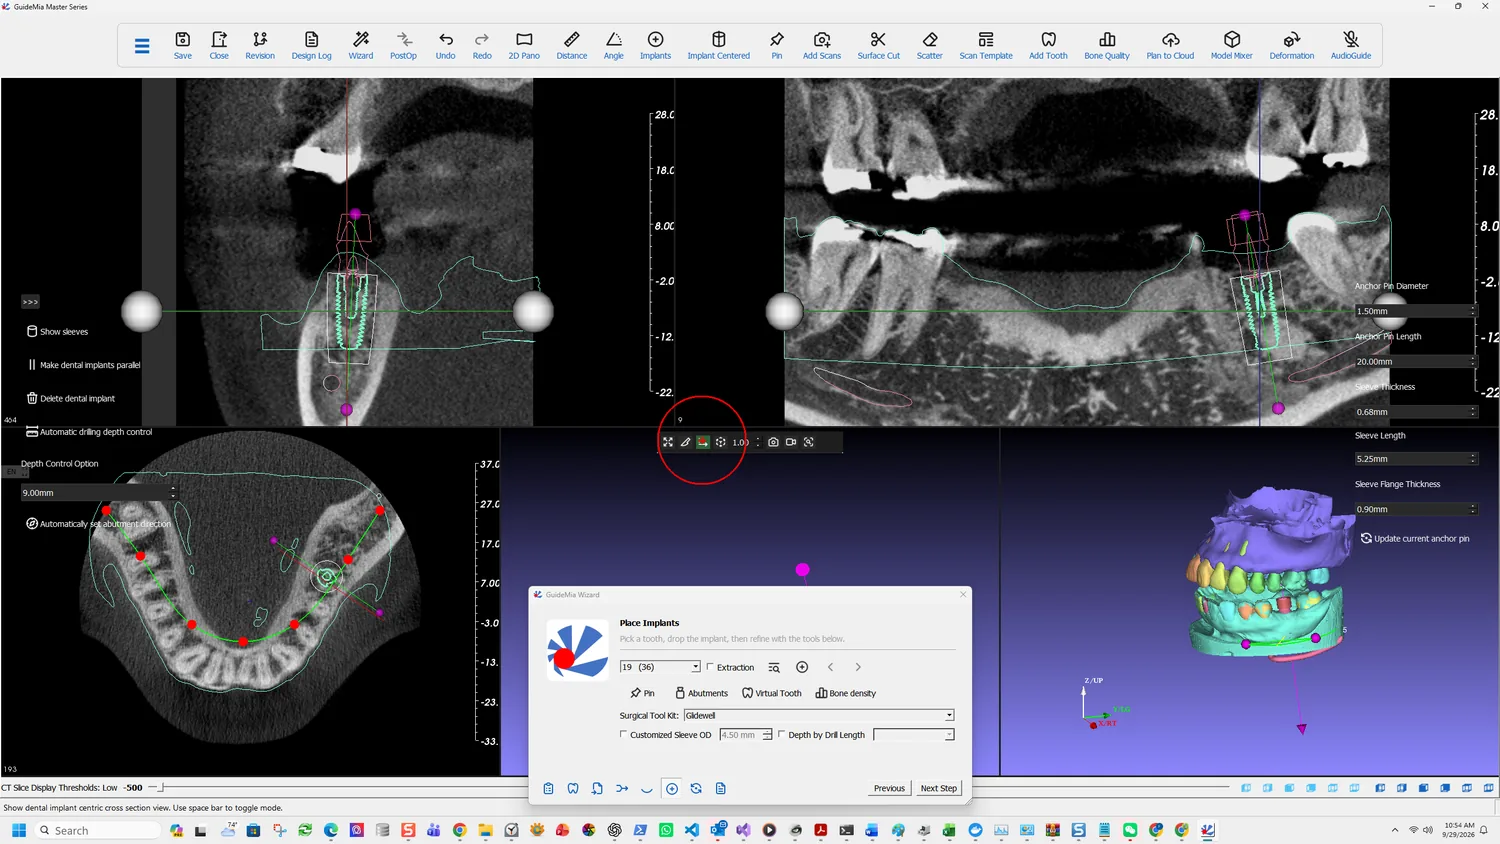
Bone density turns on neighbourhood inspection: "In the working window use mouse wheel to inspect implant neighborhood." The mouse wheel walks you through the bone immediately around the fixture, which is how you find out whether the apex is sitting in something that will hold it.
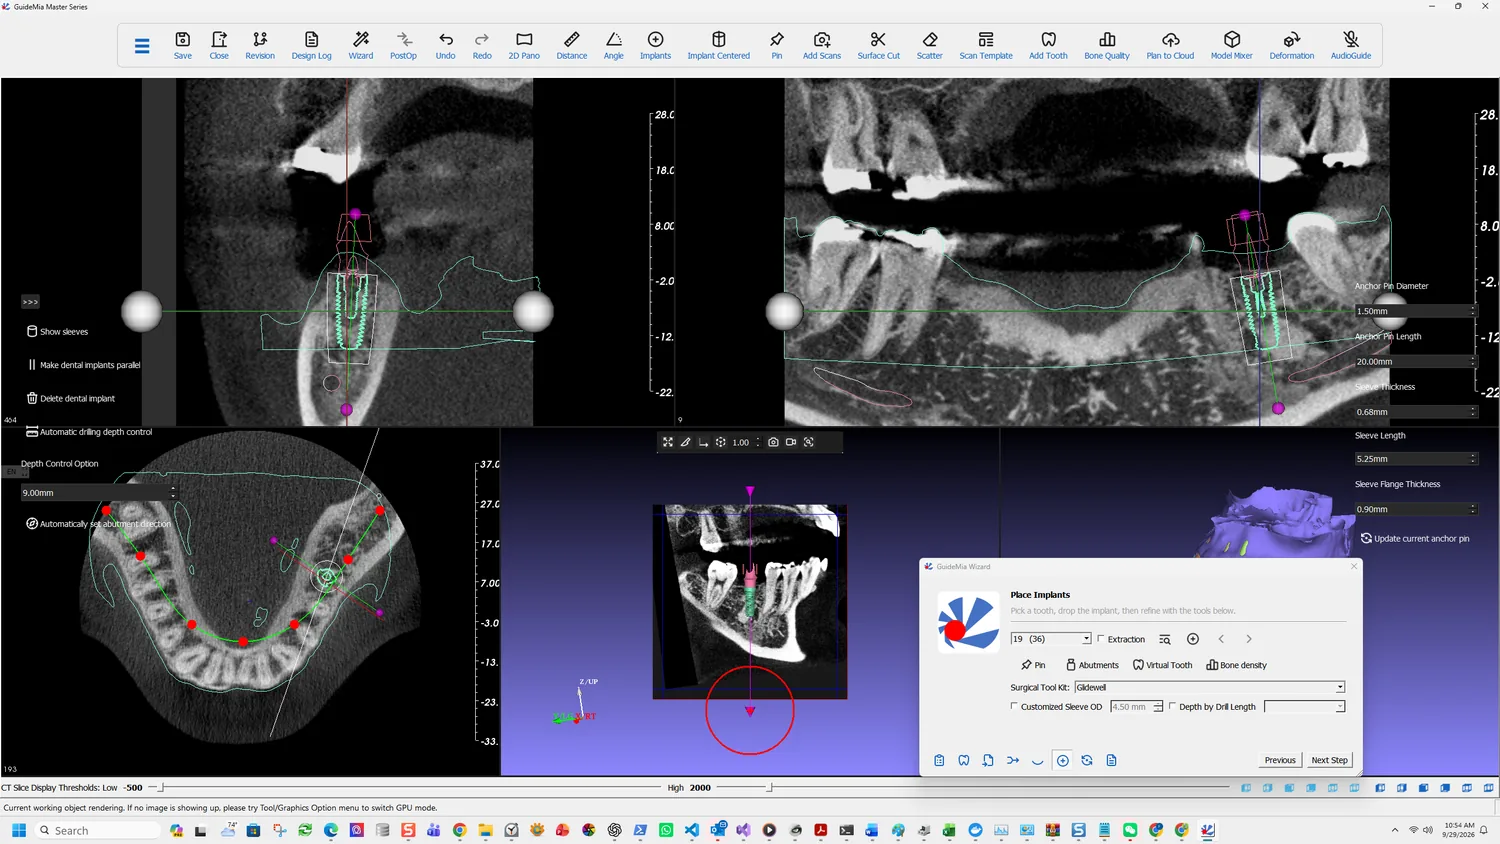
The sidebar tools
- Show sleeves displays the sleeves the current kit will produce, in place. Worth turning on before you are satisfied with the position, because a sleeve is considerably larger than the fixture and can collide with a neighbouring tooth when the implant itself does not.
- Make dental implants parallel aligns multiple fixtures. Irrelevant to a single unit, essential to a full arch.
- Delete dental implant removes the current one.
- Automatic drilling depth control, with a Depth Control Option in millimetres — 9.00 mm here.
- Automatically set abutment direction derives the abutment orientation rather than leaving it to be set by hand.
Set what the guide will be built from
The three controls at the bottom of the page are not planning aids. They determine the geometry of the guide generated later.
Surgical Tool Kit picks the kit whose sleeves and drills the guide must match:
Some implant brands have corresponding surgical tool kits, some don't. When a first implant is added, the system will try to match and set this surgical tool kit. If there is not matched kit, the system will use GuideMia universal kit as default.
So it is usually set for you by the implant you chose. When it is not, you get the GuideMia Universal Kit, which is a real kit with real sleeve diameters rather than a placeholder. A kit of your own can be defined.
Customized Sleeve OD overrides the sleeve outer diameter the kit would supply. Depth by Drill Length sets the total drill length directly instead of deriving it — "You can set the total drill length as you like."
Change either here, before the guide is generated, not after.
The panel on the right carries the anchor pin and sleeve dimensions the guide will be built to: pin diameter and length, sleeve thickness, sleeve length and sleeve flange thickness, with Update current anchor pin to apply a change.
The full Place Implants page splits into Implant, Abutment, Sleeve and Depth Control tabs, where the Wizard shows one combined panel. Alongside it in Treatment Planning:
- Anchor Pins or Screws — a page of its own. Pin on the Wizard adds one by clicking a site in any image window, after which it can be moved and rotated, and "when the pin is too close to implants or other pins, it will turn red."
- Bone Reduction or Combined Guide Splitting — where a case needs the ridge reduced before placement. V6 moved the bone reduction design here, leaving only the guide half in guide design.
- Bone/Sinus Graft.
- Plan Error Simulation — models the effect of a deviation on the planned position, which is the honest way to decide whether a plan has enough margin.
Positioning by abutments is worth knowing if you use custom abutments: right-click an implant in the assembly window and the placement tool moves onto the abutment rather than the fixture, so you adjust the implant by moving the restoration. The parallel tool on the coronal view's context menu then makes abutments parallel rather than fixtures.