
Everything so far has been preparation. The scans were loaded, the occlusal plane was established, the arches were cut into individual teeth and each tooth was given a root. None of that expressed any clinical intent — it described the patient as they are.
This step is where the case first says what it wants to become. Four presses of the Happy Button take GuideMia from a set of separated crowns to a complete proposed arrangement: every tooth moved onto an arch curve, collisions and interproximal contacts settled, attachments placed. It is the first time the case looks at itself, and it is the first result in the whole workflow that you have to judge rather than accept.
Take the judging seriously. An alignment that looks wrong here is almost never the alignment's fault — it is segmentation, or the articulation of the two scans, showing through. Both are far cheaper to fix now than after the case has been staged into aligners.
The occlusal plane, once more
The Happy Button reads "Adjust occlusion plane for tooth alignment." The occlusal plane was already defined when the upper jaw was loaded, but it was defined against unsegmented scans. Now that GuideMia knows where each crown is, you get one more chance to place the plane against the teeth themselves, which is the surface every later judgement about extrusion, intrusion and the curve of Spee is measured from.
GuideMia brings the ortho planes into view and makes a single tooth current so you can see the plane in context. Turn the model and check that the plane sits where you would draw it. If it does, press the Happy Button; if not, "Define arch plane" on the panel shows it for adjustment.
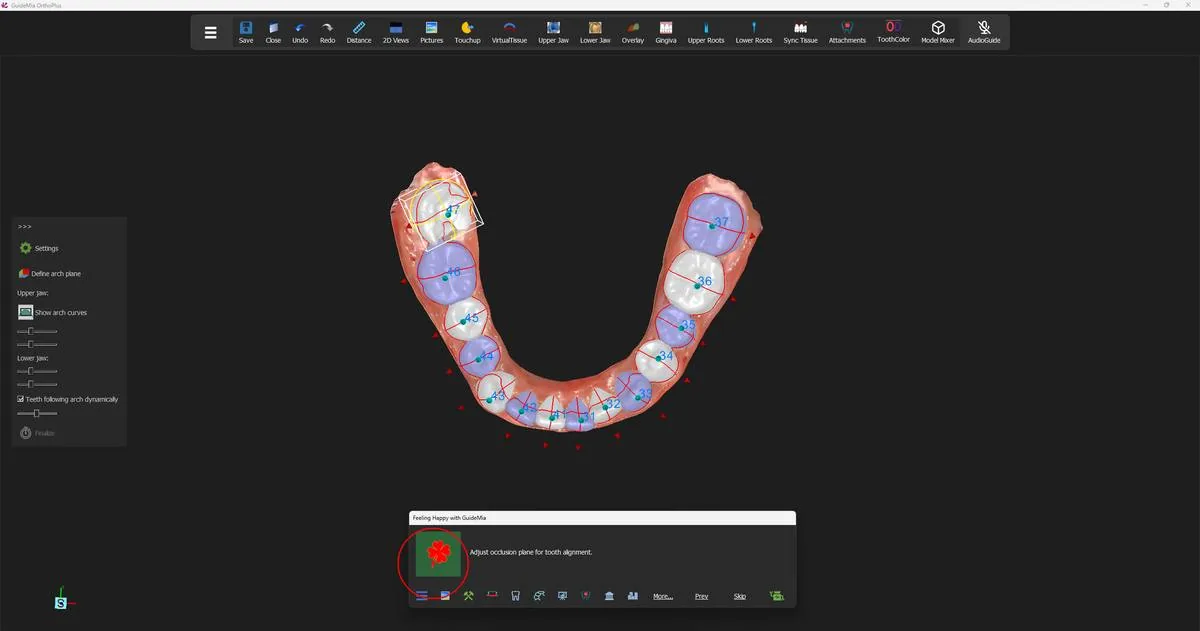 The teeth numbered and the occlusal plane brought up for a last look before alignment.
Arch curves and the treatment plan
The next press reads "Adjust arch curves and align automatically for an initial plan." Two things happen. The ortho planes go away and the arch curve appears, drawn through the arch on its own grid; and the Initial Treatment Plan dialog opens.
The arch curve is worth a moment before the dialog takes your attention. "Show arch curves" describes what you are looking at:
"This function will show and adjust the upper arch curve. There are two arch curves for each jaw. The default one is generated according to jaw width and length, and another one is simply a spline connecting the facial center points of the teeth. You can always adjust the control points on the arch curve to customize it."
Drag a control point and the teeth follow, because "Teeth following arch dynamically" is ticked by default:
"When this option is on, any changes to the arch curve will incur instant tooth movements so that you will know how the teeth will move according to the arch curves."
That live response is the fastest way to understand what a case will tolerate. Widen the posterior handles and watch how much crowding disappears.
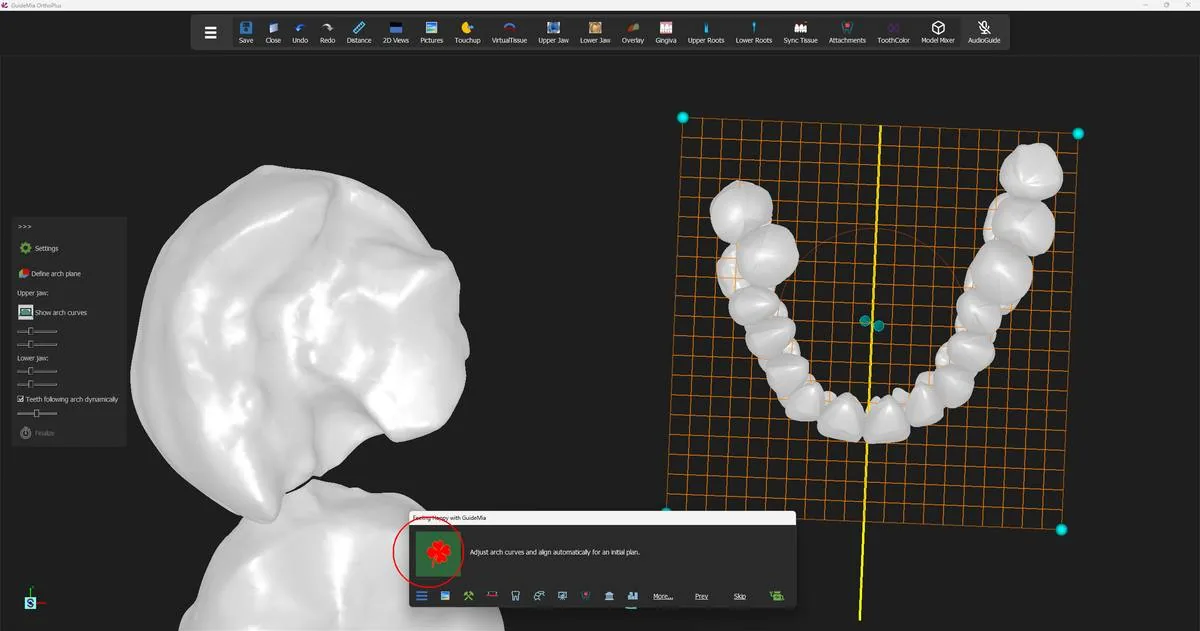 The arch curve on its grid, with the width and curvedness controls on the panel.
Saying what you want
The Initial Treatment Plan dialog is where clinical intent is expressed — expansion, protraction and retraction, distalization, allowed IPR, midline, extractions, missing teeth. It has its own step in the support knowledge base and more controls than any other surface in the product. Three things about it change how you work in this step.
It is not modal. You can leave it open, turn the model, drag an arch handle, and come back to it. In the demo it stays open through the preview and the finalise steps, so the numbers can be watched as they change.
Values apply as you set them. A numeric field takes effect when you leave it, a checkbox when you click it. You do not press "OK" to make a value count. What "OK" does is start the next operation:
"This button will apply the parameters and generate initial plan. In case of automatic design, the tooth segmentation has not been performed, this will simply save the parameters for later use."
The crowdedness readout is usually blank, and that is the good outcome. The dialog only fills it in for values above 0 — and a case that fits has a crowdedness of zero or below. The real number, negative included, is written into the status bar at the bottom of the window: upper arch crowdedness is followed by the value. Read the status bar, not the dialog.
The dialog carries its own warning about how much weight to put on these figures, and it is worth repeating to anyone who asks:
"Note: Some of those treatment plan parameters, such as lower jaw extrusions, spee curve height, are rough estimations. The actual results are subject to various factors."
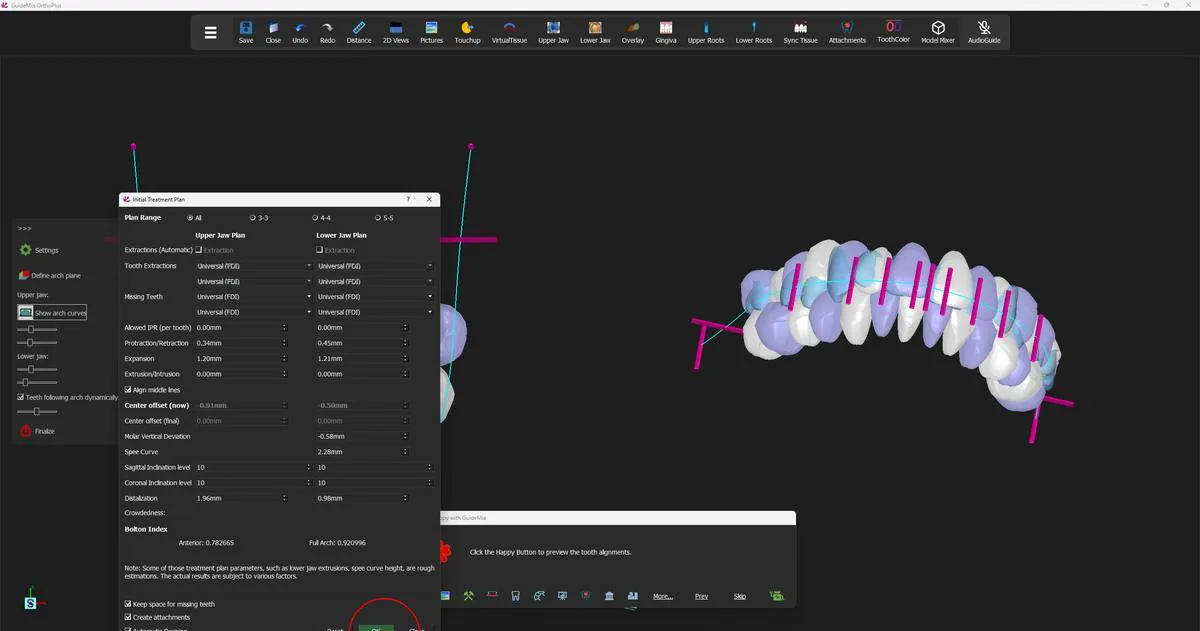 The Initial Treatment Plan dialog, with the real crowdedness value in the status bar at bottom left.
The preview
Press the Happy Button again — "Click the Happy Button to preview the tooth alignments." — and GuideMia arranges the teeth. It does this at 98% of the way to the ideal arch, using the smile-correction control on the panel, whose own description explains the scale:
"This value changes of this slider will update the preview of the initial tooth alignments. The slide value will indicate the percentage the teeth will likely be moved. 100% means the teeth will be moved to the ideal arch curves."
Nothing is committed. The preview is a proposal you can reject by changing a plan parameter or an arch handle and previewing again, and the demo does exactly that — the protraction and distalization figures in the dialog move between one preview and the next as the arch is adjusted.
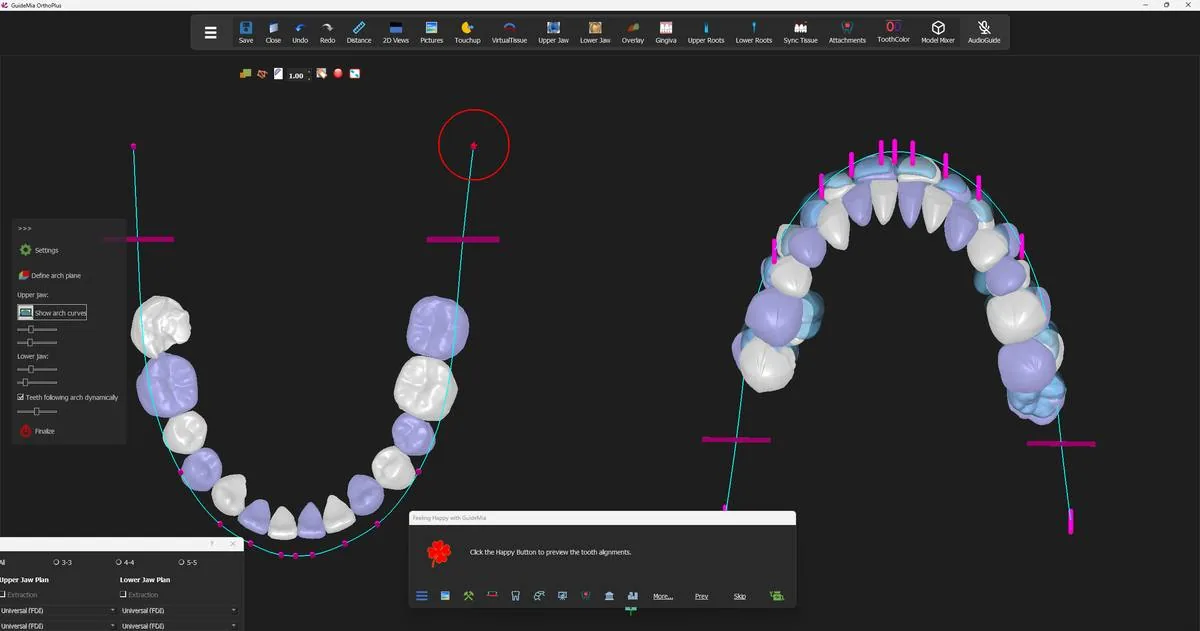 The proposed positions previewed against the arch curve, with the starting positions still visible behind them.
Finalising
The fourth press reads "Click the Happy Button to finalize alignment." This is the one that commits, and it does more than accept the preview:
"Finalize the tooth setup. Once the initial preview looks fine, you can click this button to finalize the setup. This will involve steps to adjust collisions and IPRs, to move teeth according to Spee curves, etc."
If attachments were asked for in the treatment plan — "Create attachments" is ticked by default — they are placed before the movement data is worked out, so the plan accounts for them rather than having them added afterwards. That is why the arch you see at the end of this step already carries attachments.
GuideMia then fills in the movement data, hides the ortho planes in both 3D windows, and moves the panel from "Automatic Planning" on to "Planning Final Positions" — the manual tooth setup tools, which are step 8.
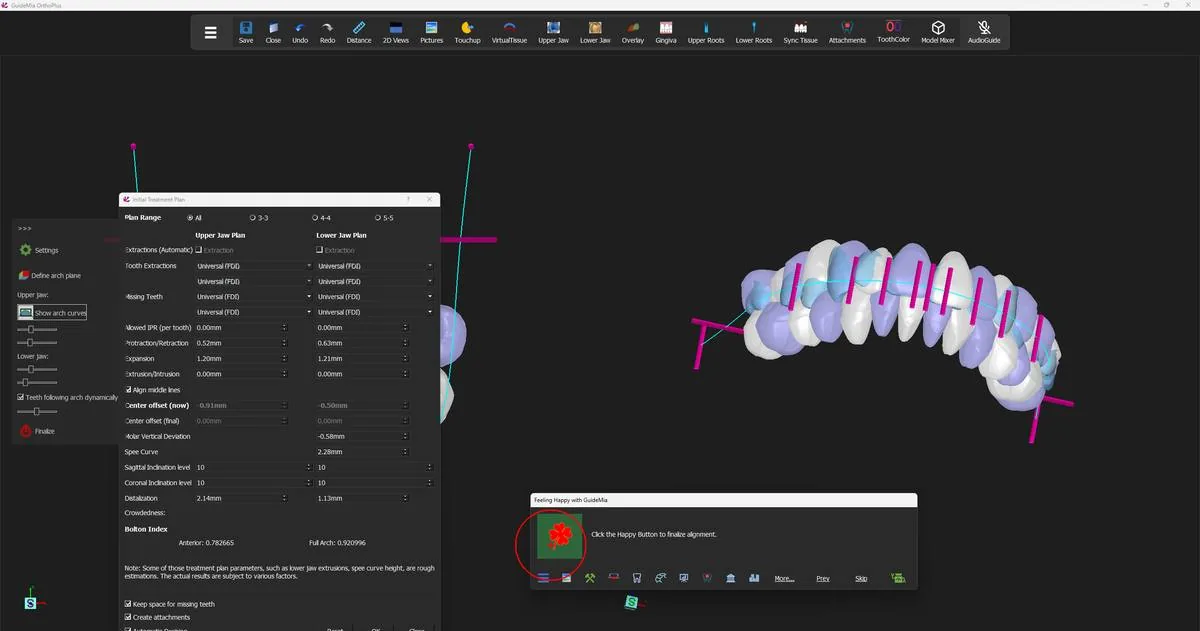 Finalising the alignment, with the treatment plan still open beside it.
Judging what came back
The Happy Button now offers "Click the Happy Button to enter tooth setup." Do not press it yet. This is the point in the workflow with the best ratio of looking to fixing.
Turn the model and look for four things.
Does the arch read as an arch? From the occlusal view the crowns should sit on a smooth curve with even contacts. A tooth that sits visibly off the line its neighbours describe, or that has been rotated much further than the case called for, is usually one whose mesial-distal direction was read wrongly during segmentation.
Does the bite make sense from the front and the side? GuideMia aligned each arch onto its own curve; whether the two arches meet sensibly afterwards depends on the articulation you supplied in the scans. Anteriors that finish edge-to-edge, or a midline that has walked, point back at the bite in the scan files rather than at the alignment.
Is any crown malformed? A crown that comes through the alignment torn, notched, or missing part of its surface did not become that way here — it was segmented that way, or the scan did not cover it. It will still be movable, but it will make a poor aligner, so deal with it before staging.
Are the attachments on the teeth you expect? They were placed against the final positions, so a strangely placed attachment is often the first visible sign that a tooth's orientation is wrong.
If everything looks right, the alignment is done and you can go on. If it does not, the fixes live upstream — in segmentation, in the crown boundaries, or in the scan itself — and it costs one step to go back now against several later.
The display maps are the other half of this inspection. Turning them on and off from the right-click menu is how you check contacts and how far individual teeth are being asked to travel; step 7 covers what each one colours and what the colours mean.
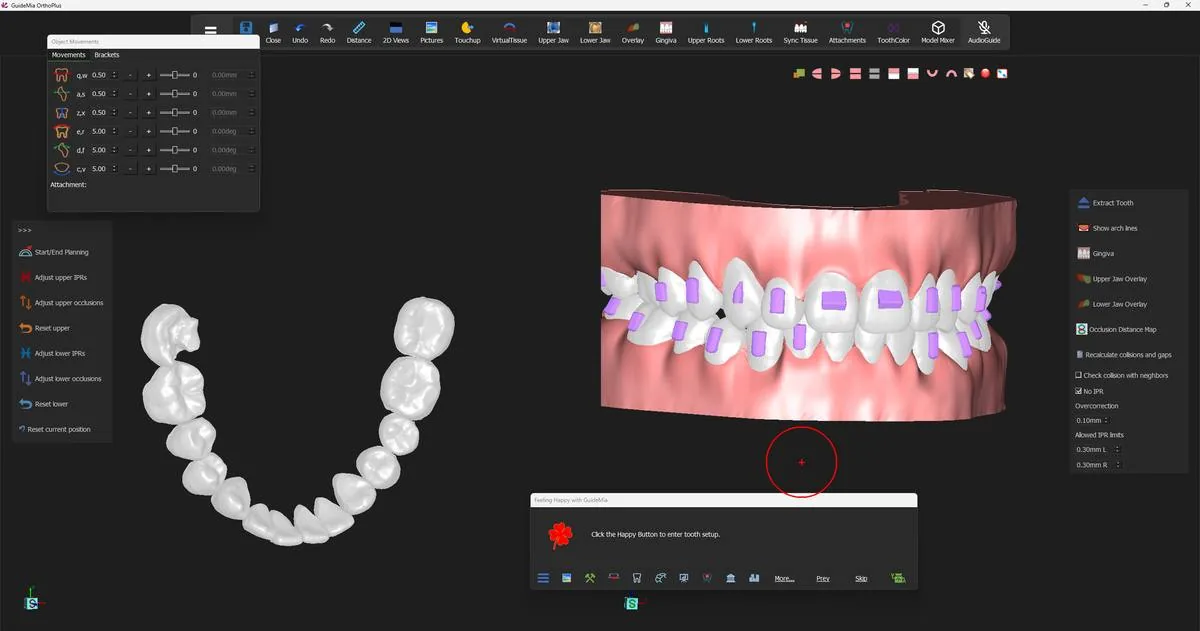 The finished alignment: both arches on their curves, attachments in place.
Where you are now
The case has a proposed final position for every tooth, with attachments, and a first set of movement figures behind them. Nothing is staged yet — there are no steps and no aligners, only a starting arrangement and a target arrangement. Turning the target into something you would actually treat is the next two steps: adjusting individual teeth and making room for them in step 8, then breaking the movement into steps in step 9.
The "Automatic Planning" section of the workflow panel carries more than the four Happy Button presses use:
| Control | What it is for |
|---|---|
| "Settings" | The movement profile — how much total and per-step movement GuideMia will plan |
| "Plan movements from step" | Keeps existing steps up to a given step and replans only after it |
| "Define arch plane" | Shows the arch (occlusal) plane so it can be adjusted |
| "Show arch curves" | Shows and adjusts the arch curve for the jaw you are on |
| "Teeth following arch dynamically" | Teeth move as you drag the curve; on by default |
| "Upper jaw:" / "Lower jaw:" width and curvedness | Shape the curve without dragging handles |
| "Smile Correction" | The preview percentage; the Happy Button sets it to 98 |
| "Finalize" | Commits the setup, adjusting collisions, IPRs and the Spee curve |
Below it sits "Arch Curve Control", a third way to move teeth that the demo does not use. It works from an arch control curve rather than the arch curve: "Show and adjust arch plane (Crown center level is suggested)" places the plane, "Update/show upper arch control curve" builds a curve from it, and "Adjust upper teeth by arch" snaps the teeth toward it —
"This function will snap the teeth toward the control curve. You can combine this tool and the arch curve adjustment to obtain the best results. After this operation, use the button below to adjust IPRs and gaps."
That last sentence is the pattern for the whole of step 8: move teeth, then settle the contacts.