
Two models of the same arch, in two coordinate systems. This step makes them one, and the accuracy of everything afterwards rests on it: the implant is planned against CT anatomy and the guide is built on scan surfaces, so a registration error puts the drill somewhere the plan never intended.
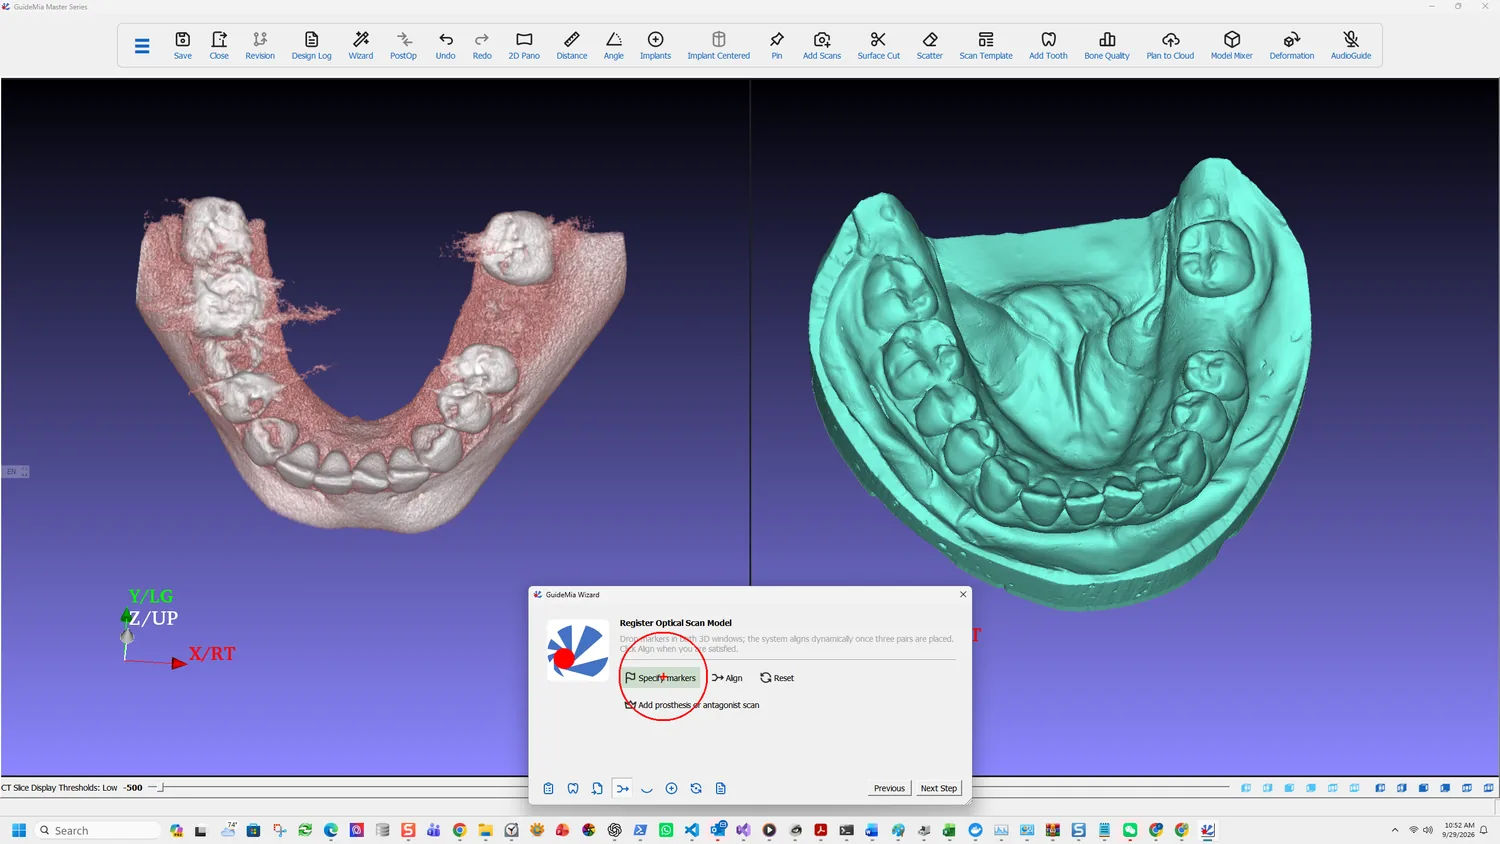
The Wizard states the method in a sentence: "Drop markers in both 3D windows; the system aligns dynamically once three pairs are placed. Click Align when you are satisfied."
Placing markers
Specify markers starts it. You are working across two windows — the CT-derived model on one side, the optical scan on the other — and clicking the same anatomical point on each.
Use this button to specify markers in the both 3D windows. The registration tool works dynamically. Once it has three pairs of points, it will start dynamic registration. You can observe the results and add more points on both sides. It is not required to specify markers in same order in the windows.
Two things in that are worth pulling out.
Order does not matter. You are not building a numbered correspondence; the tool works out which point pairs with which. So you can place three on one model and then three on the other, or alternate, whichever is easier to keep track of.
Three pairs starts it. Below three there is nothing to solve. At three the alignment begins computing and updating as you watch.
And one caution that reverses the obvious instinct:
More markers may not produce better results.
More points do not average out to a better fit. A badly placed marker is weighted like a good one, so adding points to compensate for an uncertain one makes things worse rather than better. Place few, place them well, and remove rather than dilute a bad one.
Pick features with an unambiguous apex — cusp tips, a clear groove intersection, the corner of a restoration. A broad flat surface is easy to click and impossible to click twice in the same place.
Finishing
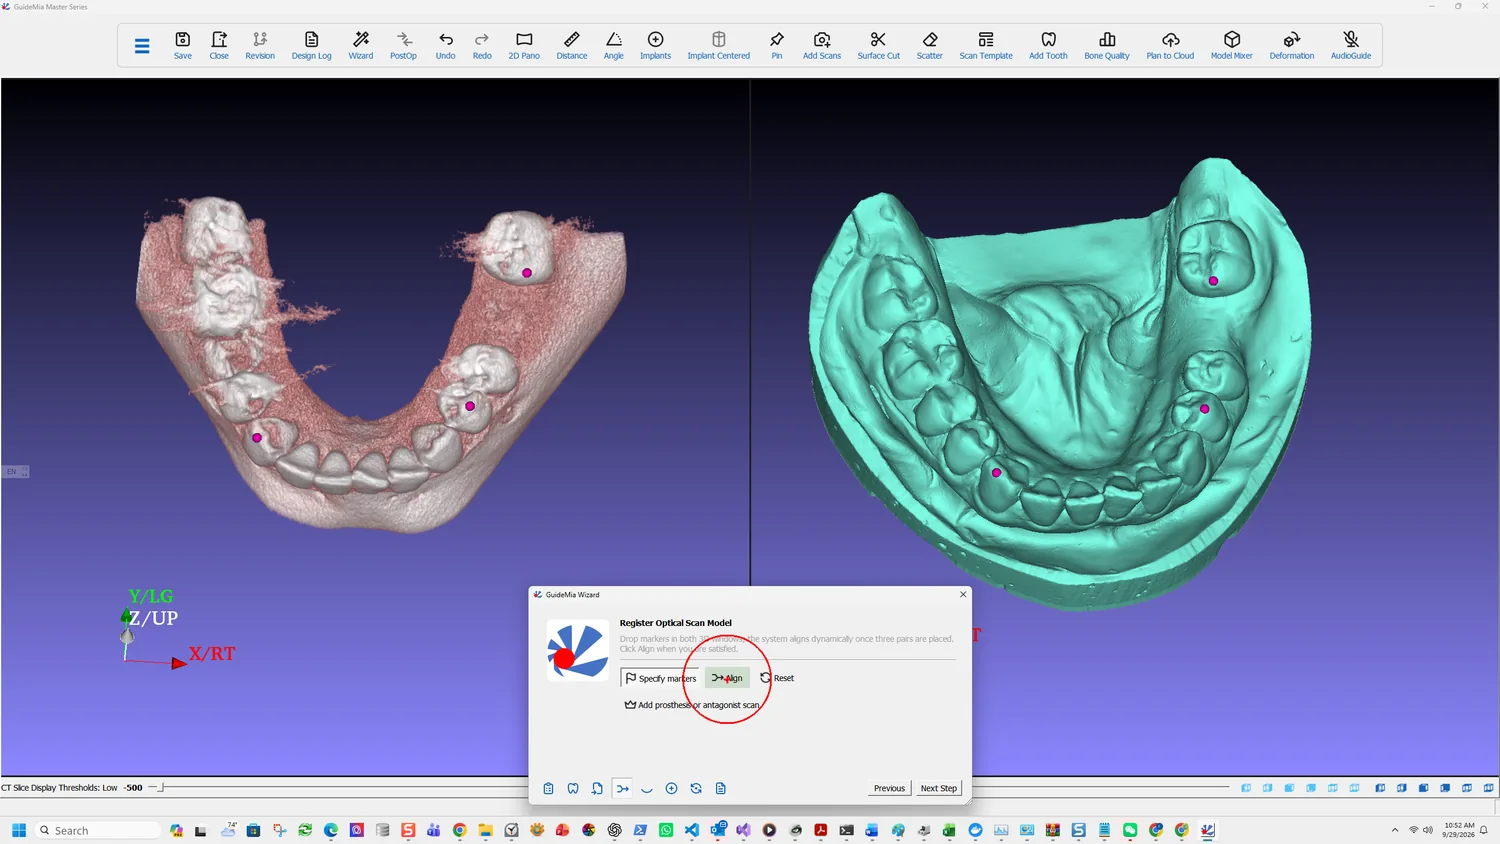
Dynamic registration is a preview. It is not applied until you say so:
Finish Alignment. Even though the system is doing the dynamic registration, you still need to press this button to finish.
This is the single most missed step in the whole sequence, because the screen already looks right. A case that was never aligned looks aligned on your monitor and nowhere else.
Reset undoes the registration and clears the markers, so a registration going wrong costs only the markers you placed.
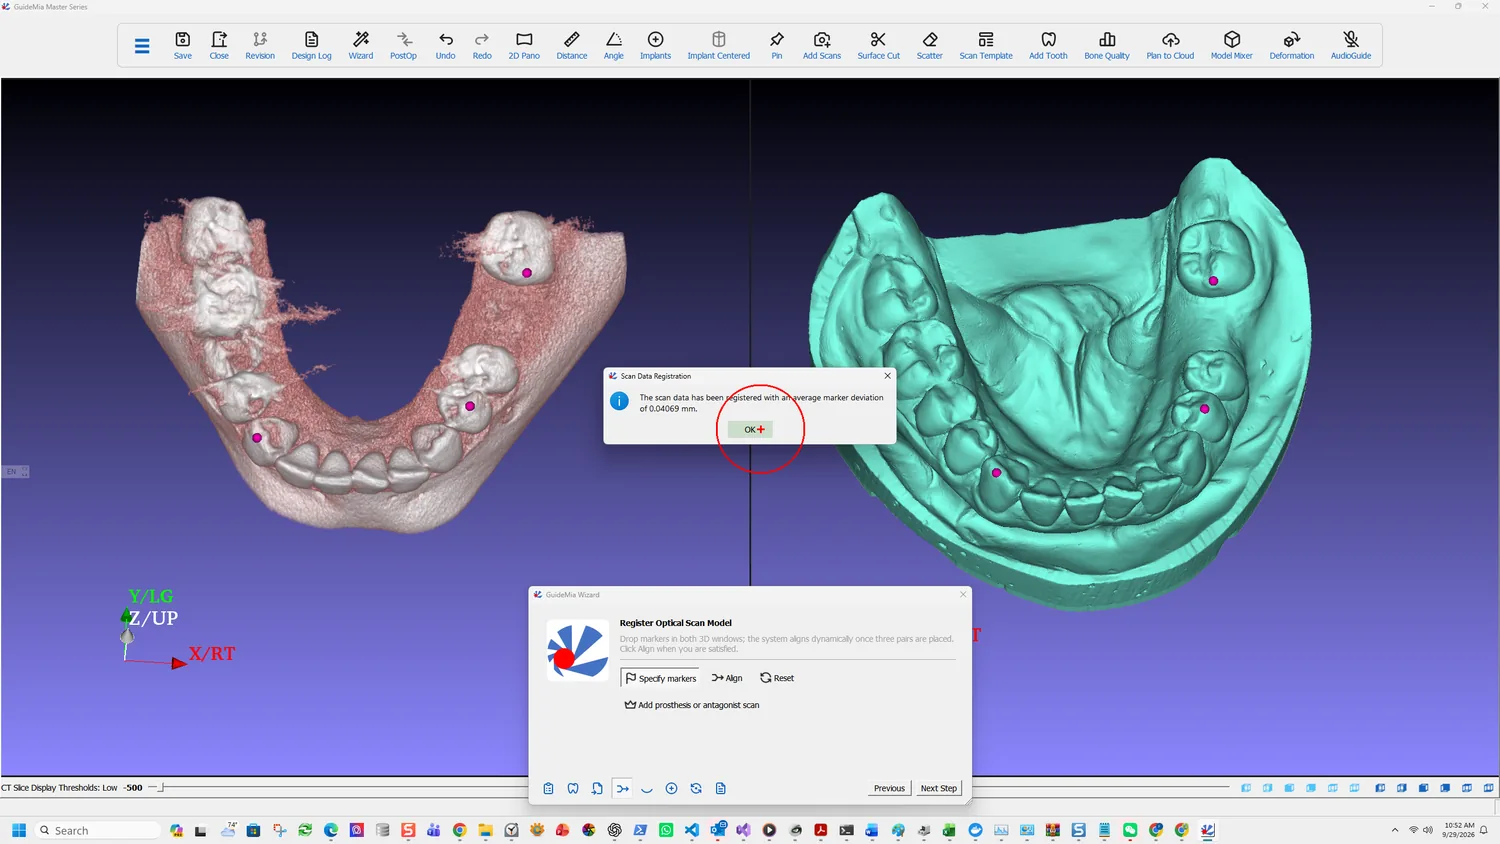
When it completes, the software tells you how well it did:
The scan data has been registered with an average marker deviation of 0.04069 mm.
Read that number. It is the average distance between your paired points after alignment, and it is the only quantitative feedback the step gives you. A figure in the hundredths of a millimetre, as here, means the markers agreed with each other. A figure an order of magnitude larger means one of them did not — and the remedy is to find the bad marker and remove it, not to add more.
What it does not tell you is whether you clicked the right anatomy. Three markers placed consistently on the wrong cusps will register beautifully and align the models wrongly. The number measures self-consistency; the check below measures correctness.
Checking it before moving on
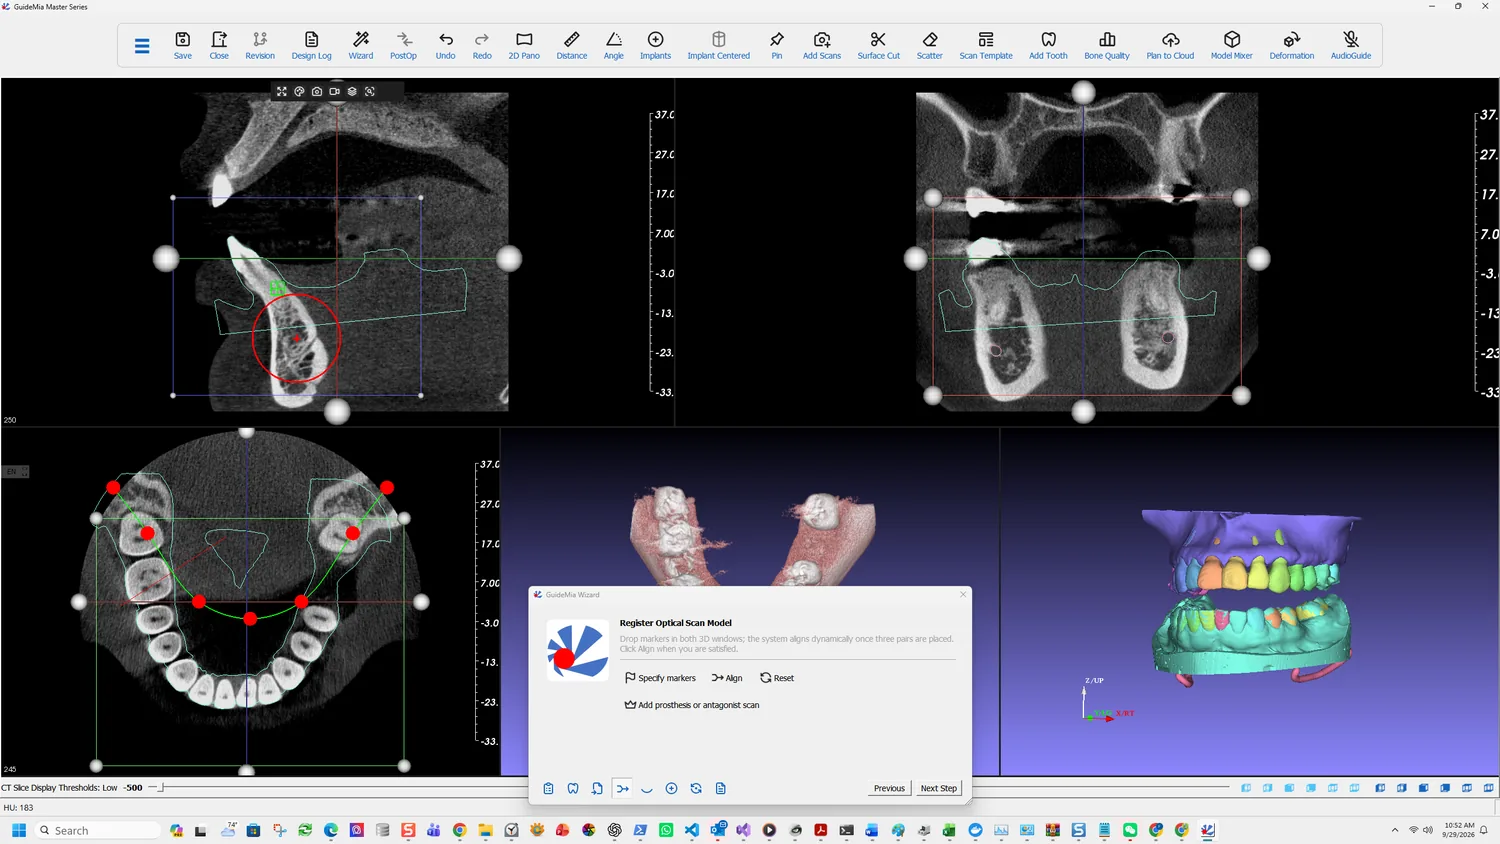
The 3D view is the least sensitive place to judge a registration. Two surfaces can look coincident and be half a millimetre apart.
Look at the 2D slices instead. The scan's outline is drawn over the CT, and a good registration has that outline following the enamel — sitting on the tooth surfaces rather than floating above them or cutting inside them. Step through several slices; an error that is invisible on one can be obvious two slices away.
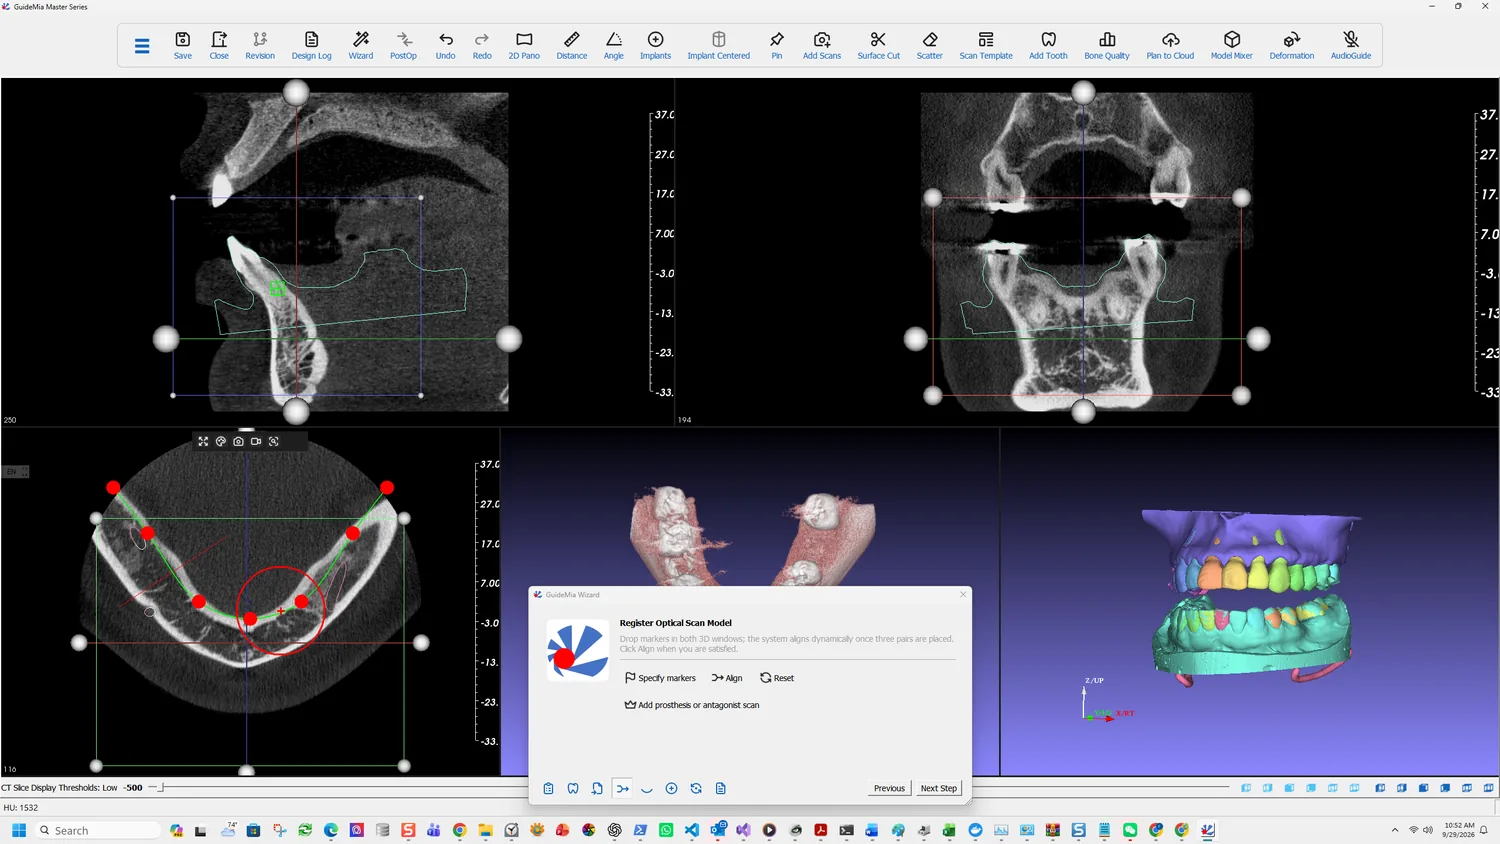
Check it where it matters most: at the teeth adjacent to the implant site, because those are what the guide will actually seat on.
This same outline is what you will be looking at again in fit analysis, from the other end: that step compares the finished guide against this registered model, so it can only be as truthful as this alignment is.
The full Model Registration page carries tools the Wizard does not expose, and one of them answers the case where markers alone are not enough:
- Fine-tuning of model position — step length and angle controls for the sagittal, coronal and axial views, which nudge a model by a set increment rather than by dragging. This is how you correct a registration that is nearly right, and it is only available on the full panel.
- The same page handles registration of a radiographic guide, which follows a different route from an optical scan.
When a registration cannot be rescued, the cause is usually the scan rather than the markers. Go back to planning mode and right-click the scan template model to repair it — small holes and defects in a scan will also defeat the guide cut several steps later, so fixing it now saves the same problem twice.