
An intra-oral scan is a surface, and surfaces arrive with defects: holes where the scanner could not see, spikes and bubbles from a plaster model, triangles whose normals point the wrong way, thin bridges of geometry connecting the buccal and lingual sides through an interproximal space. None of that stops you looking at the model. All of it stops the operations that come next — crown boundaries cannot be traced reliably across a hole, teeth cannot be lifted cleanly out of a non-manifold mesh, and a model with inconsistent normals cannot be closed into a solid.
This step is one Happy Button press. It is also the heaviest single press in the workflow, and it is the last comfortable moment to deal with a scan you are not happy with.
The bounding box, and the angle it reports
Before the repair, GuideMia puts a green bounding box around the models in the assembly window and asks you to set it. Its instruction:
Adjust the bounding box, then fix jaw Models. It is recommended that the angle between the two indicates the OP-FH angle. Click the Happy Button to fix models.
The step's full title spells out what the box is and is not:
Adjust the bounding box, then fix jaw Models. This is only to adjust view orientation but not the occlusal plane. Rotations about the Z or Y axis indicates the FH plane and the occlusal plane have corresponding discrepancies.. [sic]
Read that carefully, because the box looks like a manipulator and is not one. Turning it does not move the occlusal plane you settled in step 2 and does not move the models — it sets the orientation the case is viewed and framed in, which GuideMia treats as the FH plane. The consequence is the useful part: once the box represents FH and the plane represents the occlusion, the angle between them is the OP-FH angle, and you have it as a by-product of setting up the view. If you find yourself rotating the box about Z or Y to make it look right, that rotation is telling you the two planes disagree by that much.
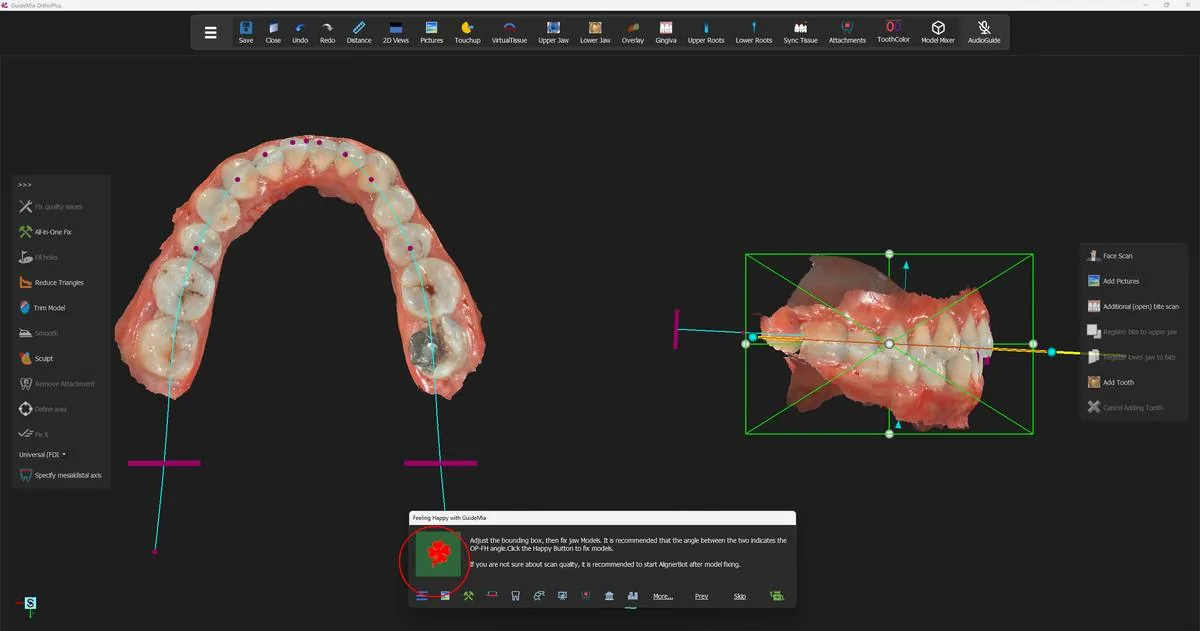 The bounding box on the models in the assembly window, with the occlusal plane still drawn through them.
The instruction carries a second paragraph on this case, because the scans are colour scans:
If you are not sure about scan quality, it is recommended to start AlignerBot after model fixing.
This is the first of the points where GuideMia offers to finish the case for you. AlignerBot presses the Happy Button step after step, without stopping, to the end of the design. The advice being given is about where to hand over: let the model repair happen under your eye, look at the result, and start the automatic run from there rather than from a scan you have not inspected. The repair is the step whose outcome everything else inherits.
What GuideMia tells you about the scan
Press the Happy Button and, before anything is repaired, GuideMia reports what it has found:
Scan Quality — The scan files may have critical quality issues around the following teeth or their neighbors. OrthoPlus will try to perform model fixing and tooth segmentation. If they are not properly handled, manual model fixing is suggested. #30(FDI#46) #31(FDI#47)
Note what this is and what it is not. It is not a refusal, and it is not a prediction of failure — GuideMia will go ahead and try. It is a list of the teeth to look at afterwards. On this case they are the lower right first and second molars, and the numbering is given twice — once in the Universal scheme and once, in brackets, in FDI — so that whichever you read, you know which teeth are meant.
Write the numbers down. They are the teeth whose crown boundaries you will check first in step 4, and the teeth whose segmentation you will check first in step 5. OK dismisses the dialog.
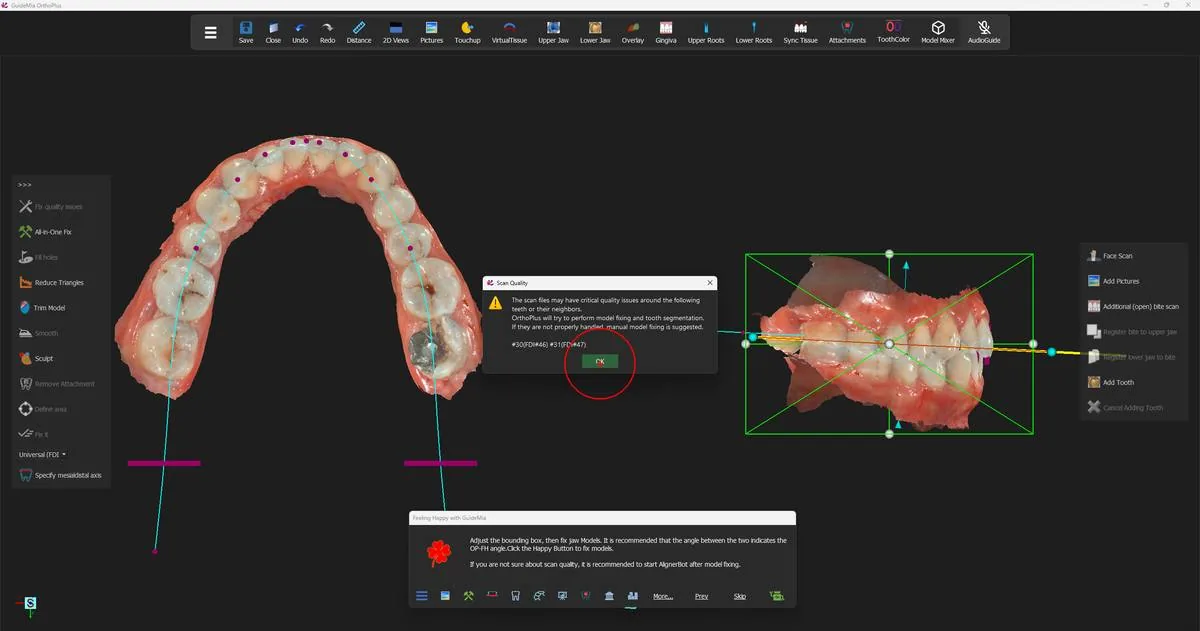 The scan-quality report, naming the teeth that need watching.
Choosing how hard to repair
GuideMia then asks which repair to run:
GuideMia can automatically fix model quality issues. We suggest "All-in-one Fix" if you are not sure about the scan file quality. Otherwise select "Quick Fix". If you believe the models have good quality, select "Minimum Fix". The option "Fix and Re-mesh" is to fix scans with problematic area bigger than 2mm. For ideal results you may want to use local fix tools alternatively.
The buttons are "Quick Fix", "All-in-one Fix", "Minimum Fix" and "No Fix". Read the advice as a scale keyed to how much you trust the scan: "All-in-one Fix" when you are not sure of it, "Quick Fix" when you are, "Minimum Fix" when you believe the models are already good. "Fix and Re-mesh" is reserved for damage larger than 2 mm — and note that even there the advice points you at the local fix tools instead if you want the best result.
This case takes "Quick Fix" — two flagged molars on an otherwise clean pair of colour scans.
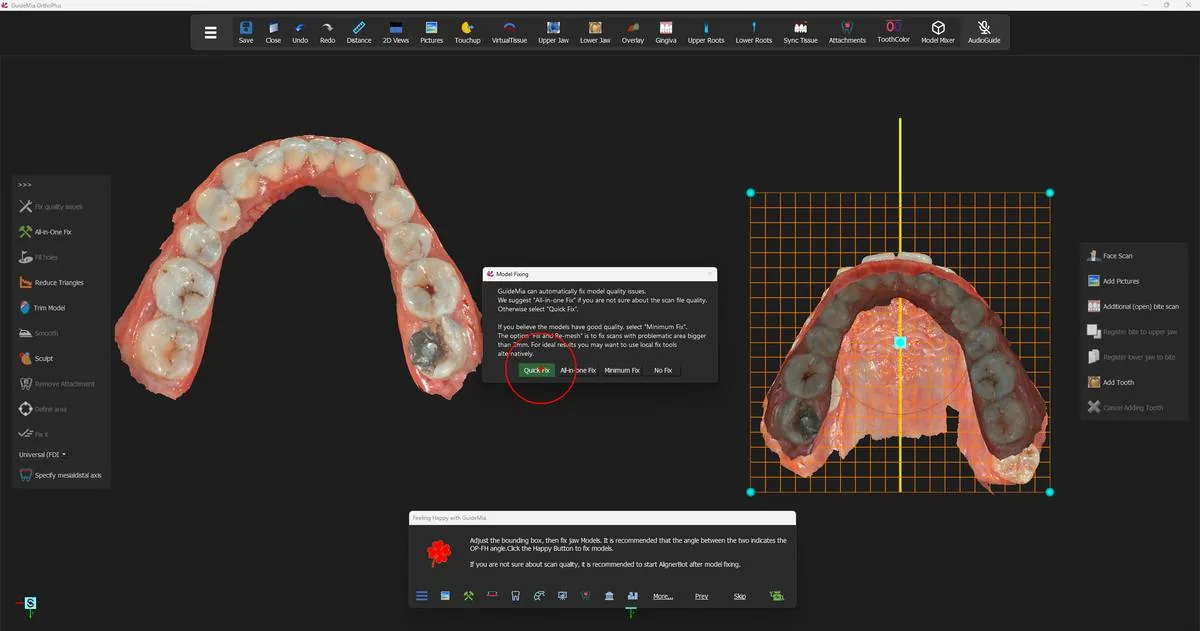 The repair options, with the models behind them.
One thing worth knowing if you later reach for the same repair by hand: the all-in-one fix run from this step is not quite the button of the same name on the workflow panel. The version the Happy Button runs can use the arch curve information to guide the repair, and the panel version cannot. If a manual repair seems to do less than the wizard's did, that is why.
After the repair
GuideMia removes the large flat triangles from the bottoms of the jaw models, repairs both models, and then aims the working window at each jaw in turn so you can look at the result. Use that: turn each model and check the areas the scan-quality dialog named, and check anywhere the scan was thin at the gingival margin.
If you are not satisfied, the whole repair toolbox is on the workflow panel's data-processing page — including the tools for the specific problems the wizard does not target, such as plaster-model bubbles and an over-long model boundary. GuideMia's own advice is to do that work there and then come back to this step for a final pass, rather than to fight it here.
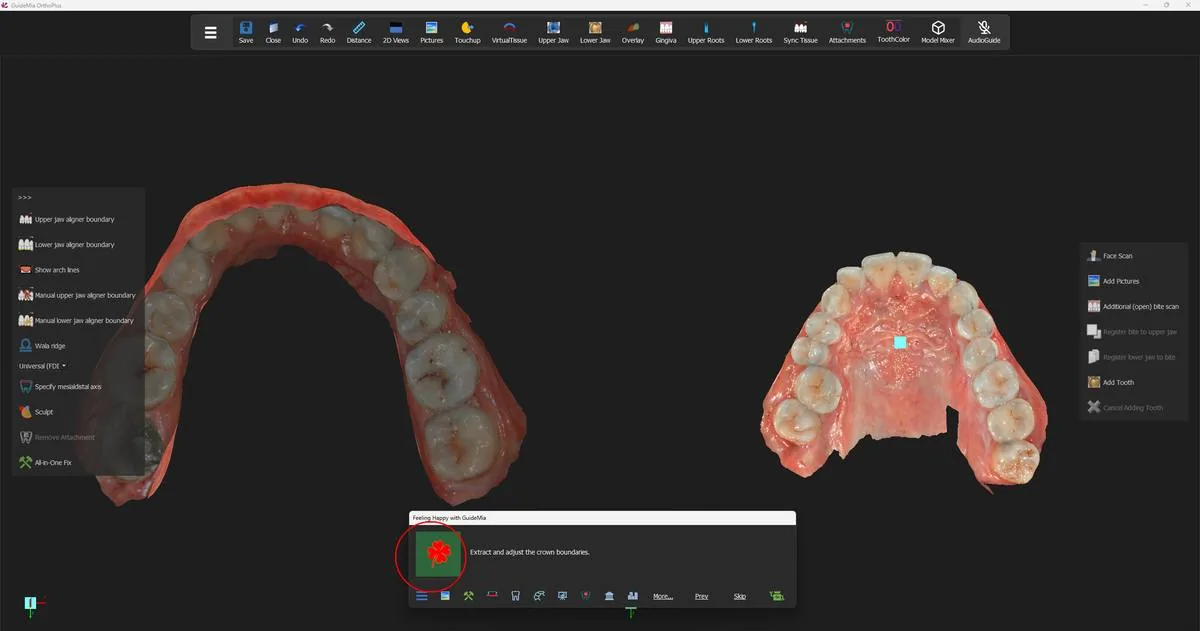 Both models repaired, with the Happy Button now offering crown boundaries.
Where you are now
Both jaw models are repaired and oriented, and you know which two teeth on this case are likely to give trouble. The models are still open surfaces, and GuideMia still has no idea where one crown ends and the next begins. Finding the crowns, and closing the models into solids, is the next step.
The repair is one press, but the "Data Processing" section of the workflow panel's data-preparation page carries a great deal more, and this is the stage to use it:
| Control | What it is for |
|---|---|
| "Mesh Optimization" | Refine and reduce triangles, and remove non-manifold geometry |
| "Smart Fix" | Repair by normal consistency — reversed triangles, non-manifold edges |
| "All-in-One Fix" | The heavy repair, run on its own |
| "Plaster Model Scan Cleanup" | Smooth away bubbles and small artefacts typical of a plaster scan |
| The bubble-size box | The rough radius of the bubbles the cleanup will act on |
| "Reduce Undercuts According to View Direction" | Reduce, not block out, undercuts on the current model — full block-out would make aligners too loose |
| "Track boundary" | Click points on the model to define a contour; click the first point again to close it |
| "Cut Model Base" | Trim the current model with that contour |
| "Reverse Cut" | Keep the other side of the cut instead |
| "Automatic boundary cleanup" | Tidy the model boundary — needs crown boundaries to exist first, so it belongs after step 4 |
| "Add Tooth" / "Cancel Adding Tooth" | Place a virtual tooth into a gap, sized and oriented by its bounding box |
| "Align models and CT" | The only route to the registration tool; CBCT cases only |
Two of these are worth a caution. "Track boundary" and "Add Tooth" are both toggles — you click the same button again to finish — and while either is active, moving the mouse off the model is how you rotate the view without adding a point. A right-click, or Escape, abandons what you were drawing.