
The Wizard opens on a question that decides which steps you will see for the rest of the case:
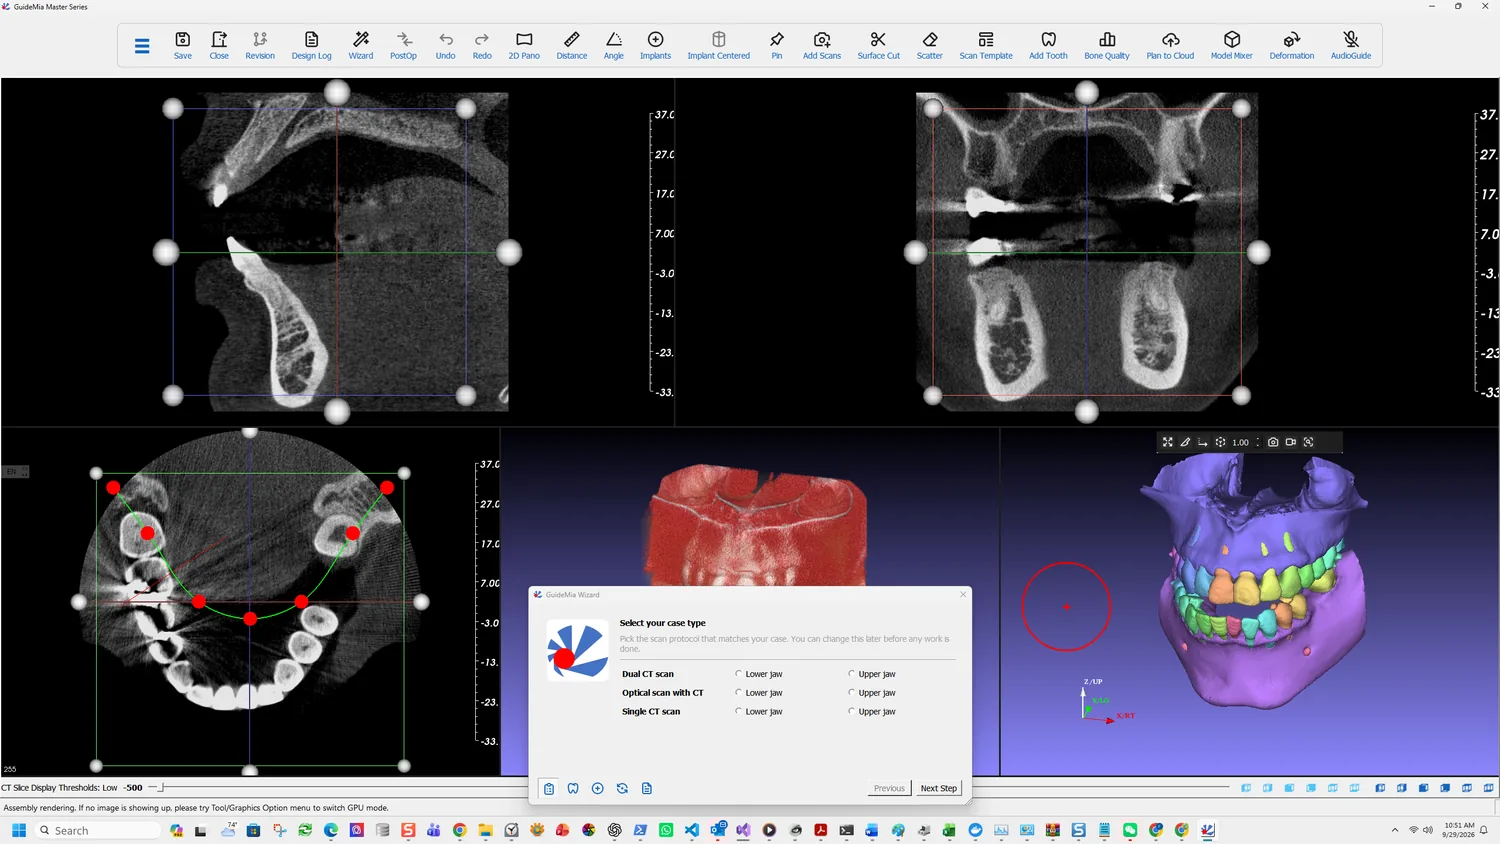
Select your case type. Pick the scan protocol that matches your case. You can change this later before any work is done.
Note the second sentence. It can be changed — but only before any work is done. This is not a preference you revise mid-case, because the steps that follow differ, and the work already done under one protocol does not carry across to another.
The three protocols
Each is offered for the lower or the upper jaw.
| Protocol | What it takes | What changes |
|---|---|---|
| Dual CT scan | Patient CBCT plus a CBCT of a radiographic guide | A registration step for the guide replaces the optical scan steps |
| Optical scan with CT | CBCT plus an intraoral or model scan | The route Part One follows |
| Single CT scan | CBCT alone | No scan to load or register; the guide is built from the bone model |
Optical scan with CT is the case recorded here, and the common one for a partially edentulous patient. The intraoral scan carries the tooth surfaces the guide will sit on, at a fidelity CBCT cannot reach.
Single CT scan is worth knowing about even if you never plan one, because it changes what the guide rests on. With no optical scan, the bone segment becomes the base for guide design, and the software builds a cylindrical clearance between the guide and the bone and tooth model so the guide sits on the neighbouring teeth rather than intruding into soft tissue or bone. No tissue information is needed and no flap is required. The release notes describe the sequence: load the CT, segment bone — preferably with tissue peeling so the bone surface is not too rough — place implants, then on entering guide design answer yes when asked whether to design a purely tooth-level guide.
Dual CT scan is the older protocol, and it still has a place — it is the one Part Two takes. A radiographic guide represents the gum surface and the planned tooth arrangement for a fully edentulous case, and it also solves a partially edentulous case where there is not enough natural tooth left to register a CBCT against a model scan — a patient with a long bridge, for instance.
Choosing the jaw
The lower and upper options are not merely a label. They set which arch the region of interest, the segmentation and the nerve work apply to. A lower-jaw case gets the mandibular canal as a first-class object; an upper-jaw case is concerned with the sinus instead.
What is behind the dialog
The workspace is already populated, because the CT loaded before the Wizard appeared.
Three CT slice views — sagittal at top left, coronal at top right, axial at bottom left. Each carries a millimetre scale, a bounding box with handles that defines the region of interest, and slice lines you drag to move through the volume. The axial view also shows the arch curve with its control points; that curve is what the panoramic reconstruction follows.
Two 3D views. The left is the working object window, the right the assembly window. The distinction matters later: in the assembly window you can right click any object and make it current, and it is then shown in the working object window. Export acts on the current object.
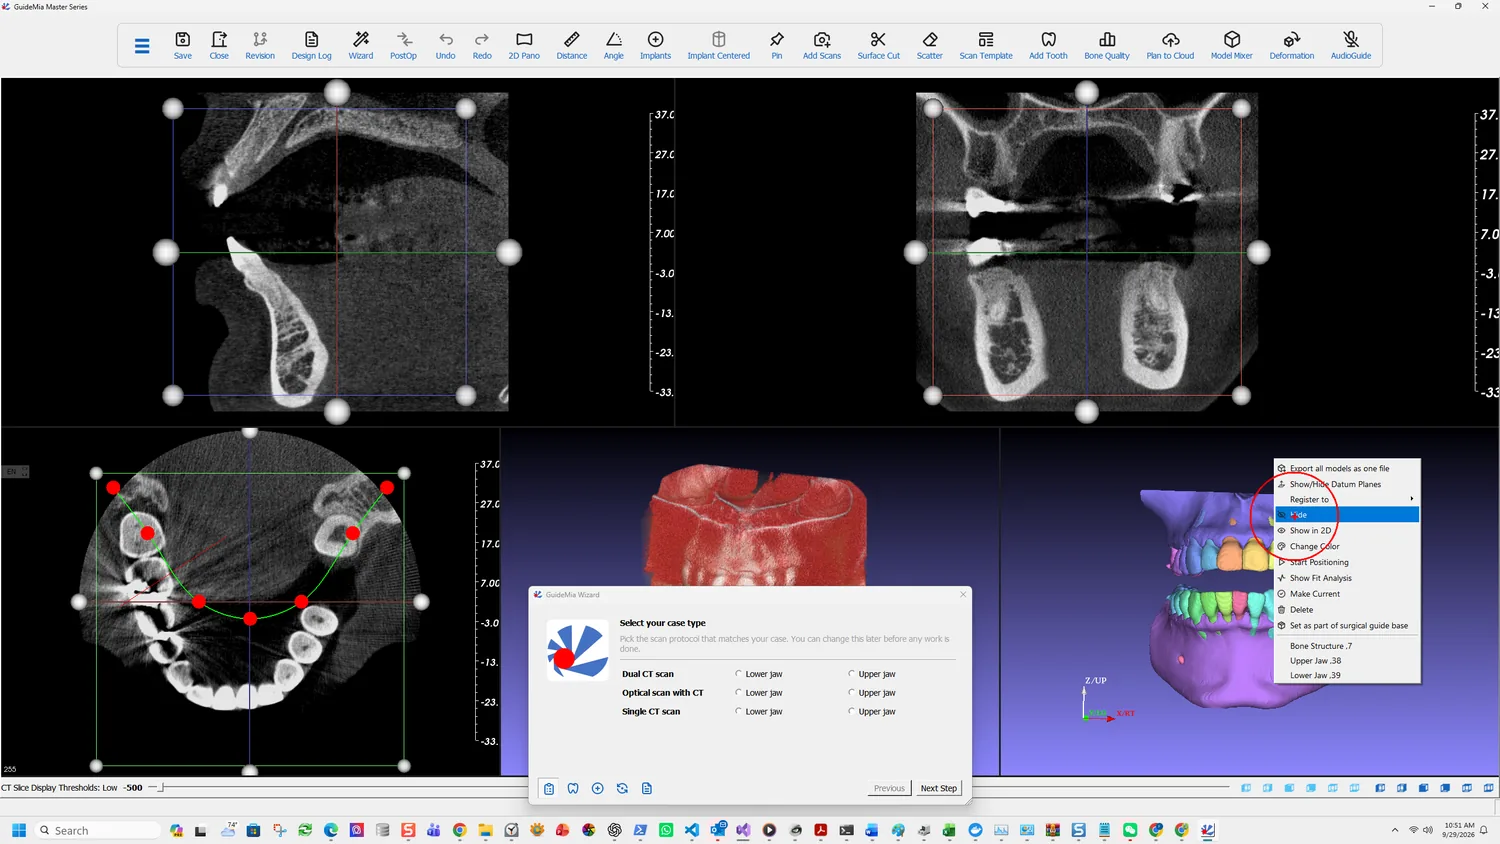
That right-click menu is worth opening once now, because it is the same on every object for the rest of the case: Export all models as one file, Show/Hide Datum Planes, Register to, Hide, Show in 2D, Change Color, Start Positioning, Show Fit Analysis, Make Current, Delete and Set as part of surgical guide base.
Below the menu entries is the object list itself, and in this case it already reads Bone Structure, Upper Jaw and Lower Jaw — the AI has segmented the volume before you have chosen anything. That is why the 3D view behind the dialog is already showing separated, coloured teeth.
The threshold control along the bottom reads CT Slice Display Thresholds with a Low value. This is a display control — it governs what the slice views show. The thresholds that build the bone model are a different thing, set during segmentation.
How the interface divides the work
Three surfaces, and knowing which owns what saves most of the hunting a first case involves.
The Wizard walks the steps. One page each, Previous and Next Step at the bottom, and only the controls that step needs.
The sidebars hold the extra tools for the current page — the ones a straightforward case can ignore.
The workflow pages, in the dock widget, carry the full interface. They are grouped as Case Preparation, Treatment Planning, Surgical Guide Design and Report Generation, and they contain work the Wizard never surfaces at all.
The Wizard is a route through the software, not a reduced version of it. Everything it offers exists on the workflow pages too, which is why a case that needs something unusual is not stuck — you leave the Wizard for that step and come back.
The Workflows button turns the Wizard on and off. V6 added a workflow customisation tool, so the sequence of pages is itself configurable rather than fixed — useful for a practice that always runs the same protocol and wants the irrelevant steps gone.