
Two scans in a shared bite are not yet a case. GuideMia has no idea which way is up, where the midline runs, or what "level" means for this patient. The occlusion plane — the datum plane — is what supplies all three, and it is the first thing the workflow builds.
It is worth understanding how far its influence reaches, because it is easy to treat this as a formality and click past it. The plane is the reference every later measurement is taken against: the arch curves are laid out on it, the angle between it and the FH plane is reported from it, and its centreline becomes the centreline the finished alignment is built around. GuideMia says so plainly in its own guidance for this step — "The centerline of the plane will determine the final centerline of the alignment, so it may not necessarily be the current center line of the upper jaw." If the plane is tilted or its midline is off, nothing downstream corrects it; it simply carries through.
Letting the AI engine propose the plane
The Happy Button now reads Occlusion Plane, with a one-line instruction:
Use GuideMia AI Engine to create datum plane.
Press it. GuideMia analyses the upper jaw scan and produces the plane together with the control points the arch curves will be built from. This is the first point in the workflow that depends on the AI engine. Where the engine is not available you build the plane by hand instead, from four points: two on the lingual surfaces of the upper incisors, on the midline and at roughly the height the lower incisors will meet them, and two more at the centres of the occlusal surfaces of the molars or the area behind them. Generate Datum Plane on the tool bar to the left of the 3D view is the manual route.
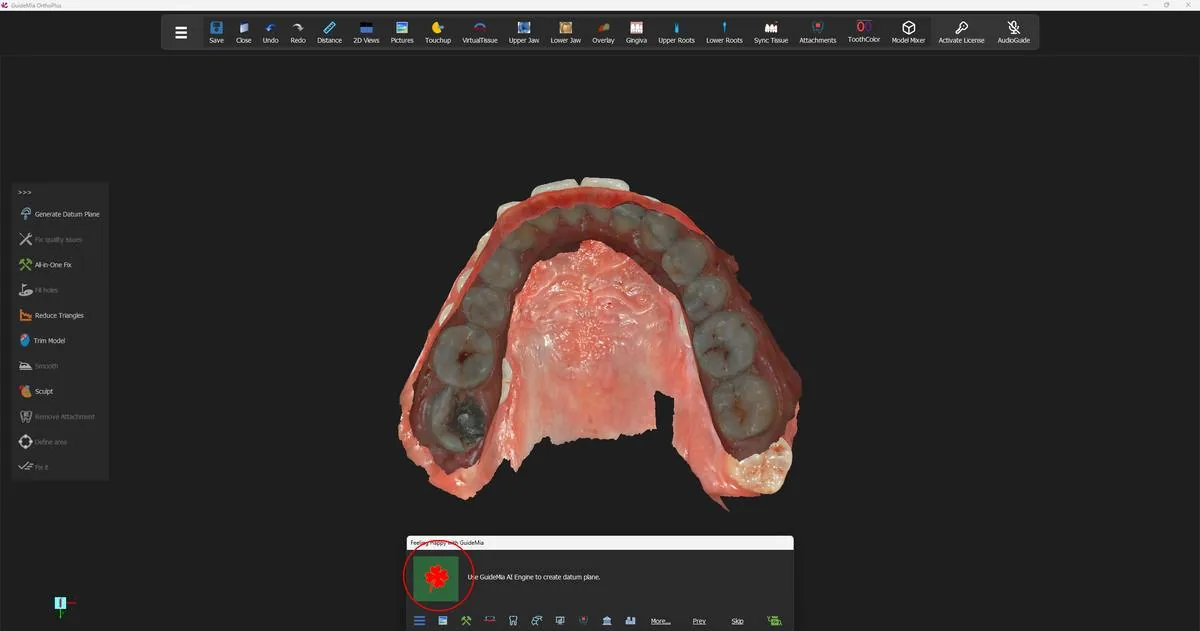 The upper jaw alone, with the Happy Button standing on the occlusion plane step.
While the analysis runs, GuideMia asks a question of its own:
Occlusions — Do you want to evaluate the occlusions?
This case answers No, and carries on. The evaluation is not something you lose by declining: the occlusal distance map is available from the model's context menu at any point later in the case, and step 7 covers reading it. Answer Yes if you want to look at the bite as it came in before anything is changed.
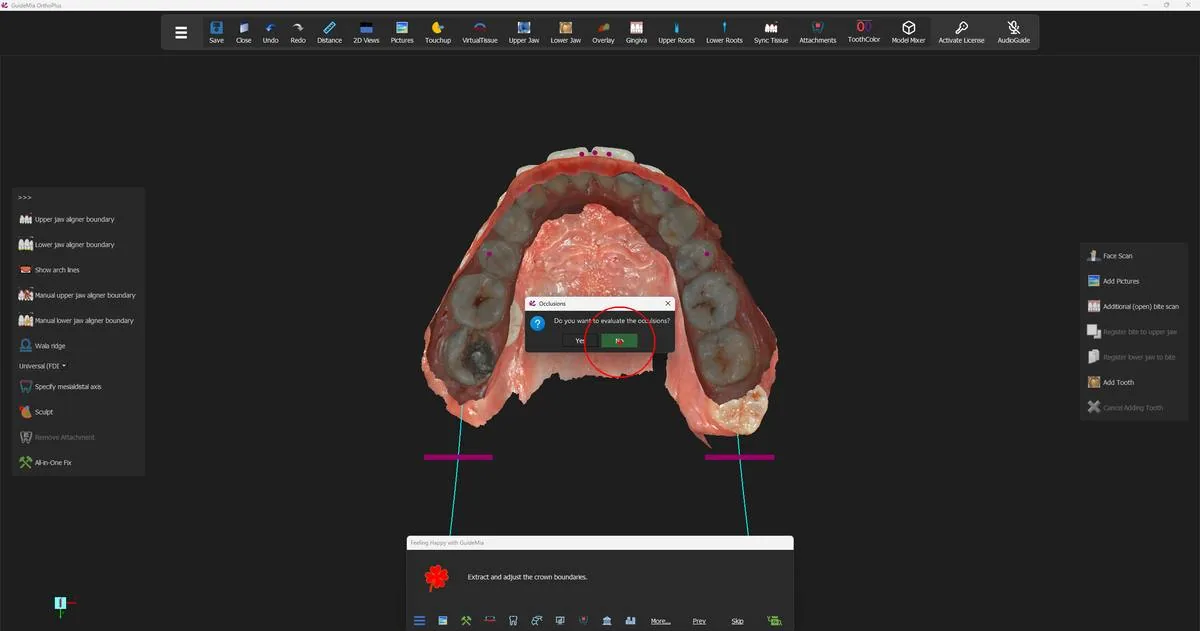 GuideMia offering to evaluate the occlusions before the plane is settled.
Reviewing what it produced
The Happy Button now reads Adjust occlusion plane, and its instruction is the real guidance of this step:
After you adjust the occlusal plane, click the HappyButton to Adjust the FH Plane. It is recommended to make sure the plane orientation and middle line best reflect the actual dental arch and occlusal plane.
Two things are on screen. In the working window on the left the upper arch is shown from the occlusal, overlaid with the arch control points and the arch curves GuideMia has derived. In the assembly window on the right the plane itself is drawn as an orange grid through the model, with a yellow centreline running front to back and round cyan handles at its corners.
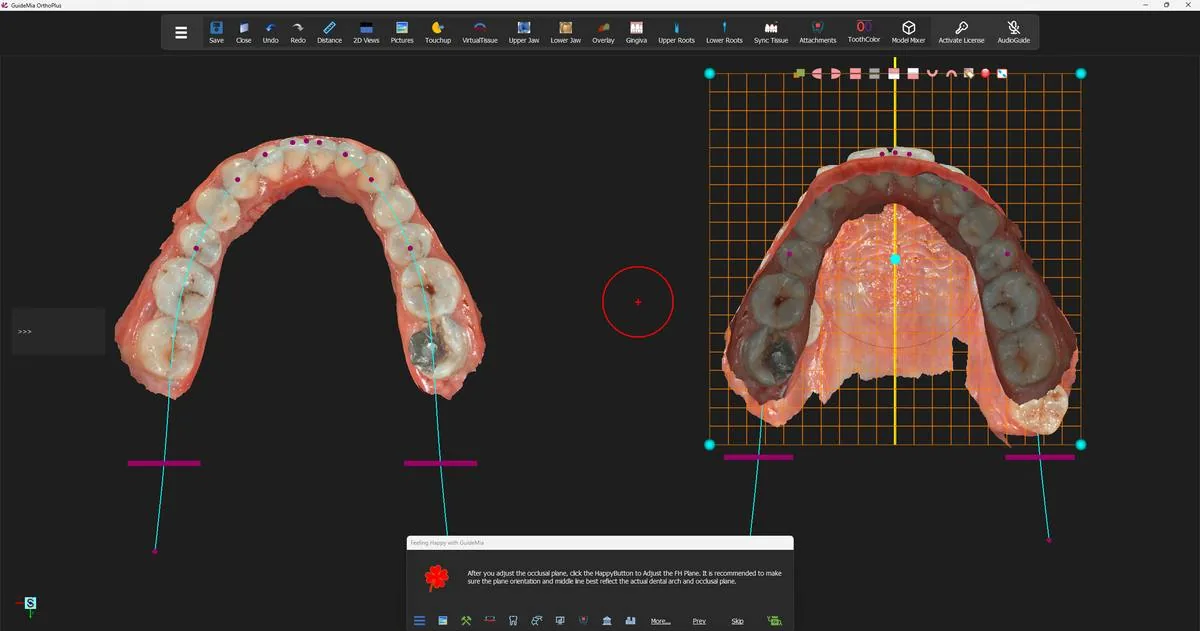 The proposed plane in the assembly window, with its centreline and corner handles, and the arch control points on the model at left.
Judge two things, in this order.
Orientation. Looking at the arch from the front, the plane should sit level across the arch rather than cant to one side; looking from the side, it should follow the occlusal surfaces rather than dive through them at the back. The grid makes this easy to read once you turn the model — where the grid stops being parallel to the run of the cusps, the plane is wrong. Turning the model is the step here, not an aside: the tilt that is invisible from the occlusal view is obvious from an oblique one.
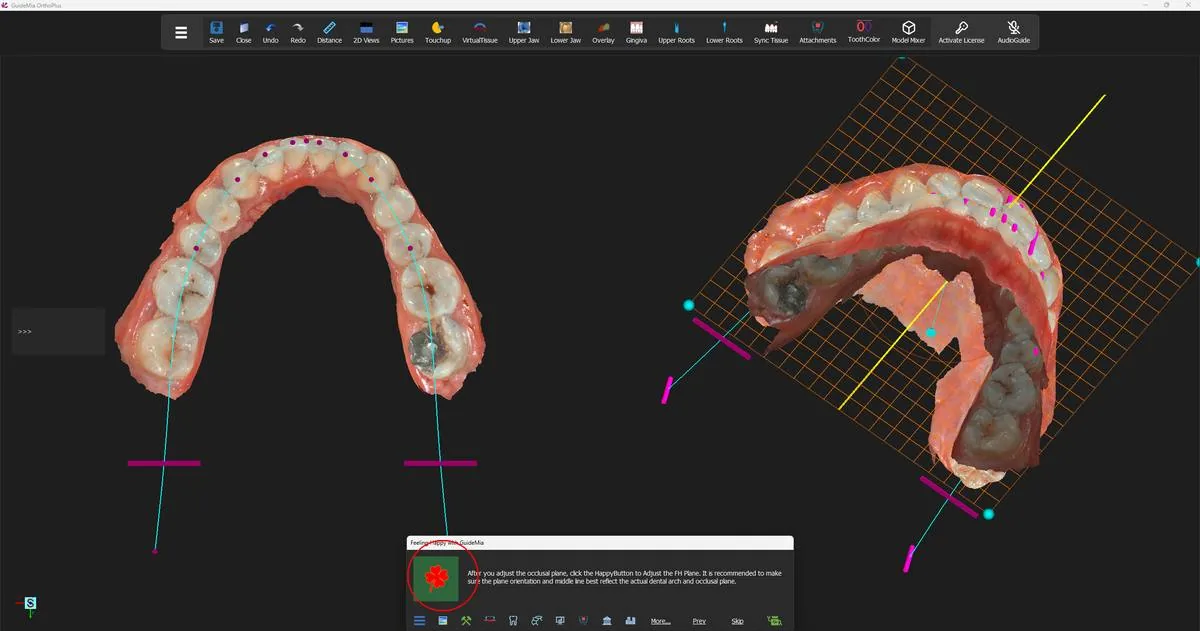 The same plane seen obliquely, where a cant that the occlusal view hides becomes visible.
Midline. The yellow centreline is the one that matters. Set it where the patient's arch midline should be, which is not necessarily where the scanned upper arch's midline currently is — a displaced upper midline that you intend to correct should not be baked into the datum. Drag the handles until both readings are right.
When they are, press the Happy Button again. GuideMia moves on to adjusting the FH plane, and a green bounding box appears around the models in the assembly window. That box, and what the angle between it and the occlusal plane means, is step 3.
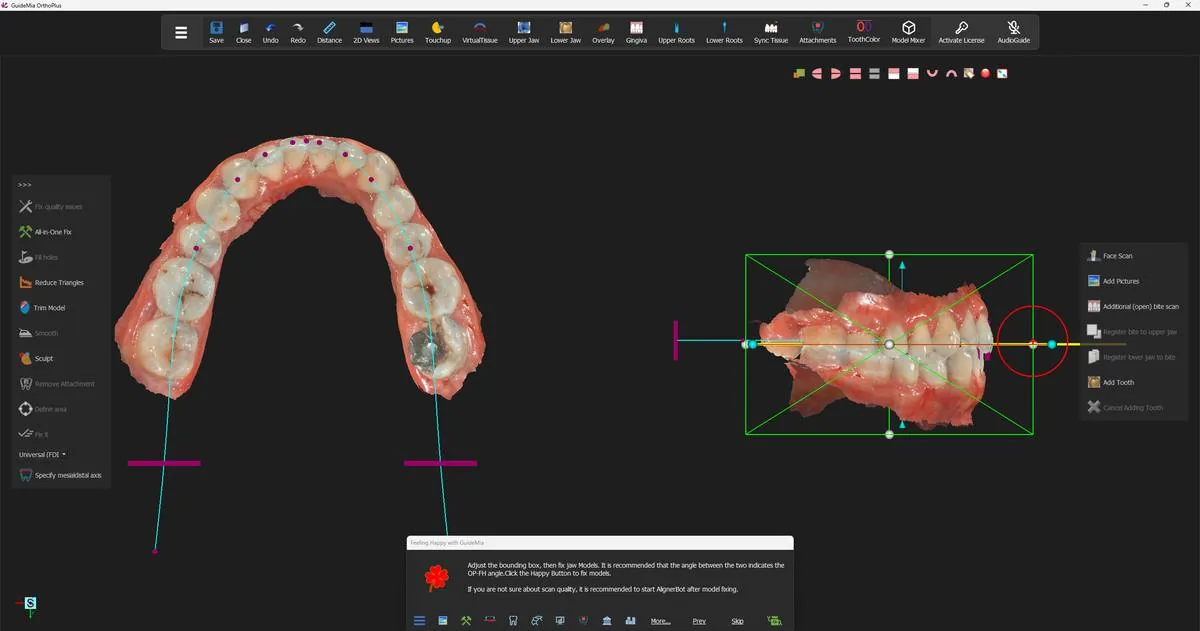 Pressing on has produced the bounding box, and the instruction has changed to the model-fixing step.
Opening the full workflow panel
Up to this point the tools you have needed have been placed in front of you, in the floating bars down each side of the 3D view. Those bars are rebuilt at every Happy Button step and carry only what that step needs — which is exactly right while the wizard is leading, and not enough when you want to do something it has not offered.
The ">>>" control at the top of the left-hand bar is the way out of that. Its status tip:
Turn on the full workflow panel and access more functions.
Press it and the full workflow panel becomes available, with a page for each stage of the case and every tool that stage owns. The panel and the floating bars are alternatives rather than companions — while the panel is up the bars stay suppressed, and closing the panel brings them and the Happy Button back. From here on, whenever this guide says a tool is "on the workflow panel", this is the control that gets you there.
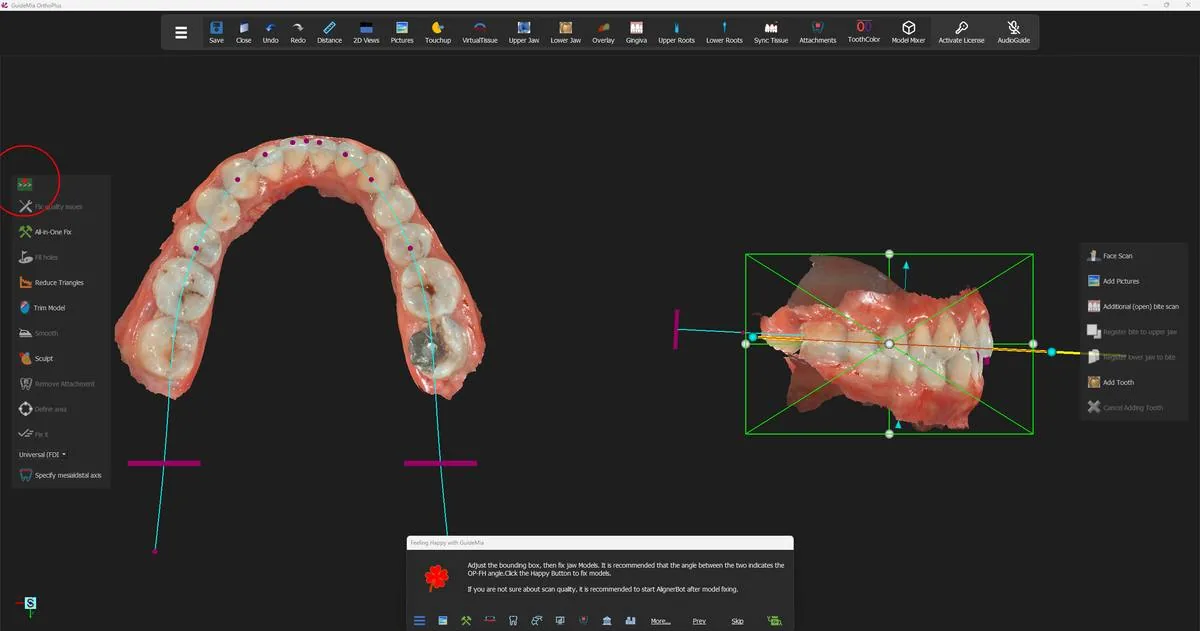 The ">>>" control at the head of the left-hand tool bar.
Where you are now
The case has a datum plane, an orientation and a midline, and GuideMia has derived a first set of arch control points from them. The scans themselves have not been touched yet — no holes filled, no artefacts removed, no bottoms closed. Repairing them is the next step.
While the occlusion-plane steps are current, the left-hand bar carries the model-fixing set. None of it was needed on this case, but it is the right place to deal with an obviously bad scan before the plane is committed:
| Control | What it is for |
|---|---|
| "Generate Datum Plane" | Build the plane from four hand-placed points, when the AI engine has not produced one |
| "Fix quality issues" | Bring up the model-fixing tools for the current model |
| "All-in-One Fix" | Geometry and topology repair in one pass, including holes that connect the buccal and lingual sides |
| "Fill holes" | Close openings left by an incomplete scan |
| "Reduce Triangles" | Thin a mesh that is heavier than it needs to be |
| "Trim Model" | Cut the model back to a boundary |
| "Smooth" | Even out a rough surface |
| "Sculpt" | Push and pull the surface by hand |
| "Remove Attachment" | Take an existing attachment off the scan |
| "Define area" / "Fix it" | Mark a region and repair only that region |
On a case that does have a CBCT, this step also offers the volume-circling tools; that path is not covered in this guide.