
This step is not a step. It is the reference the rest of the guide sends you to: three colour maps that GuideMia can paint onto the models, what each one measures, and when in the workflow you would want it on.
They matter because most of what you need to judge about an aligner case is not visible on a white model. Whether two crowns are touching or 0.3 mm apart, whether a root is being pushed through the buccal plate, whether the bite has opened where you were not looking — none of that is legible from shading. The maps make it legible.
They also matter because they are modes, not readouts. A map stays on until you turn it off, and a model wearing a colour map does not look like the model you are used to. If a jaw suddenly renders in unfamiliar colours, the first thing to check is whether a map is on.
Where they live
All three are on the right-click menu in the 3D windows. Right-click on the model — a tooth or a jaw, depending on the map — and the items sit near the top of the menu, above "Export ...".
The captions are toggles, so what you see tells you the current state: "Show occlusion distance map" when it is off, "Hide Occlusion Distance Map" when it is on. The same is true of the other two.
One consequence of them being on the right-click menu: opening that menu collapses the extra handles on the placement widget of whatever tooth you were moving. Re-select the tooth and they come back.
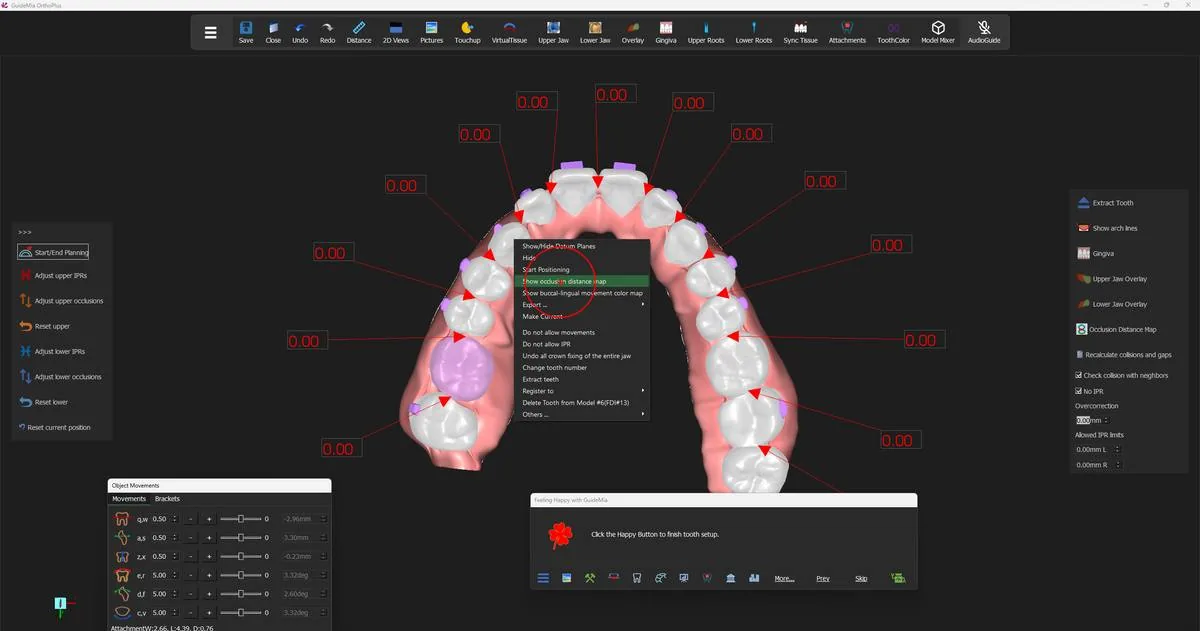 The right-click menu on a tooth, with the two map items above "Export ...".
Occlusal Distance Map
What it colours. Every point on the crowns of the current jaw, by how far away the opposing jaw is at that point. A colour scale appears at the bottom of the 3D window while the map is on, running from −2.0 to 0.0 in millimetres.
How to read it. Pale and neutral where the opposing surface is roughly 2 mm clear. As the clearance closes the surface reddens. The green end of the scale is contact — where the two arches actually meet. A red patch with a green centre is a contact point and the surface falling away around it.
What it tells you clinically. Where the bite is carrying load and where it is not. A posterior segment that stays pale while the anteriors are green is an open bite in the making. A tooth that is green over most of its occlusal table rather than at cusp tips is over-occluded against its opponent.
When to turn it on.
- After the first alignment (step 6), to see what the proposed arrangement does to the bite.
- Throughout movement planning (step 8) whenever you have moved a tooth vertically — intrusion and extrusion are the two movements whose occlusal consequence is hardest to see any other way.
- Before staging (step 9), as a last check on the final positions.
What it needs. An optical jaw or tooth model. It is available from the moment the scans are loaded, which is why it is used as far back as crown boundary work.
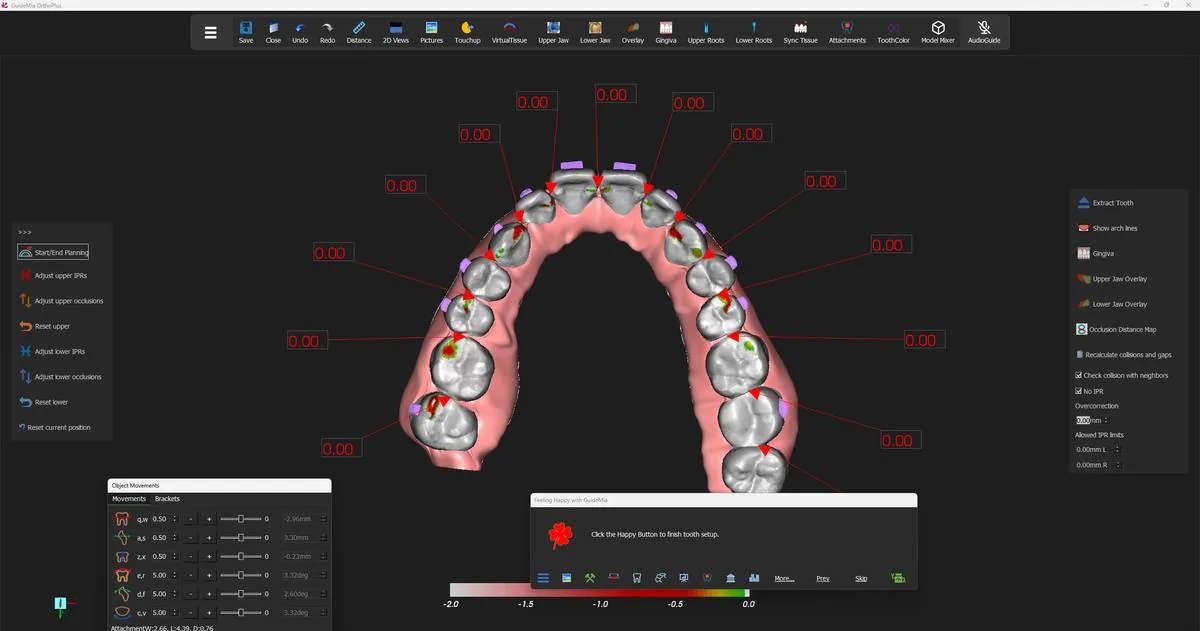 The occlusal distance map on the upper arch, with its −2.0 to 0.0 mm scale.
Bone density map
What it colours. The virtual roots, by the density of the bone they sit in.
How to read it. As a warning surface rather than a measurement. Where a root runs out of dense bone, that is where the movement you are planning has the least support.
What it tells you clinically. Whether a planned root movement — torque, bodily translation, uprighting — is asking a root to travel into bone that will carry it, or through a plate that will not.
When to turn it on. During movement planning, on any tooth whose plan involves significant root movement rather than crown tipping.
What it needs. A loaded CBCT and a virtual root on the tooth. The density it shows is measured density, so it exists only where there is radiographic data to measure. Turning the map on also turns virtual roots on, so the roots appearing at the same moment is expected, not a second command firing.
Buccal-lingual movement map
What it colours. The virtual root of a tooth, by how much buccal-lingual movement that tooth is being asked to make.
How to read it. As a magnitude map over the root, so you can see not just that a tooth moves buccally but where along its length the movement is greatest — which is the difference between tipping the crown out and moving the whole tooth out.
What it tells you clinically. Which teeth in an expansion are doing the work, and whether they are doing it bodily or by tipping. On a case being expanded, this is the map that shows you which roots are being asked for the most.
When to turn it on. After the first alignment, when the arch has been widened and you want to see where the expansion actually landed; and during movement planning, on any tooth you are moving buccally or lingually by hand.
What it needs. A virtual root on the tooth. No CBCT is required — a pontic-style root from an optical-scan case is enough.
Turning them off
Right-click the same model and choose the item again — the caption will now read "Hide Occlusion Distance Map", "Turn off bone density map" or "Turn off buccal-lingual movement color map".
Turning a map off is a per-jaw operation: "Hide the occlusion map of the current jaw." If you have had the map on in both arches, you will turn it off twice, once in each 3D window. The demo does exactly that at several points — one right-click in the assembly window and one in the working object window.
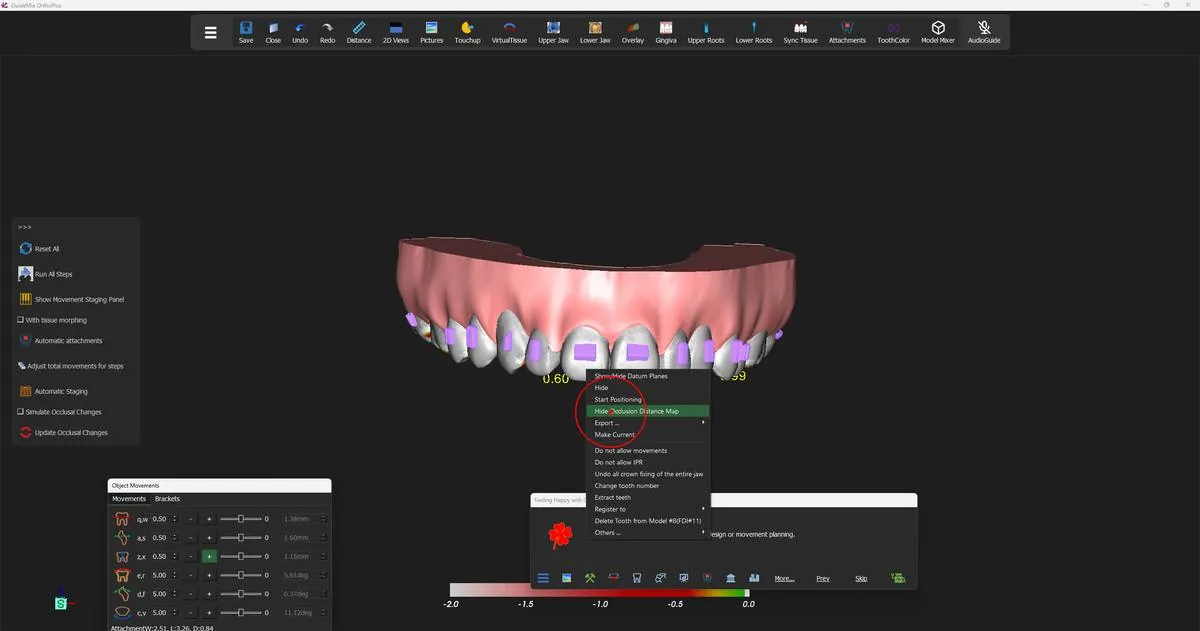 Turning the occlusal distance map off again from the same menu.
The model with no map on
Worth knowing what you are returning to. With every map off, the models render in whatever the current display mode gives you: the textured scan early in the workflow, plain crowns with tissue once the arches have been segmented and rebuilt.
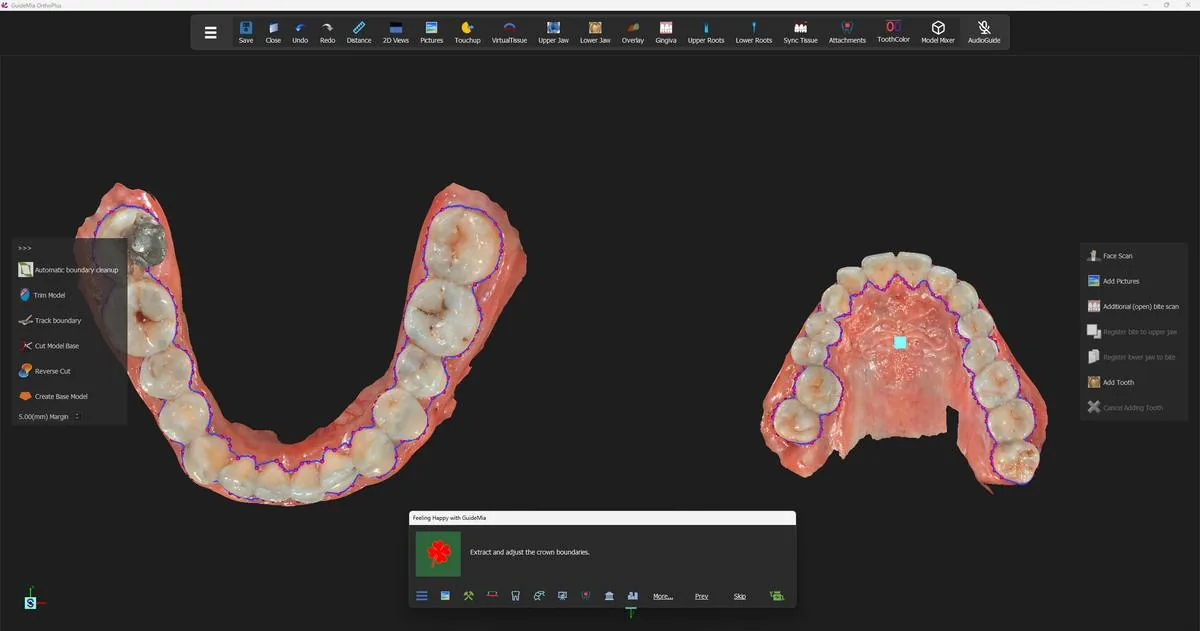 The same arches with no map on — the textured scans during crown boundary work.
At a glance
| Map | Colours | Needs | Turn it on to see |
|---|---|---|---|
| Occlusal Distance Map | Crowns, by distance to the opposing jaw, −2.0 to 0.0 mm | An optical jaw or tooth model | Where the bite touches and where it has opened |
| Bone density map | Virtual roots, by bone density | A loaded CBCT and a virtual root | Whether a root movement has bone to travel into |
| Buccal-lingual movement map | Virtual roots, by buccal-lingual movement amount | A virtual root | How much of an expansion is bodily and how much is tipping |
The maps are not the only display state reachable while you are inspecting a result. The same right-click menu carries "Show/Hide Datum Planes" and, under "Others ...", "Hide in 2D" / "Show in 2D" and "Change Color" — which recolours all teeth when used on a tooth, not just the one you clicked.
There is also a panel-side toggle. "Occlusion Distance Map" appears on the right-hand tool strip of the movement planning pages, and does the same job as the menu item for the jaw you are working on. Use whichever is nearer to hand; the state is the same one.
And if you have hidden something and cannot find it again: right-click on empty background in the assembly window and the "Show other objects" submenu lists everything currently hidden, by name.