
The files exist. What remains is getting the case in front of whoever has to approve it, and making sure the project you spent the last twelve steps building is still there tomorrow.
Both are done from the system menu — the button at the left of the toolbar, which opens "the full GuideMia menu with every Project / Edit / View / References / Tools / Account / Help / ProjectType entry."
Sending the case out for review
Project → "All files for Web Review" packages the case for someone else to look at:
"This generates a package of file for online review. It can only be reviewed on GuideMia's portal."
What follows from that is the package is for GuideMia's portal, not for a generic 3D viewer — the reviewer opens it in a browser and gets the case, not a folder of meshes to work out for themselves.
This is the step to use when a doctor has to sign off a plan before a lab commits to printing. The reviewer does not need GuideMia installed and does not need the project file, which means the plan can be approved without the working copy leaving your machine.
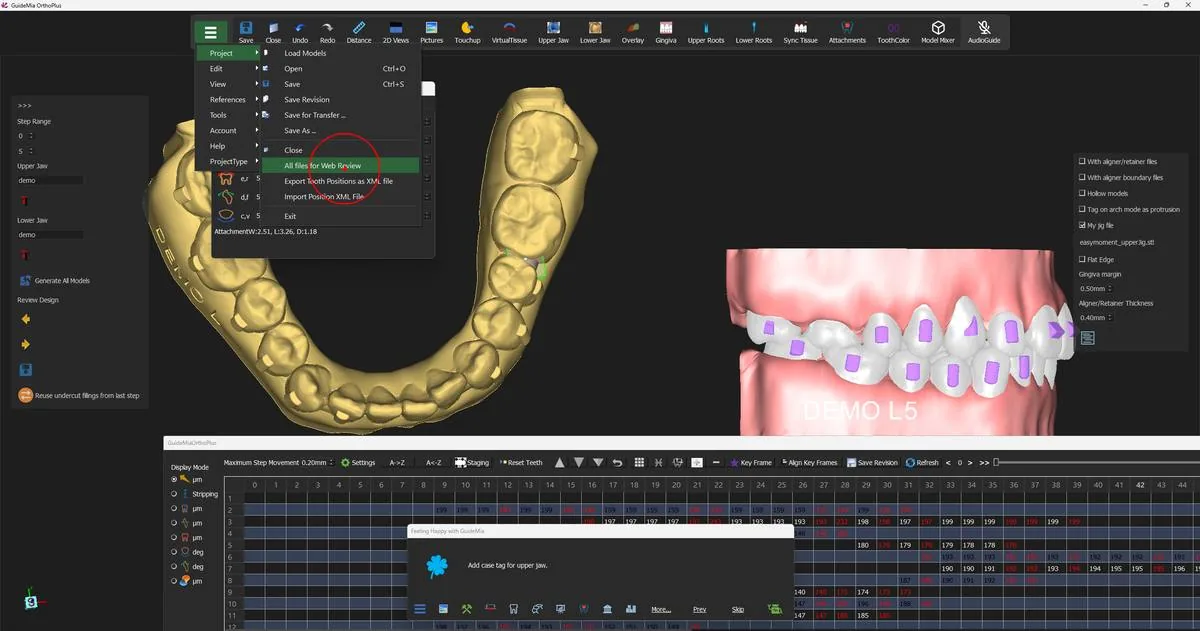 Packaging the case for online review from the Project menu.
You may have already met this offer. If you drove the design with the Happy Button rather than the panel, GuideMia asks at the end of the last generate step:
"Web Review" — "Do you want to save files for web review?"
Yes produces the same package. Answering No costs nothing — the menu entry is still there afterwards.
Saving the project
Project → "Save", or the Save button on the toolbar. It saves the current project: the scans, the segmentation, the roots, the plan, the staging, the attachments and the tags.
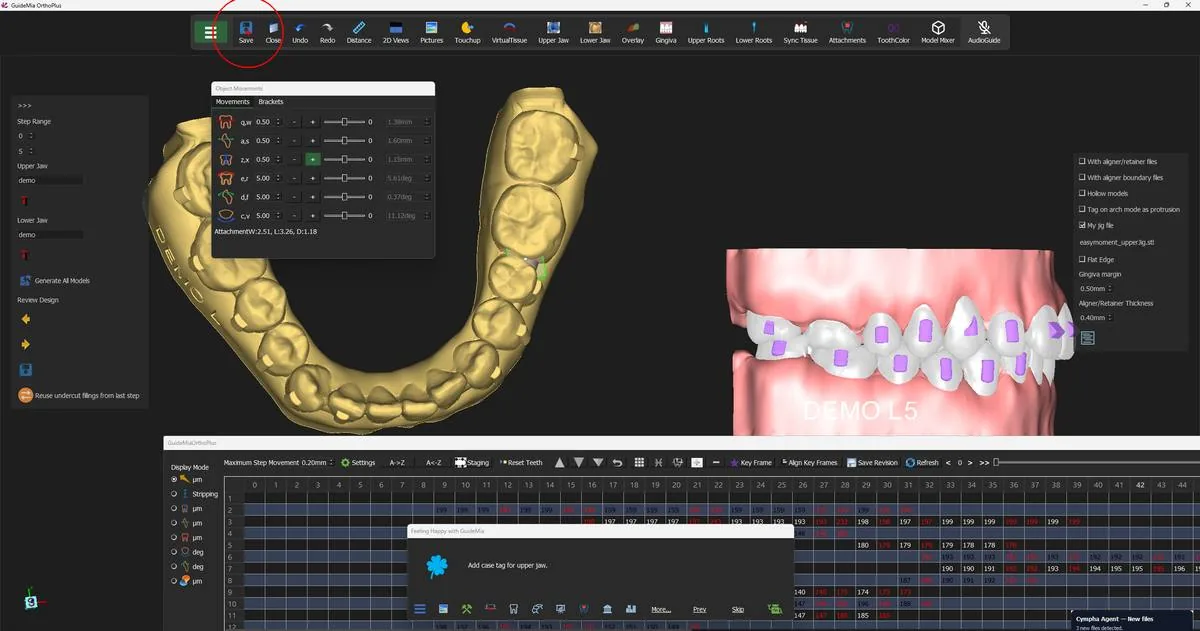 Saving the finished project.
Save at this point even though the models and aligners are already written to disk, because they are two different things. The STL files are output; the project is the case. Reopening the project is what lets you come back in six weeks, change one tooth and regenerate from step 20 — and without it, all you have is a folder of geometry no-one can revise.
Three neighbours in the same menu are worth knowing before you need them:
- "Save Revision" stores the current plan as a named revision. A plan here means the tooth positions plus the attachments, and saved revisions are listed against the case, so you can keep a plan you are unsure about beside the one you sent out and switch between them from the Data Preparation page.
- "Save for Transfer ..." prepares the project to go to another machine.
- "Save As ..." writes it under a new name, leaving the original untouched — the safe way to start an alternative plan on the same case.
The record of the session
The recorded case ends where this guide began: Help → "End documenting".
"Start documenting" and "End documenting" bracket a session and produce a step-by-step record of it — every tool used, what GuideMia said about it, and a picture of the screen with the click marked. It is how the recording behind this guide was made.
It is worth knowing about for two reasons that have nothing to do with writing manuals. A case that went wrong somewhere and needs GuideMia support is far easier to diagnose from a documented session than from a description of one. And a technician being trained on a workflow can be handed a document of the case they just watched, rather than notes.
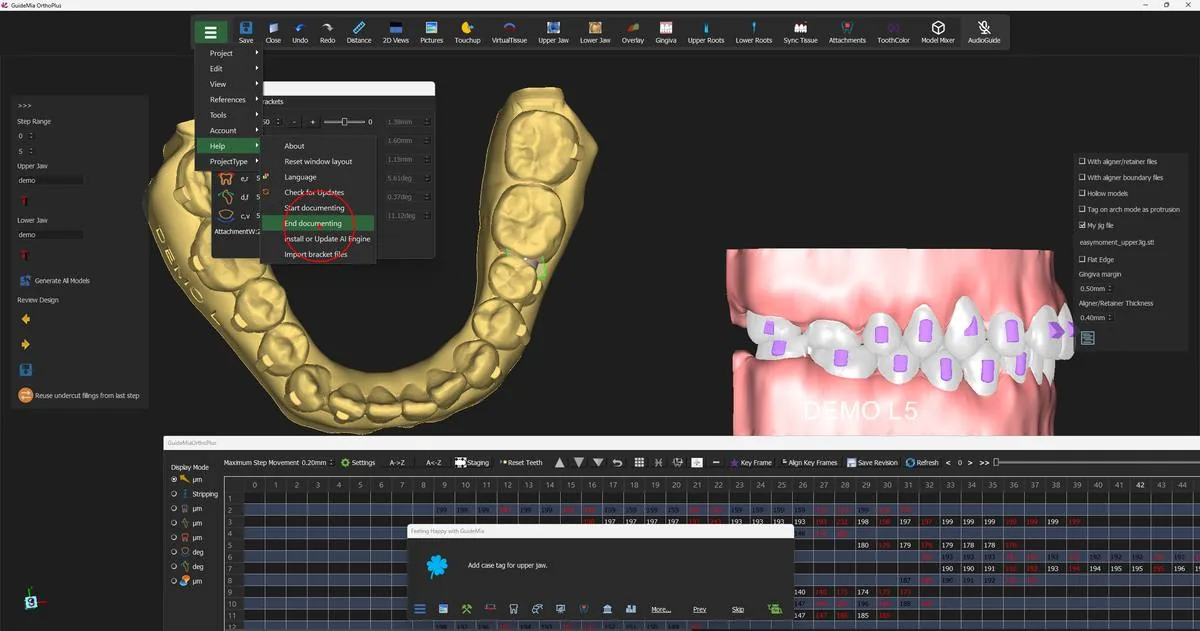 Ending the session record from the Help menu.
Where you are now
The case is finished. Two optical scans became segmented arches, a set of target positions, a staged sequence of movements, an attachment set, and a folder of files a lab can put on a printer. The project is saved, and the plan is out for review.
The "Project" menu carries more than the demo used:
| Entry | What it is for |
|---|---|
| "Load Models" | Bring model data into the project |
| "Open" | Open an existing project |
| "Save" | Save the current project |
| "Save Revision" | Store the current tooth positions and attachments as a named plan |
| "Save for Transfer ..." | Package the project to move to another machine |
| "Save As ..." | Save under a new name, leaving the original untouched |
| "Close" | Close the project |
| "All files for Web Review" | Package the case for review on GuideMia's portal |
| "Export Tooth Positions as XML file" | Write the tooth positions out on their own |
| "Import Position XML File" | Read tooth positions back in |
| "Export STL file" | Export a model as STL |
And from "Help":
| Entry | What it is for |
|---|---|
| "Start documenting" / "End documenting" | Record the session as an illustrated step-by-step document |
| "Check for Updates" | Look for a newer release |
| "Language" | Change the interface language |
| "Reset window layout" | Put the docks and windows back where they started |
| "Install or Update AI Engine" | Install or refresh the engine behind the automatic tools |
| "Import bracket files" | Load a bracket configuration file |
| "About" | Version and build information |
The export entries are the escape hatch when a case has to move between systems. "Export Tooth Positions as XML file" takes the plan out as coordinates rather than geometry, and "Import Position XML File" brings one back, which is how a plan produced elsewhere is brought onto a case that already has its scans and segmentation here.