
The fixture is placed. Before committing to a guide, this step asks the question the plan has to survive: does the implant serve the restoration, and does it work against the opposing arch?
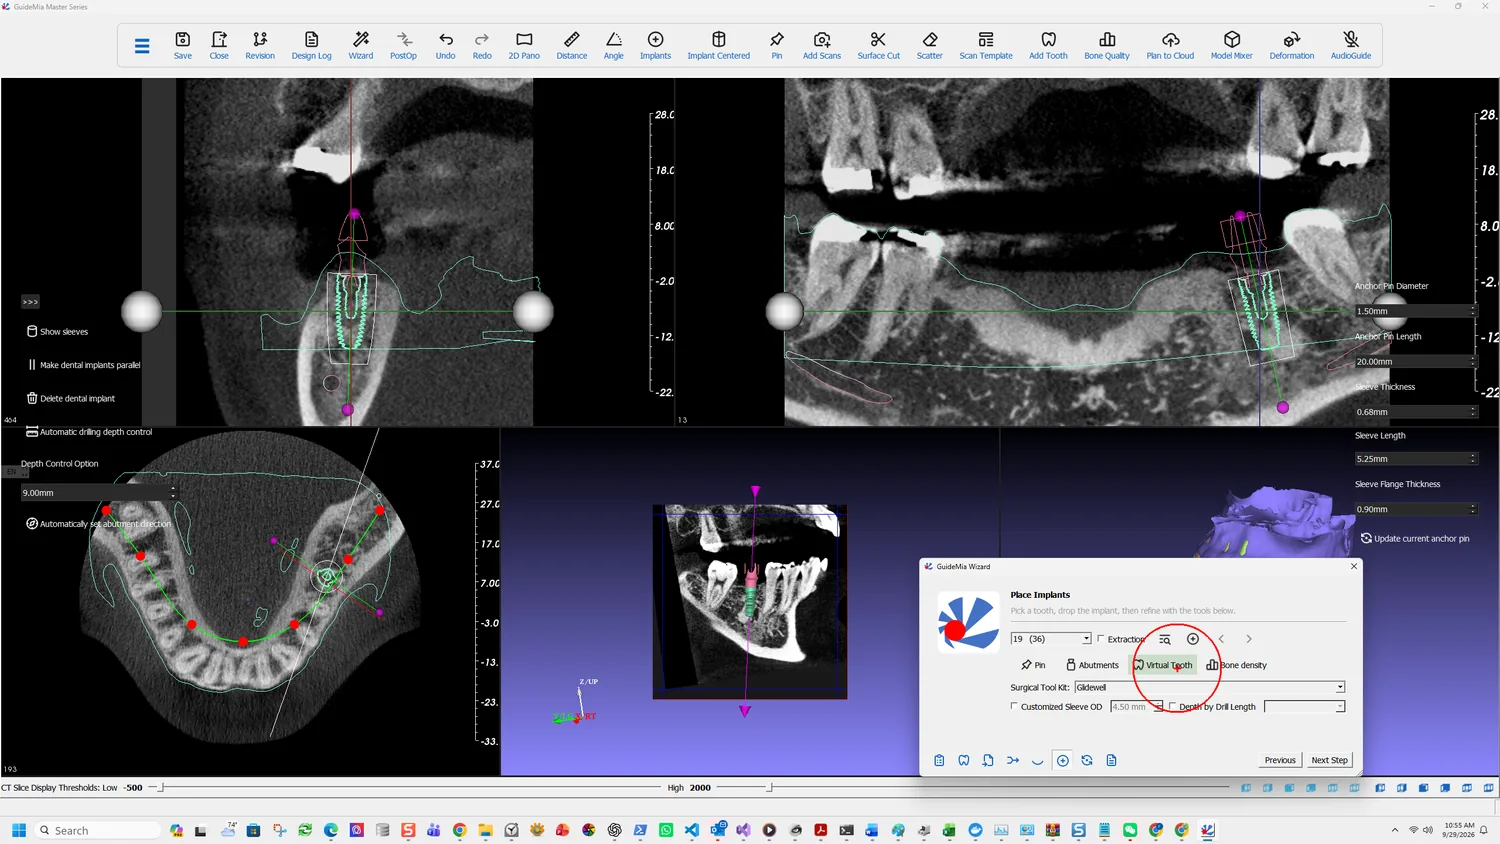
Put the restoration on the plan
Virtual Tooth places a tooth model at the site so the plan can be judged against what will eventually be there:
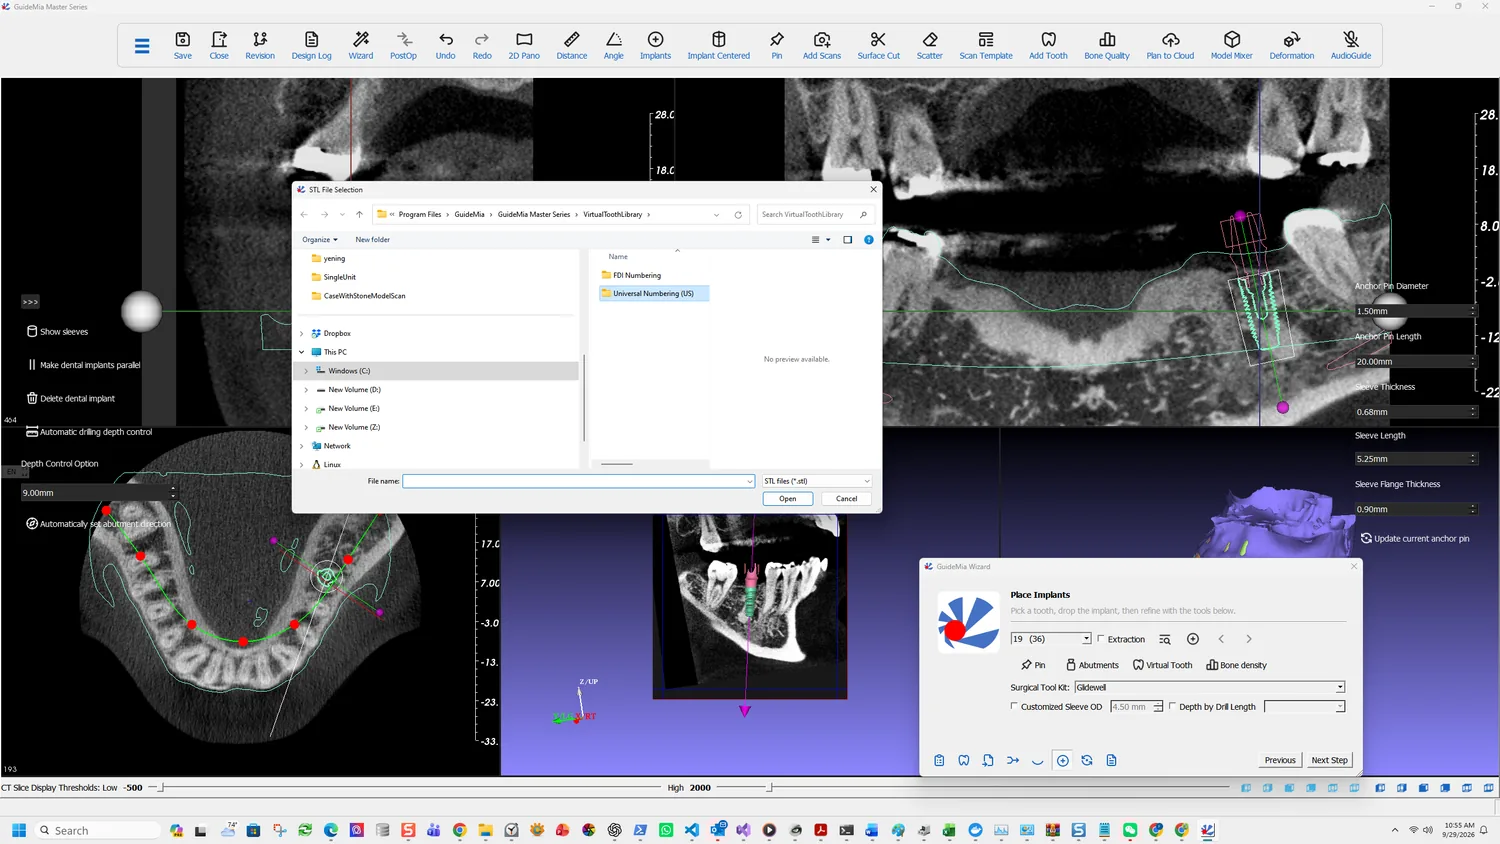
Add tooth STL models. GuideMia has a set of tooth templates. You can also use your designs.
So there are two routes — the shipped templates, or your own STL from wherever you design crowns. The file dialog takes either.
One caution comes with it, and it is worth reading before anyone builds on the output:
Please be advised this virtual tooth function is for visualization and treatment planning purposes. It may or may not meet the need to make temporary restoration from it.
It is a planning object, not a restoration. If a provisional is wanted, design it properly elsewhere.
Local and global deformation tools adjust the shape and size of a tooth model once placed, so a template can be made to fit the space rather than being accepted as it comes.
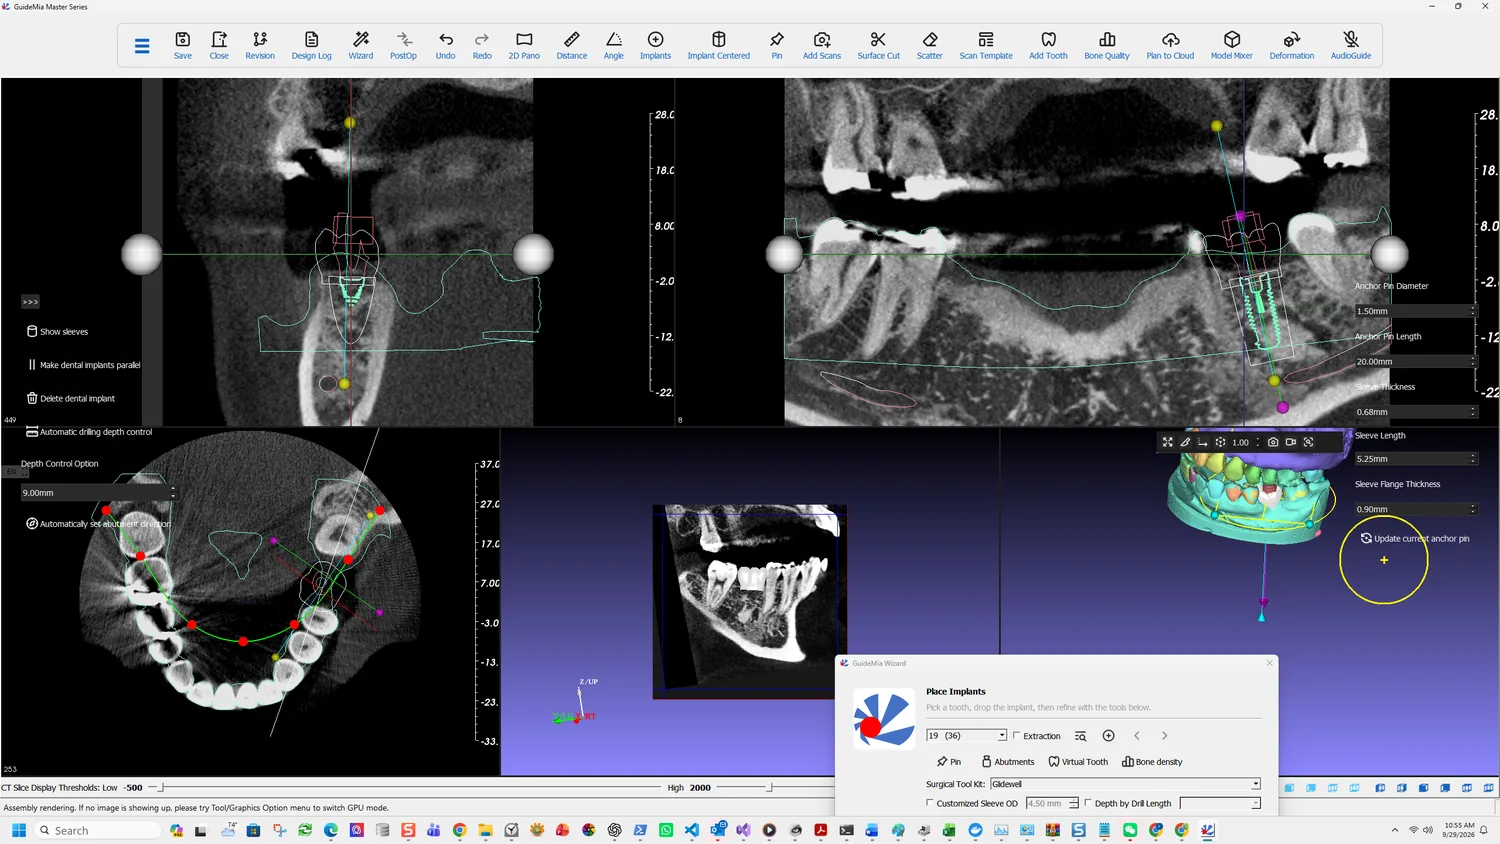
Judge the plan against it
This is where prosthetically driven planning becomes concrete rather than a phrase. With the tooth in place you can see whether the fixture emerges where the restoration needs it, or whether the plan is bone-driven and the restoration will have to compensate.
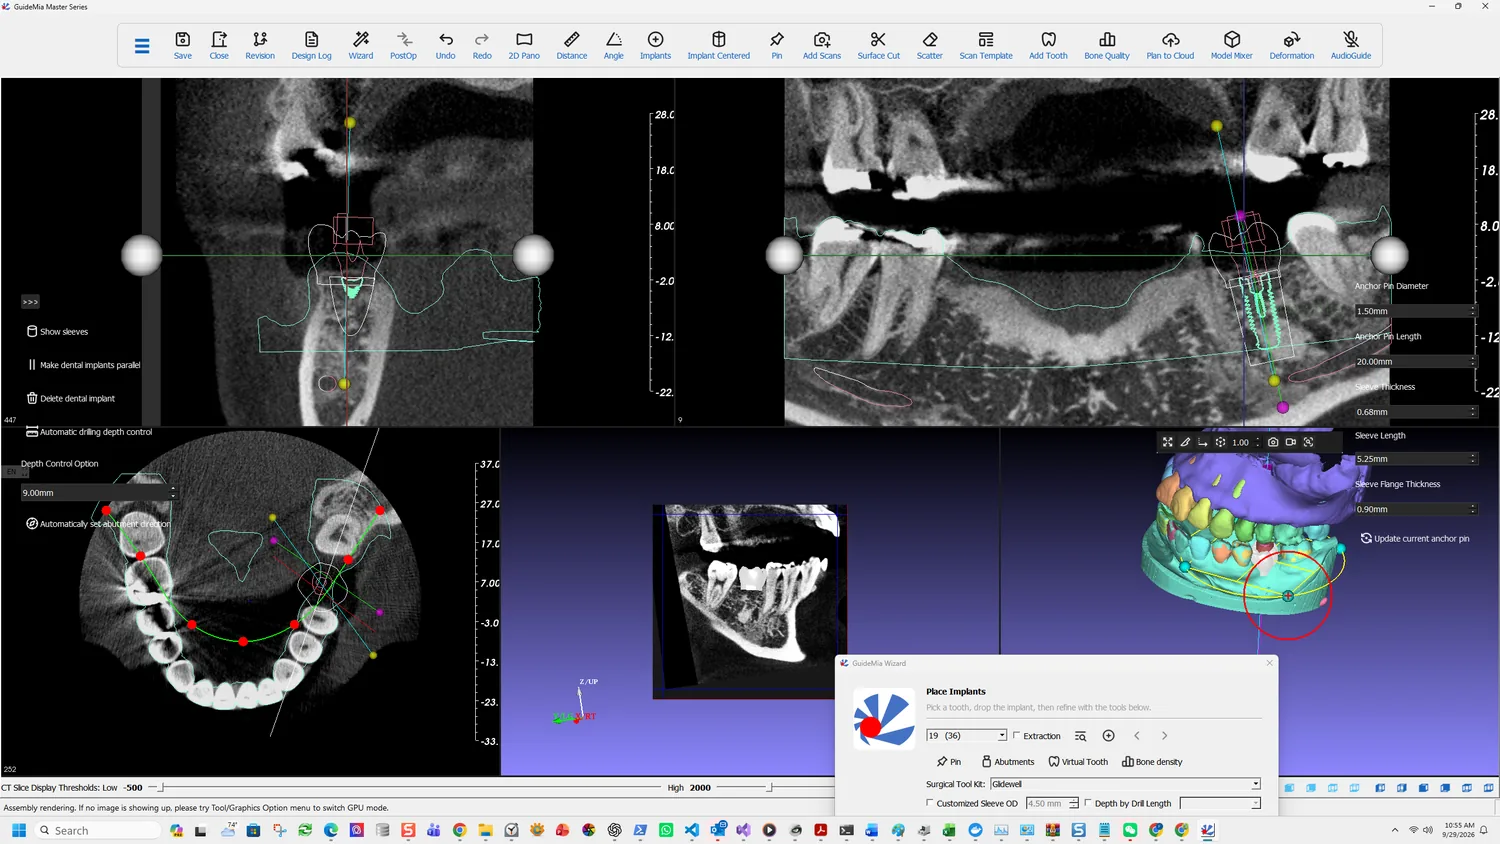
If the answer is wrong, go back to implant placement and move it. The cost of moving a fixture at this stage is nothing; the cost after the guide is generated is regenerating it, and after surgery it is not recoverable.
Bring in the antagonist
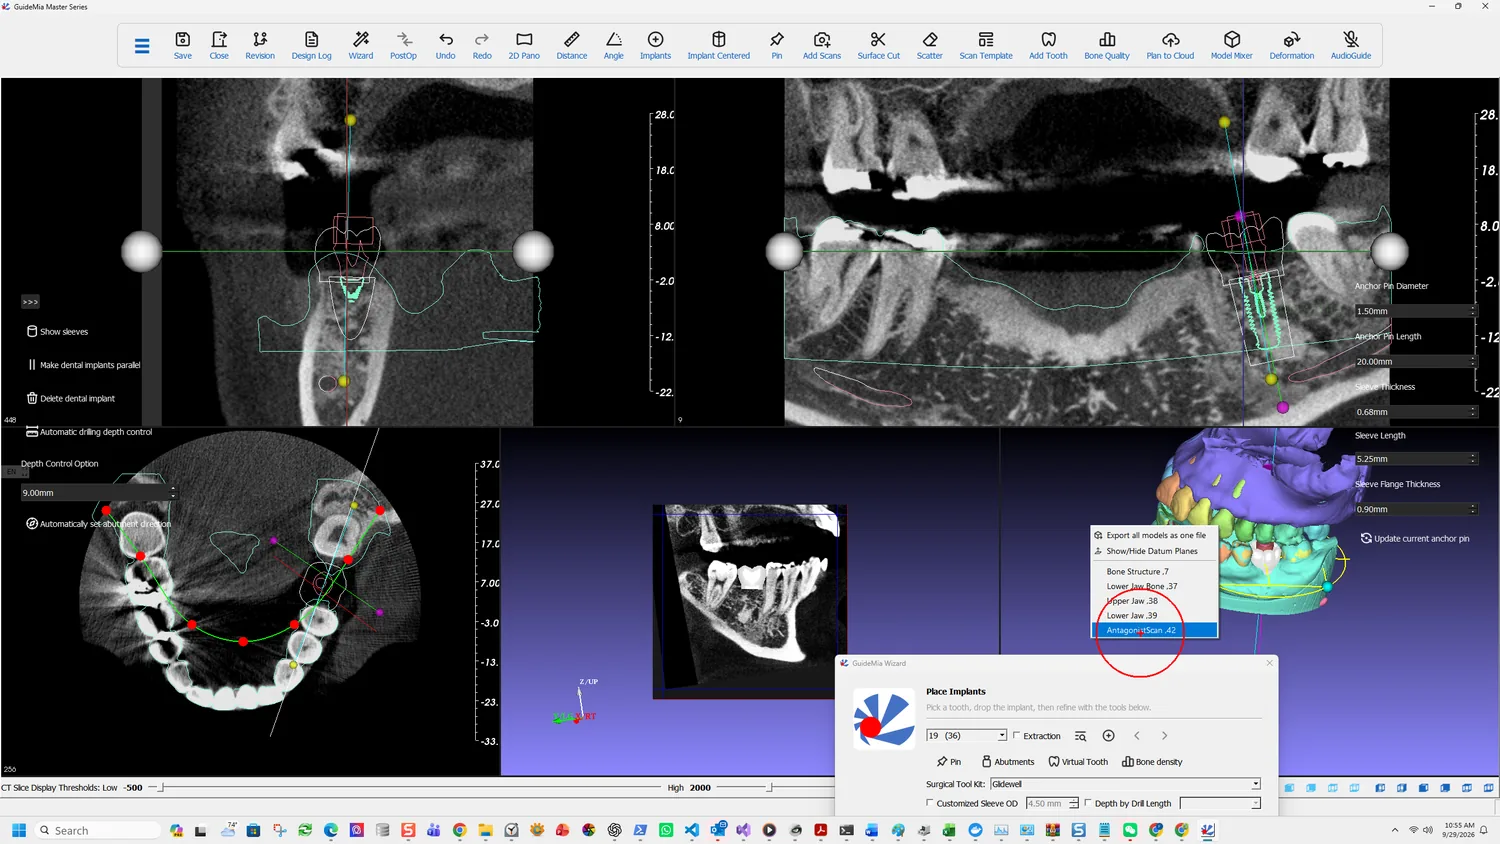
The opposing arch loaded earlier is what tells you whether there is room. Show it and look at the occlusal clearance over the planned restoration — a fixture that is ideal in the bone and leaves four millimetres of clearance has a problem that only appears here.
Show in 2D brings an object into the slice views rather than leaving it in 3D only:
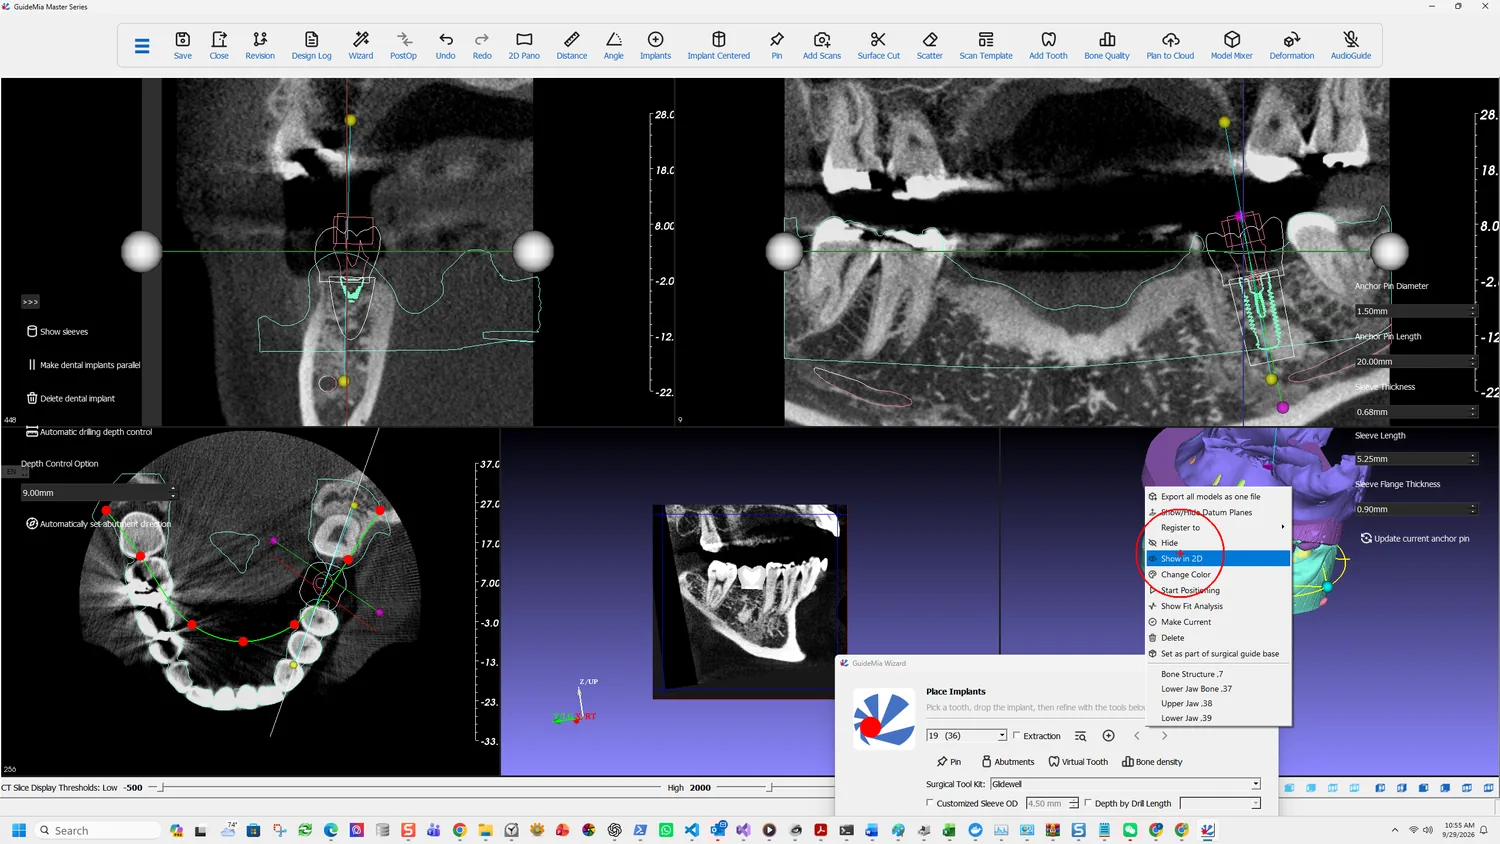
That matters for judging clearance, because a 3D view of two surfaces tells you they do not intersect but not by how much. On a slice you can see the gap and, with the measurement tools on the toolbar, put a number on it.
Check it one more way
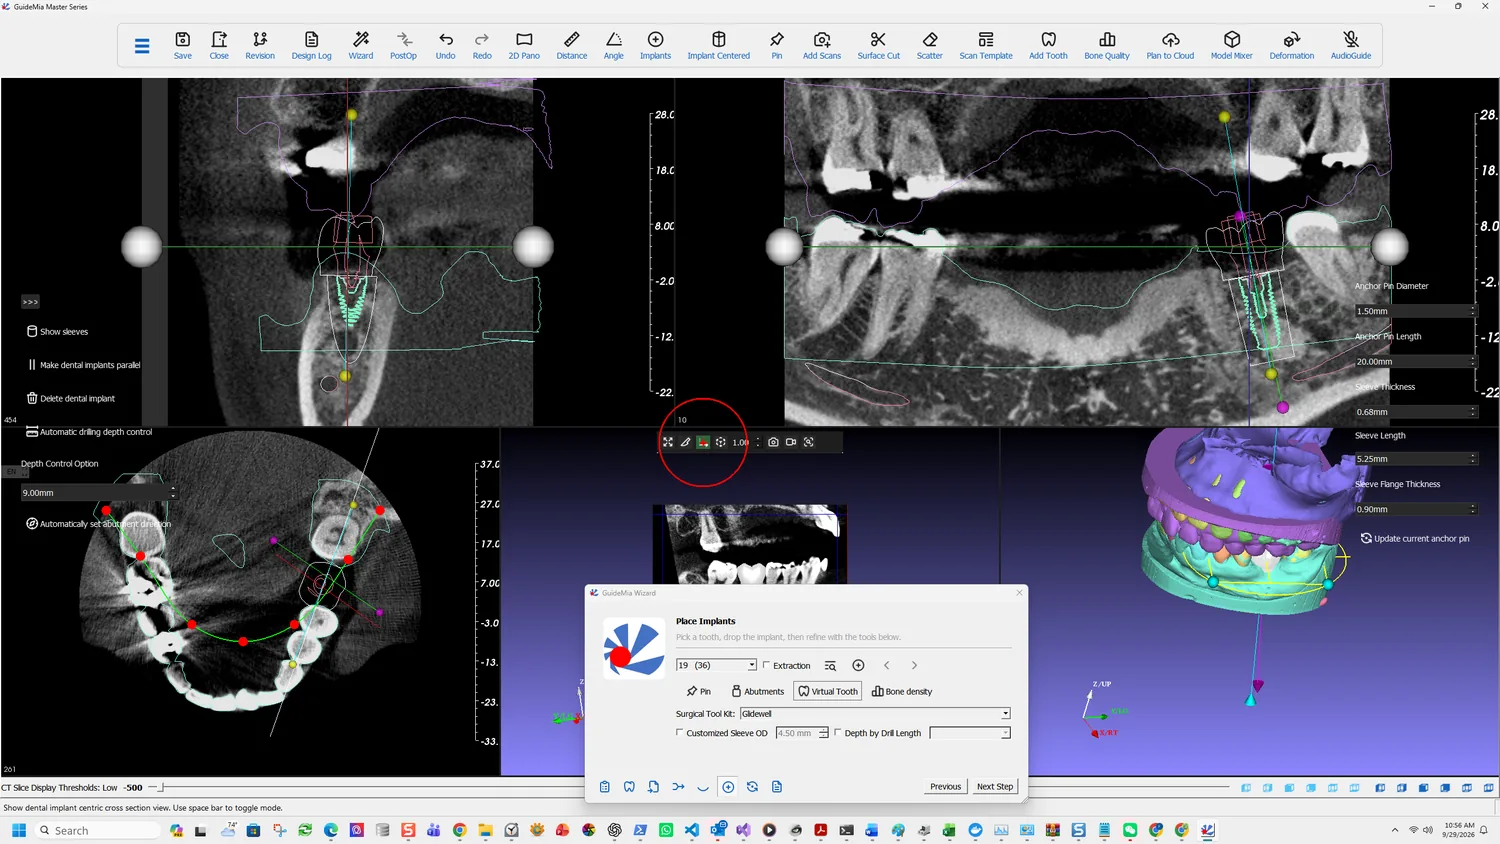
Show dental implant centric cross section view again, with everything now loaded — fixture, restoration, antagonist, nerve. This is the single view that carries the whole decision, and it is the one to sit on before moving to guide design.
Four things to satisfy yourself about before the next step:
- Bone. Adequate width and length, with the apex in something that will hold.
- The canal. Clearance to the mandibular nerve, judged on a slice rather than in 3D.
- The restoration. The fixture emerges where the tooth needs it.
- The occlusion. There is room for the restoration against the opposing arch.
Guide design validates the plan before it builds anything — the status bar says so — but it validates geometry, not judgement. These four are yours.
The toolbar carries the measurement tools this step wants: Distance and Angle, and 2D Pano for a panoramic reconstruction along the arch curve.
Bone Quality maps bone density to colours across the model, which is a faster way to survey a site than walking it with the mouse wheel.
Plan Error Simulation, on the Treatment Planning page, models what a deviation does to the planned position. If the margins in the four checks above are tight, this is the tool that tells you whether the plan tolerates a real surgical error or only a perfect one.
Save Revision stores the plan — the implants and their positions — under the case. A second plan can then be built and Switch to selected plan moves between them, which is how two options are prepared for a discussion rather than one being overwritten by the other.